Ingredients
Method
- Prepare Your Workstation: Line a large baking tray with baking parchment. Inflate the 6 balloons until they are about 10-12cm in diameter (the size of a small dessert bowl). Don't over-inflate them. Tie them securely. Wash and thoroughly dry the outside of each balloon to ensure they are clean.
- Melt the Chocolate: Place the finely chopped dark chocolate and the optional coconut oil in a heatproof bowl. Set the bowl over a saucepan of gently simmering water (a bain-marie), ensuring the bottom of the bowl doesn't touch the water. Stir occasionally until the chocolate is completely melted and smooth. Alternatively, you can melt it in the microwave in 30-second bursts, stirring in between. For a detailed guide on different methods, BBC Good Food has a great article on how to melt chocolate.
- Cool the Chocolate: This is a crucial step. Remove the bowl of melted chocolate from the heat and let it cool for 5-7 minutes. It should be lukewarm to the touch, not hot. If it's too warm, it will slide right off the balloon or cause it to pop.
- Create the Base: Spoon a small circle of melted chocolate (about 3cm wide) onto the prepared baking parchment for each bowl. This will create a flat base for your chocolate bowls to stand on.
- Dip the Balloons: Holding a balloon by its knot, carefully dip the rounded bottom into the lukewarm chocolate. Swirl it gently to coat it evenly, creating a bowl shape about halfway up the balloon. I find that a gentle twisting motion helps create a clean line.
- Set the Bowls: Immediately after dipping, place the chocolate-coated balloon onto one of the chocolate circles you made on the parchment paper. This will anchor it. Repeat with the remaining balloons.
- First Chill: Place the baking tray with the balloons into the refrigerator and chill for about 15 minutes, or until the chocolate is just starting to set.
- The Second Coat (Optional but Recommended): For a sturdier bowl, remove the tray from the fridge and carefully apply a second coat of chocolate over the first. This helps prevent breakage. Return the tray to the fridge.
- Final Chill: Chill the bowls in the fridge for at least 1 hour, or until the chocolate is completely hard and firm to the touch.
- Release the Bowls: Once fully set, it's time for the big reveal. Hold the chocolate bowl gently and use a pin or the tip of a small knife to puncture the balloon near the knot. The balloon will deflate slowly, pulling away from the inside of the chocolate shell. Carefully peel away and discard the balloon.
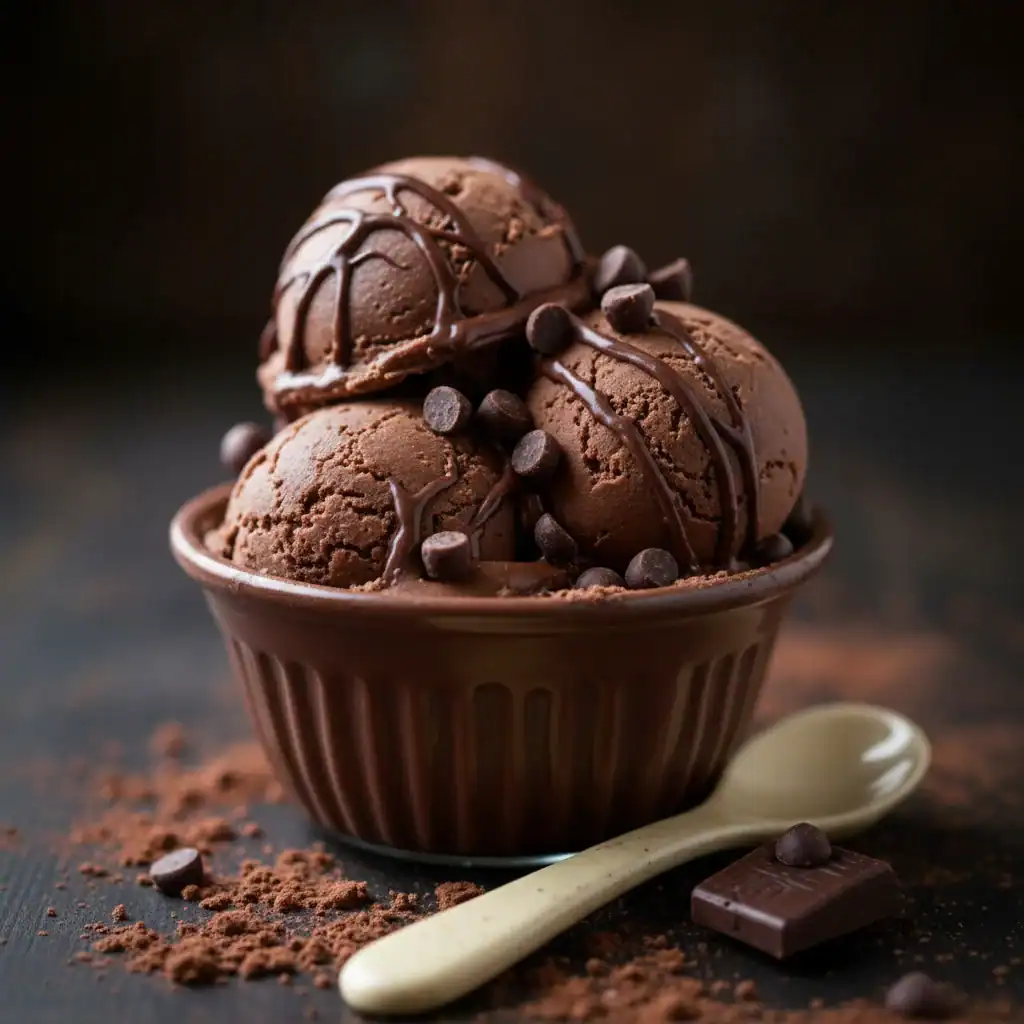
- Fill and Serve: Your beautiful chocolate bowls are ready! Just before serving, take your ice cream out of the freezer to soften slightly. Place a generous scoop or two into each chocolate bowl, top with chocolate chips, fresh berries, a drizzle of sauce, and enjoy immediately.
Notes
For sturdier, less fragile bowls, don't skip the optional second coat of chocolate. Ensure the chocolate is lukewarm, not hot, before dipping to prevent the balloons from popping.