How to Create the Ultimate Caramel Cloud Cake: A Heavenly Recipe
Can you picture a cake so unbelievably light, airy, and wonderfully fluffy that every mouthful feels like savouring a sweet, caramel-infused cloud? A dessert that brings a hush to the room, not through its richness, but through its sheer, delicate perfection? If so, your quest ends here. We are going to show you, step-by-step, how to craft the most divine caramel cloud cake you could ever imagine. This guide is more than a list of instructions; it is your key to becoming a baking legend among your friends and family.
Leave behind the notion of dense, heavy sponges and cloyingly sweet frostings. The true magic of this cake is found in its sublime texture and the sophisticated, deep flavour of a genuine homemade caramel. We promise that with our detailed guide, you will be able to create this stunning bake right in your very own kitchen.
What Exactly Is a Caramel Cloud Cake?
Before we roll up our sleeves and get our hands dusty with flour, let’s explore what makes this cake so unique. The “cloud” in its title is no mere poetic flourish; it accurately describes the sponge’s structure. We create this texture using a baking technique similar to a chiffon or genoise cake, which harnesses the power of whipped egg whites to yield an incredibly light, bouncy, and airy crumb. It is a method that ensures a beautifully soft texture that remains sturdy enough to hold its shape.
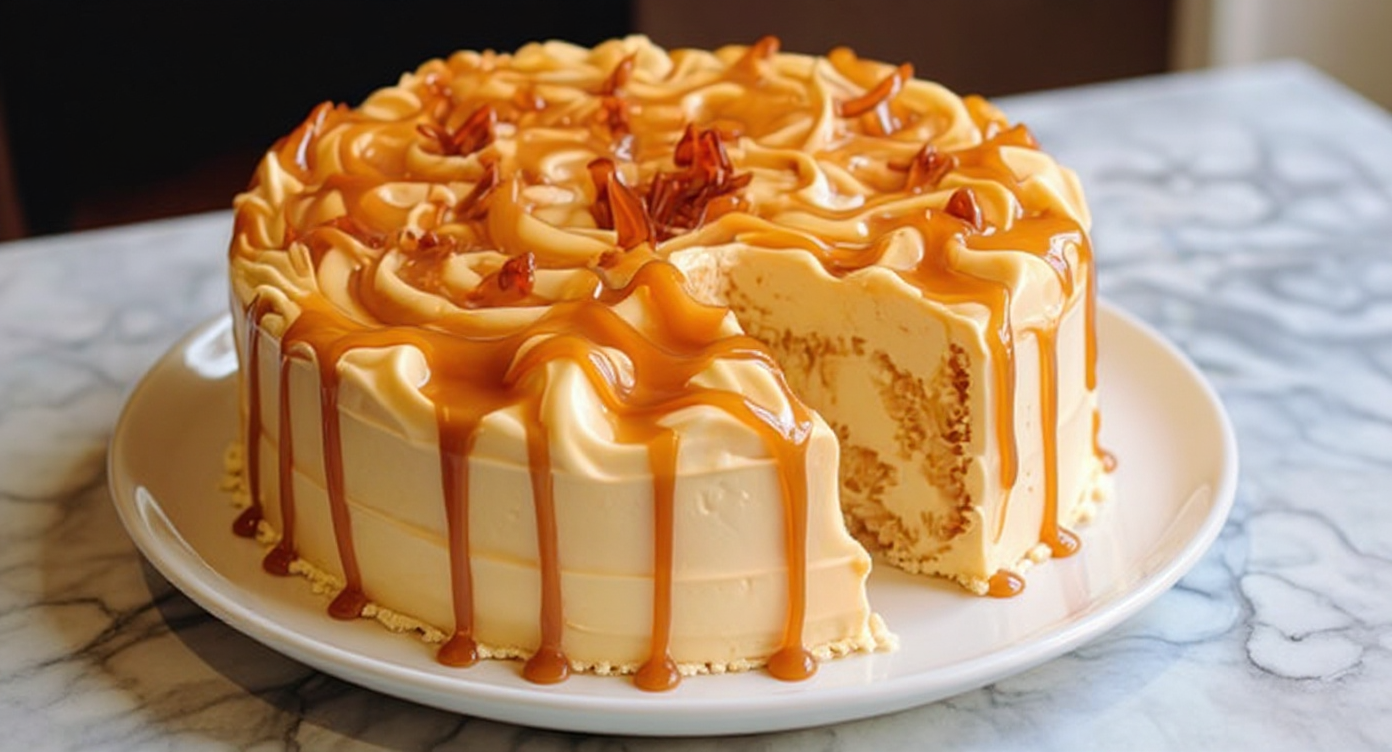
This heavenly sponge is then cloaked in a sumptuously smooth caramel frosting. We are not referring to a basic buttercream with a dash of caramel essence. We are making a proper caramel from scratch that will form the frosting’s base, lending it a rich, authentic, and slightly toasted taste that cuts through the sweetness beautifully. It represents the perfect marriage of a light caramel cake and a truly luxurious topping.
Essential Ingredients and Equipment
Exceptional baking always begins with high-quality ingredients. For this particular cloud cake recipe, accuracy is paramount. We strongly suggest using digital scales for the most reliable measurements. Organising all your ingredients before you start, a professional practice known as ‘mise en place’, will ensure the entire process is seamless and far more enjoyable.
For the Cloud Cake Sponge
- 200g plain flour, plus extra for dusting
- 1 ½ tsp baking powder
- ½ tsp salt
- 6 large free-range eggs, separated
- 200g caster sugar, divided
- 120ml whole milk
- 80ml vegetable oil
- 1 tsp vanilla extract
For the Fluffy Caramel Frosting and Drizzle
- 200g granulated sugar
- 90ml water
- 240ml double cream, warmed
- 1 tsp vanilla extract
- A generous pinch of sea salt
- 250g unsalted butter, softened to room temperature
- 300g icing sugar, sifted
Essential Kitchen Tools
- Two 8-inch (20cm) round cake tins
- Baking parchment
- Digital kitchen scales
- Electric stand mixer or hand mixer
- Several mixing bowls
- A small, heavy-bottomed saucepan
- Spatula and whisk
- Wire cooling rack
Step-by-Step Instructions for Your Caramel Cloud Cake
And now, for the most exciting part! We have divided this recipe into three clear and manageable phases: preparing the sponge, making the caramel frosting, and finally, assembling your creation. Follow these steps carefully, and you will be on the path to baking success.
Part 1: Preparing the Light and Fluffy Sponge
- Set the Oven and Tins: First, preheat your oven to 160°C (320°F) Fan / 180°C (350°F) conventional. Grease your two 8-inch cake tins with butter and line the bases with baking parchment. Finish by lightly flouring the sides and tapping away any excess.
- Sift the Dry Components: In a medium-sized bowl, sift together the plain flour, baking powder, and salt. Sifting is vital for a light sponge, so please do not be tempted to skip this step!
- Prepare the Yolk Mixture: In another large bowl, whisk the egg yolks with 150g of the caster sugar, the milk, vegetable oil, and vanilla extract until the mixture becomes pale, smooth, and has thickened slightly.
- Merge the Mixtures: Gently fold the dry ingredients into the yolk mixture in two or three stages. Take care not to overwork the batter; fold just until no flour streaks remain. Set this batter to one side for a moment.
- Whip the Meringue: Using an electric mixer in a spotlessly clean, dry bowl (glass or metal works best), beat the egg whites on a medium speed to soft peaks. While the mixer is still running, slowly pour in the remaining 50g of caster sugar. Continue beating until the meringue is glossy and holds stiff, firm peaks when you lift the beaters.
- Fold to Combine: Gently incorporate about a third of the whipped egg whites into the main batter to lighten its consistency. Then, carefully fold in the rest of the whites in two more additions. The aim is to preserve as much air as possible, so use a light touch with a large spatula.
- Bake the Sponges: Pour the batter equally between your prepared tins, smoothing the tops with a spatula. Bake for 25-30 minutes, or until a skewer pushed into the middle of each cake comes out clean. Allow the cakes to cool in the tins for 10 minutes before carefully turning them out onto a wire rack to cool down completely.
Part 2: Crafting the Perfect Caramel Frosting
This is the step where true alchemy occurs. Creating caramel from scratch is deeply rewarding and is what transforms this cake from merely good to truly spectacular. For a more in-depth look at the science of sugar, you might find resources like this guide to making caramel sauce from Serious Eats helpful.
- Create the Caramel Base: In your heavy-bottomed pan, add the granulated sugar and water. Gently swirl the pan to help the sugar dissolve, but avoid stirring. Bring it to a boil over a medium heat. Allow it to bubble, without stirring, until the syrup transforms into a rich, deep amber colour. This usually takes between 5 and 10 minutes. Keep a very close eye on it, as it can go from perfect to burnt in seconds!
- Halt the Cooking Process: Once it reaches that perfect amber shade, carefully and slowly pour in the warmed double cream. Be prepared for the mixture to bubble up vigorously, so it is wise to stand back! Whisk energetically until it is smooth, then take it off the heat and stir through the vanilla extract and sea salt.
- Let the Caramel Cool: Transfer the caramel into a heatproof bowl and allow it to cool down to room temperature completely. It will naturally thicken as its temperature drops. You can place it in the fridge to accelerate this, but ensure it returns to room temperature before moving on to the next step.
- Prepare the Buttercream: In a large mixing bowl, use an electric mixer to beat the softened butter until it becomes pale and fluffy, which should take about 3-4 minutes. Slowly add the sifted icing sugar, starting on a low speed to incorporate it, then increasing the speed to high until the mixture is completely combined and smooth.
- Finish the Frosting: Set aside approximately 4 tablespoons of your cooled caramel sauce for decorating later. Pour the remaining caramel sauce into the buttercream. Beat on a medium-high speed until your fluffy caramel frosting is silky, uniform, and irresistibly tasty.
Part 3: Assembling Your Masterpiece
- Prepare the Layers: When your cake layers have cooled completely, use a long, serrated bread knife to trim the tops if they have crowned while baking. This will give you a flat, even surface for stacking.
- Build the Base: Position one cake layer on your chosen serving plate or cake stand. Spread a liberal amount of the fluffy caramel frosting evenly across the top, going right to the very edge.
- Add the Second Layer and Crumb Coat: Gently place the second cake layer on top. Apply a very thin layer of frosting over the top and sides of the whole cake. This is known as a ‘crumb coat’, and its purpose is to seal in any stray crumbs. Place the cake in the refrigerator for 20-30 minutes to allow the coating to set.
- Apply the Final Coat: Take the chilled cake out of the fridge. Cover it with the rest of the frosting, using a palette knife or cake scraper to achieve either a perfectly smooth or an attractively textured surface.
- Add the Caramel Drizzle: If your reserved caramel sauce has stiffened, warm it gently in the microwave for just a few seconds to make it pourable. Artfully drizzle it over the top edge of the cake, encouraging it to drip attractively down the sides. Your stunning caramel drizzle cake is now complete!
Top Tips for Success
To guarantee your baking adventure is a resounding success, we have put together a few expert pointers. These seemingly small details can have a significant impact on the final result.
- Use Room Temperature Ingredients: For the smoothest possible batter and frosting, make sure your eggs, milk, and butter have all been brought to room temperature before you start.
- Avoid Overmixing: After you have added the flour, mix only until it is just incorporated. Overmixing the batter develops the gluten, resulting in a tough cake—the exact opposite of our goal!
- Patience with the Caramel is Crucial: Resist the urge to stir the sugar and water while it cooks; simply swirl the pan. Stirring can encourage the sugar to crystallise.
- Ensure Layers are Completely Cool: You must never try to frost a cake that is still warm. It will cause the frosting to melt into a disappointing, runny mess. Patience truly is a virtue in baking. For those who appreciate baking precision, you may also enjoy our detailed Brownie Recipe For Deliciously Fudgy Treats.
Frequently Asked Questions (FAQ)
Can I make this cake ahead of time?
Of course! The cake sponges can be baked one day ahead. Once fully cooled, wrap them well in cling film and keep them at room temperature. The caramel sauce can also be prepared up to a week in advance and kept in an airtight container in the fridge. For the ideal texture and flavour, we suggest preparing the frosting and assembling the cake on the day you wish to serve it.
How do I store the finished caramel cloud cake?
Your finished cake should be kept in an airtight cake carrier. It will stay fresh at room temperature for up to two days, or you can refrigerate it for up to four days. If you do put it in the fridge, allow it to stand at room temperature for around 30 minutes before serving so the frosting can soften up a little.
Why did my cake turn out dense instead of light and cloudy?
A dense result is typically caused by one of two common issues: either the batter was overmixed after adding the flour, or the air was knocked out of the egg whites during the folding stage. Be especially gentle when folding, using a figure-of-eight motion to maintain as much of that precious air in the batter as possible.
Is this an easy caramel cake for beginners?
Although it involves a few more stages than a simple sponge, we consider this an easy caramel cake for a keen beginner. We have taken care to write the instructions as clearly as we can. The secret is to read the entire recipe through before you begin and to be methodical with each step. We promise the final result is more than worth the effort!
A Sweet Conclusion to Your Baking Adventure
So there you have it—our complete guide to creating an absolutely spectacular Caramel Cloud Cake. We have guided you through the process of making a feather-light sponge, a genuinely rich caramel, and a frosting that is nothing short of heavenly. This bake is more than just a dessert; it is an event in itself. It serves as the perfect showpiece for a birthday celebration, a special gathering, or simply as a weekend indulgence when you fancy creating something truly magnificent.
We are genuinely excited for you to try this recipe and to fill your kitchen with the wonderful scent of home baking. If you are searching for another delightful dessert to add to your repertoire, why not give our zesty Mini Lemon Cheesecakes a try next?
Now, the whisk is in your hands! Put on your apron, switch on the oven, and prepare for a delightful baking session. Please do share photos of your beautiful bakes with us on social media—we would love to see your stunning caramel cloud cakes!


