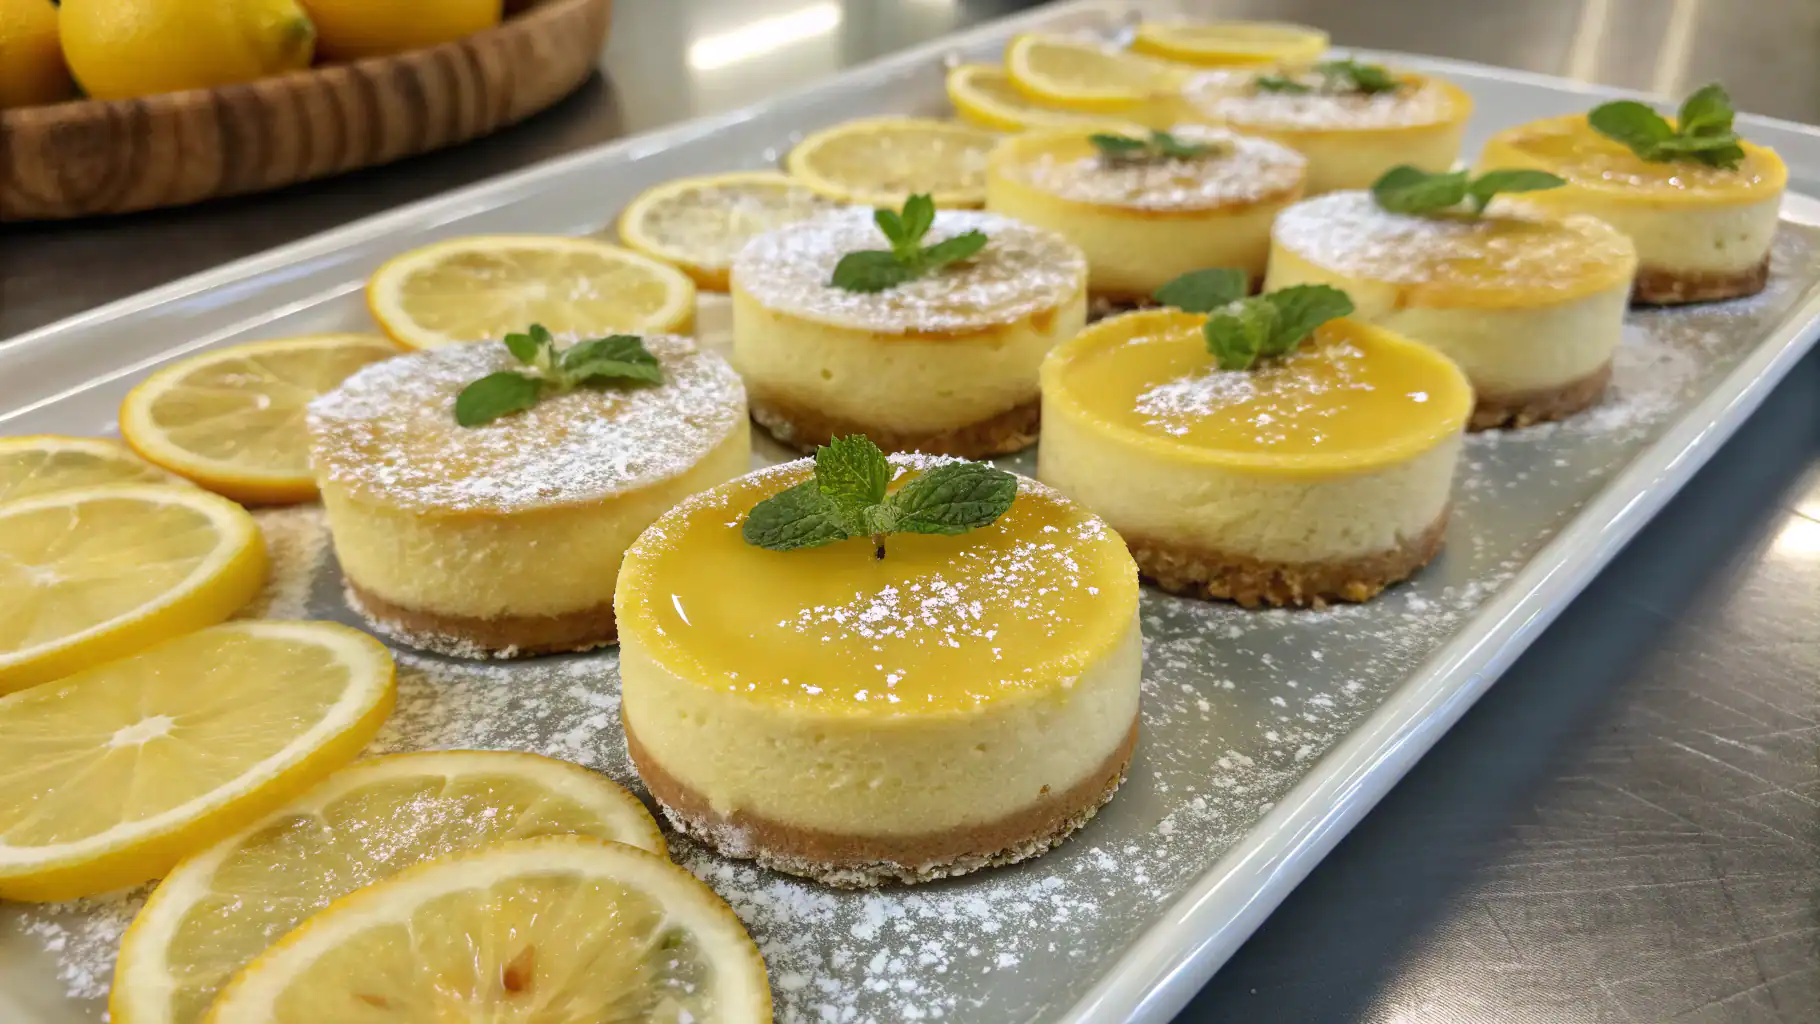
Tasty Mini Lemon Cheesecakes – Delicious & Easy!
Are you on the hunt for a truly special dessert that feels both elegant and refreshing, yet is wonderfully straightforward to prepare? Perhaps something to elevate a dinner party, grace an afternoon tea spread, or simply serve as a well-deserved treat for yourself? We think we’ve found the ideal solution. Let us introduce you to these heavenly Mini Lemon Cheesecakes, a recipe we’re sure will become your new favourite for delighting guests and family alike.
These exquisite little creations offer everything you could desire in a dessert. They balance the vibrant, zesty tang of fresh lemons with the decadent, creamy texture of a classic cheesecake, all built upon a crumbly, buttery biscuit base. Being individually portioned, they are incredibly convenient to serve, eliminating any fuss. Come along with us as we show you exactly how to craft these perfect little mouthfuls of joy.
Why You’ll Adore This Mini Lemon Cheesecakes Recipe
Before we get to the method, let’s explore why this particular recipe is destined to earn a treasured spot in your baking collection. The appeal of these cheesecakes goes far beyond their sublime flavour.
- Perfect Portions: There’s something undeniably charming about individual desserts. They remove the hassle of slicing and serving, which makes them perfectly suited for gatherings, parties, and even picnics.
- Effortlessly Elegant: While they are quite simple to make, these mini cheesecakes possess a sophisticated appearance. A delicate swirl of cream or a fine sliver of lemon zest is all that’s needed to give them a professional, patisserie-quality finish.
- Make-Ahead Marvel: This is a dream dessert for anyone who likes to plan ahead! You can easily prepare them the day before, freeing you up on the day of your event. They truly benefit from a long chill in the fridge, which enhances their flavour.
- A Burst of Flavour: We incorporate both the zest and juice of fresh lemons to guarantee a bright, tangy taste that beautifully cuts through the richness of the cream cheese. This results in a perfectly balanced and invigorating treat, making it one of the finest creamy lemon desserts you will ever taste.
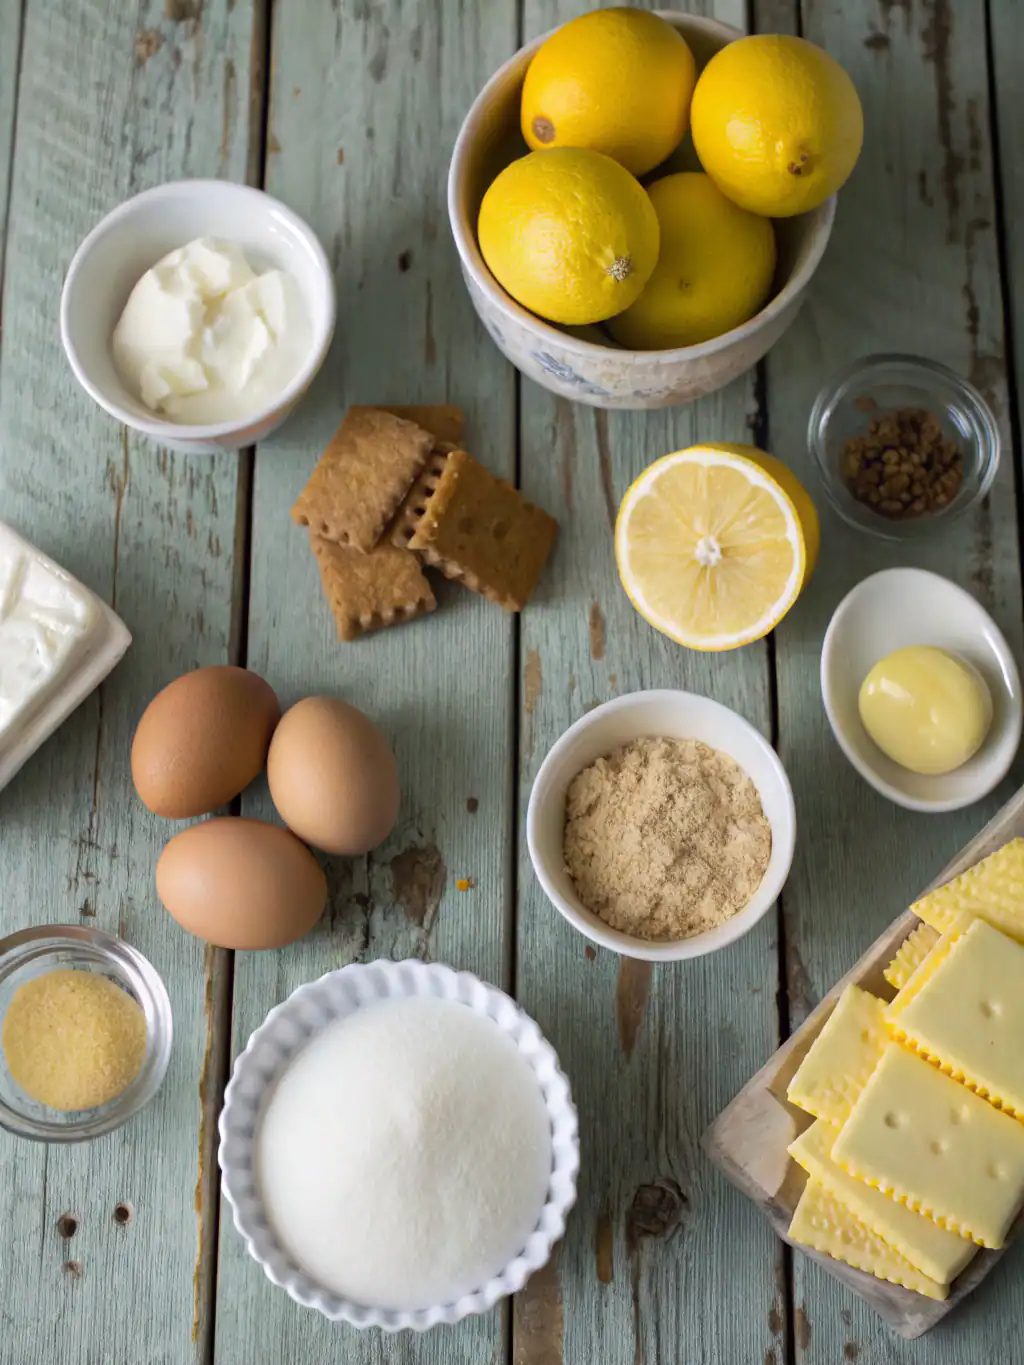
Essential Ingredients for Your Cheesecakes
The first step towards baking success is to gather your ingredients. We’ve kept the list wonderfully simple, focusing on high-quality elements that create a harmonious result. For this easy lemon cheesecake recipe, here is what you will need:
For the Buttery Biscuit Base
- Digestive Biscuits: 200g (about 14 biscuits)
- Unsalted Butter: 100g, melted
- Caster Sugar: 1 tablespoon (optional, for extra sweetness)
For the Creamy Lemon Filling
- Full-Fat Cream Cheese: 400g, at room temperature
- Icing Sugar: 100g, sifted
- Double Cream: 200ml, cold
- Lemons: 2 large, for zest and juice
Step-by-Step Guide to Making Mini Lemon Cheesecakes
With our ingredients assembled, it’s time to begin the enjoyable part. We will walk you through every stage to make sure your individual lemon cheesecakes are flawless. We suggest using a standard 12-hole muffin tin lined with paper cases for the best results.
Prepare Your Biscuit Base
First, we’ll construct that delightful, crunchy foundation. Put the digestive biscuits into a large, resealable food bag. Using a rolling pin, crush them into fine crumbs – this can be quite a satisfying task! Alternatively, a food processor will give you a more even texture. Tip the crumbs into a bowl, stir in the caster sugar if you wish, then pour over the melted butter. Mix everything together until the crumbs are fully moistened and have the consistency of damp sand.
Form the Bases
Spoon the biscuit mixture evenly among the 12 paper cases in your muffin tin; we find that about one generous tablespoon per case is the perfect amount. Press the crumbs down firmly with the back of a spoon or the base of a small glass to create a solid, even layer. A compact base is vital for supporting the creamy topping. Once done, pop the tin into the fridge to firm up for at least 30 minutes while you get on with the filling.
Whip Up the Zesty Filling
In a large bowl, place the room-temperature cream cheese and beat it with an electric mixer for a minute or so until it is completely smooth and lump-free. Sift the icing sugar into the bowl and beat again until it is well-incorporated and the mixture is creamy. Now, add the zest from both lemons and the juice from one and a half. Mix on a low speed until just combined. In a separate bowl, whip the cold double cream until it holds soft peaks – be careful not to take it too far! Gently fold the whipped cream into the lemon-cheese mixture using a spatula until it is smooth and streak-free.
Assemble Your Cheesecakes
Retrieve your muffin tin with the chilled biscuit bases from the fridge. Carefully spoon or pipe the luscious lemon filling over each base, filling the paper cases right to the top. Use a small palette knife or the back of a spoon to create a smooth, level surface for a polished look.
Chill to Perfection
This stage is absolutely essential for achieving the ideal cheesecake consistency. Cover the muffin tin with cling film and return it to the fridge to set for a minimum of 6 hours, though overnight is even better. This chilling period ensures the filling becomes perfectly firm and allows all the lovely flavours to mingle and deepen.
Top Tips for Flawless Mini Lemon Cheesecakes
We’re here to ensure your baking adventure is a resounding success. Here are some of our favourite professional hints we’ve learned over the years:
- Use Room Temperature Cream Cheese: We cannot stress this enough! Cold cream cheese will give you a lumpy filling. Be sure to leave it out on the worktop for an hour or so before you start.
- Don’t Overmix: When incorporating the whipped cream, use a gentle folding motion. If you mix too vigorously, the cream can lose its air, resulting in a dense and potentially runny filling. A delicate hand is also crucial for other bakes, like our feather-light Cloud Cake Recipe.
- Fresh is Best: Always opt for freshly squeezed lemon juice over the bottled variety. Bottled juice can have a much duller flavour profile and often contains additives that can alter the final taste. To learn more about this citrus wonder, have a look at this lemon guide from BBC Good Food.
- Easy Removal: The paper cases make it incredibly simple to handle the finished cheesecakes. Just peel the paper away when you’re ready to serve. If you opt for a silicone mould, they should release cleanly once properly chilled.
Creative Variations and Topping Ideas
While we find this classic recipe simply divine as it is, we wholeheartedly encourage you to get creative! Here are a few suggestions for customising your cheesecakes.
Biscuit Base Swaps
If you don’t have any digestive biscuits to hand, don’t worry! You can easily swap them for:
- Ginger Nuts: These add a lovely, warming spice that contrasts beautifully with the sharp lemon.
- Shortbread: For a richer, more buttery base that melts in your mouth.
- Lotus Biscoff Biscuits: Use these to introduce a deep, caramelised flavour note.
Fabulous Toppings
A final decorative touch can elevate your no-bake cheesecake bites from simply delicious to truly spectacular.
- Lemon Curd: A small spoonful of bright, zesty lemon curd on top adds an intense citrus burst.
- Whipped Cream: A classic swirl of lightly sweetened whipped cream offers a soft, airy contrast.
- Fresh Berries: A scattering of blueberries or raspberries adds a pop of vibrant colour and a complementary sweet-tart flavour. If you adore the blueberry-cheesecake pairing, you must also try our Tasty Blueberry Cheesecake Swirl Cookies Delicious Easy.
- Zest Curls: A few finely pared curls of lemon zest make for an effortlessly elegant garnish.
Storing Your Cheesecakes for Maximum Freshness
To keep your mini lemon cheesecakes tasting their absolute best, proper storage is key. They should be kept in an airtight container in the fridge, where they will remain delicious for up to 3-4 days. In our opinion, the flavour is often even better on the second day!
Should you wish to prepare them further in advance, they also freeze exceptionally well. Arrange them in a single layer in a freezer-safe container, where they will keep for up to one month. To serve, simply transfer them to the fridge to thaw overnight.
Frequently Asked Questions (FAQ) about Mini Lemon Cheesecakes
Can I use low-fat cream cheese?
We really wouldn’t recommend it. Full-fat cream cheese is crucial for achieving that signature rich, creamy consistency and for helping the cheesecake set properly. Lower-fat varieties contain more water and do not have enough fat to create a stable, firm filling.
How long do these cheesecakes last in the fridge?
When stored properly inside an airtight container, your mini cheesecakes will stay fresh and delightful for up to 4 days in the refrigerator.
Can I make this recipe as one large cheesecake?
Of course! The ingredient quantities are perfect for a 20cm (8-inch) springform tin. The method is identical, but a single large cheesecake will require a longer chilling time of at least 8 hours, or ideally overnight, to guarantee it is fully set before you attempt to slice it.
Why is my cheesecake filling not firm?
This issue usually has one of a few common causes. The most frequent reason is insufficient chilling time; you must be patient and allow at least 6 hours. Other culprits could be over-whipping the cream, which causes it to lose structure, or not using full-fat cream cheese, both of which will compromise the filling’s ability to set firmly.
Conclusion: Your New Favourite Dessert Awaits
And there you have it—our simple, fail-safe guide to creating the most wonderful Mini Lemon Cheesecakes. They are the perfect treat for any occasion and prove that you don’t need complex techniques to produce a dessert that is genuinely impressive. Bright, creamy, and zesty, they are sure to bring a touch of sunshine to your table.
We truly hope you give this recipe a go. We encourage you to get into the kitchen, enjoy the process, and have fun experimenting with different toppings! Once you have made your own delicious creations, we would be thrilled to hear how it went. Please feel free to leave a comment below to share your thoughts or tag us in your pictures on social media. Happy baking!