Vampire Bite Red Velvet Cheesecake
Are you on the hunt for a truly spectacular Halloween dessert that delivers on both flavour and appearance? Something to make your guests whisper with awe (and a touch of playful fear)? We’ve got just the thing: an indulgent, velvety, and beautifully macabre vampire bite red velvet cheesecake. This isn’t merely a dessert; it’s a centrepiece. We are here to walk you through each stage of creating this spooky masterpiece, a treat that masterfully blends rich taste with a wonderfully dramatic presentation.
What is a Vampire Bite Red Velvet Cheesecake?
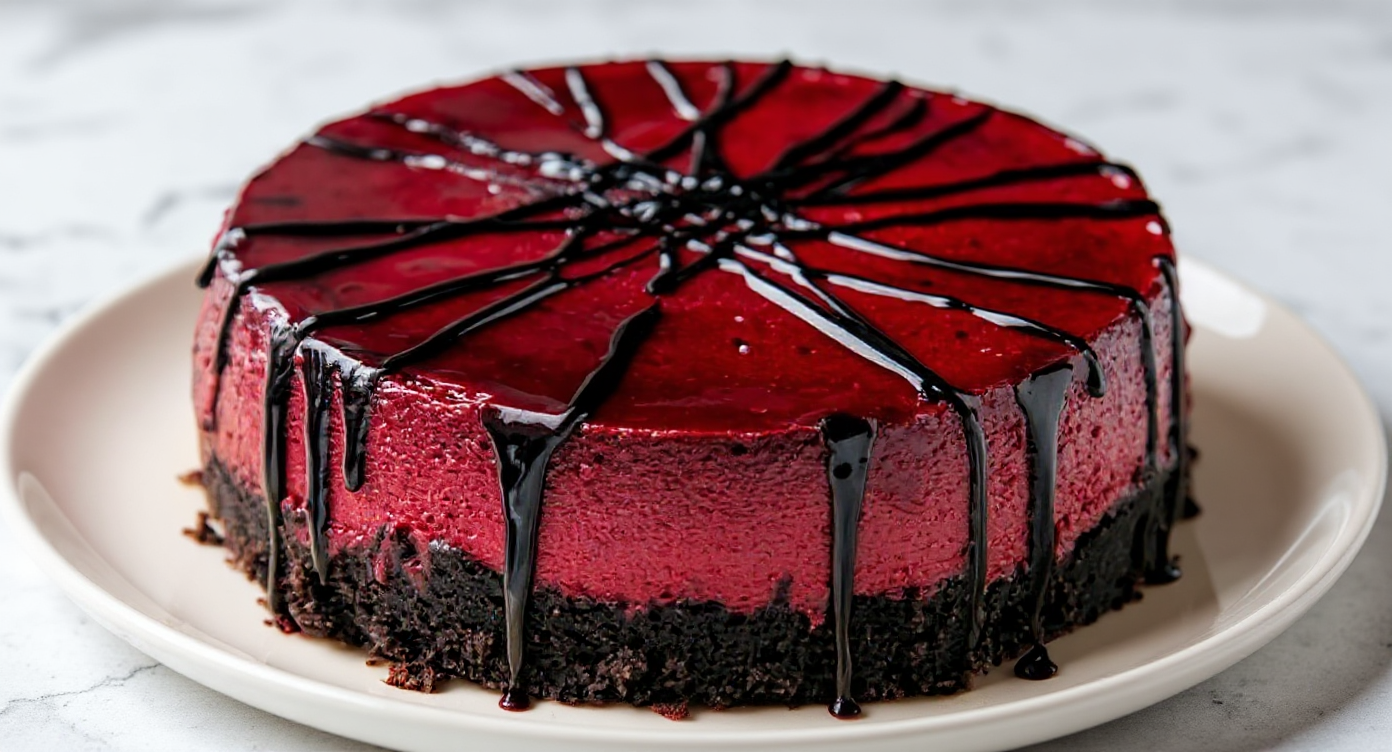
Let us paint you a picture: take the beloved flavour of a classic red velvet cake, renowned for its deep crimson colour and delicate notes of chocolate and vanilla, and reimagine it as a sumptuously smooth cheesecake. Then, envision a pristine, creamy surface pierced by two unmistakable puncture marks, from which a shimmering, dark red berry sauce appears to ‘bleed’. This is the essence of our vampire bite red velvet cheesecake. It’s a theatrical and delectable dessert, marrying the zesty sweetness of cream cheese with the deep flavour of red velvet, all resting on a dark chocolate biscuit base. It is, without a doubt, the ultimate Halloween dessert recipe for anyone wanting to make a lasting impression.
Why You’ll Love This Spooky Red Velvet Cheesecake Recipe
We have carefully crafted this recipe to be as simple and rewarding as possible, guaranteeing a superb outcome even if you’re new to baking. Here is why we are certain you will adore it:
- Visually Stunning: This is more than just a cheesecake; it’s a guaranteed centrepiece that will get everyone talking. The “vampire bite” feature is remarkably simple to achieve, yet it looks incredibly striking and is ideal for any Halloween celebration or gothic-themed event.
- Incredibly Delicious: The harmony of flavours is simply divine. The zesty, smooth cheesecake filling, the deep chocolate biscuit crust, and the sharp-yet-sweet berry coulis come together to create a perfectly balanced and unforgettable taste in every mouthful.
- No-Bake and Stress-Free: We have chosen a no-bake approach for this recipe. This means you can forget about the fuss of water baths or the worry of your cheesecake developing cracks in the oven. It is a straightforward, dependable method that yields a beautifully creamy texture.
- Perfect for Making Ahead: As this dessert requires several hours to chill, it is the perfect candidate for advance preparation. You can assemble it the day before your party, freeing up your time when you need it most.
Essential Ingredients for Your Vampire Cheesecake
To embark on this ghoulishly good culinary adventure, we must first assemble our vital components. We strongly suggest using high-quality, full-fat ingredients where noted, as this will ensure your no-bake Halloween cheesecake possesses the most superior flavour and texture.
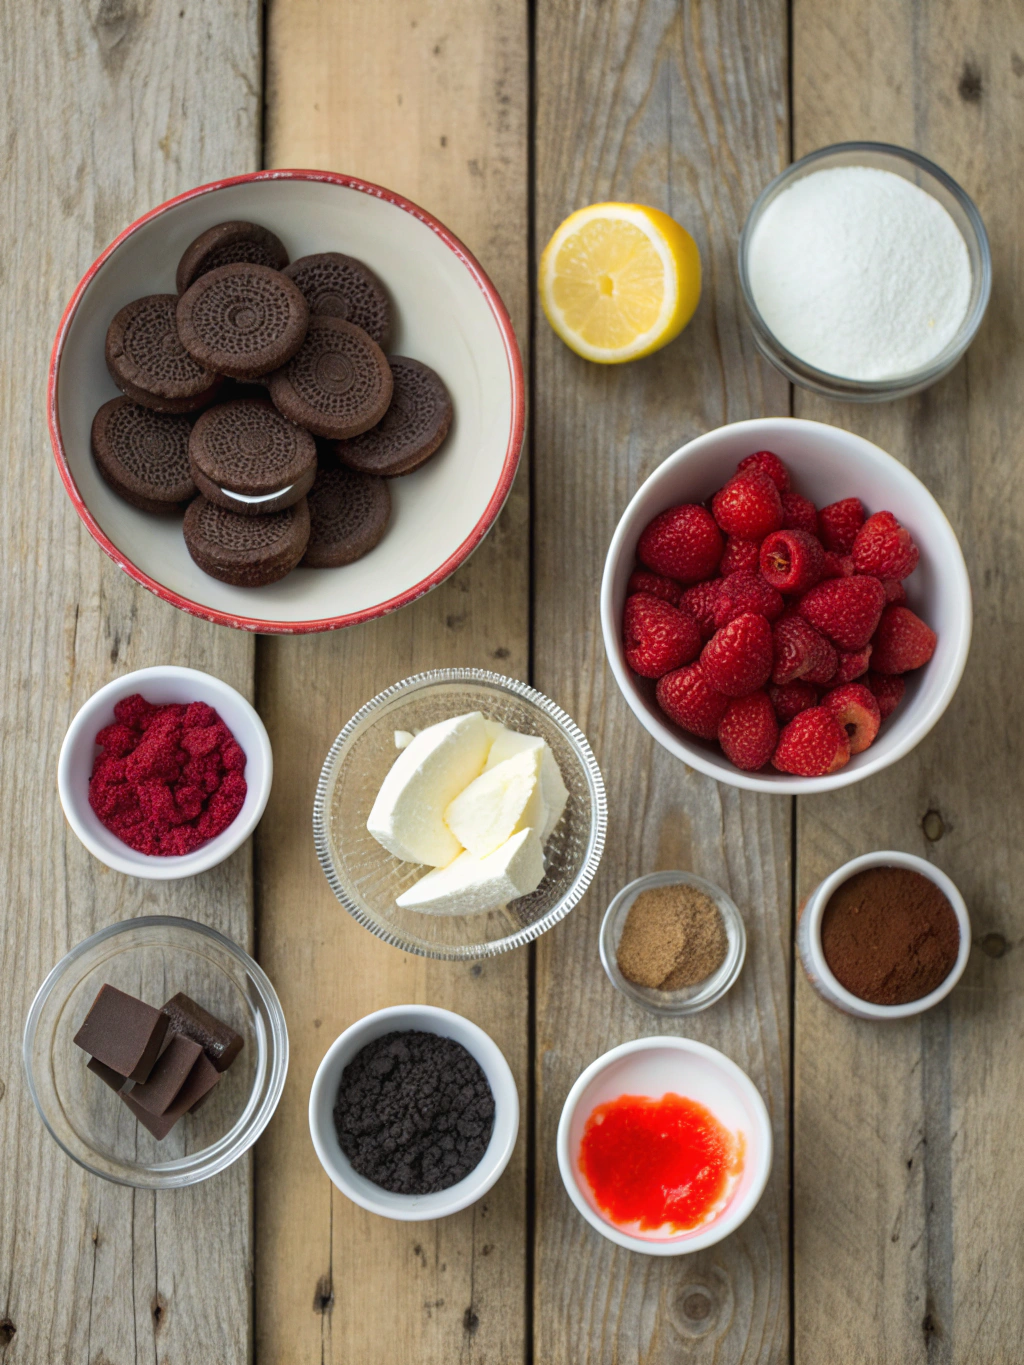
For the Chocolate Biscuit Crust
- 300g chocolate digestive biscuits or Oreos
- 125g unsalted butter, melted
- 1 tbsp cocoa powder (optional, for extra chocolate flavour)
For the Red Velvet Cheesecake Filling
- 600g full-fat cream cheese, at room temperature
- 100g icing sugar, sifted
- 300ml double cream, cold
- 1 tsp vanilla extract
- 2 tbsp cocoa powder, sifted
- 1-2 tsp red gel food colouring (use gel for a vibrant colour without adding too much liquid)
For the ‘Vampire Bite’ Topping
- 200g frozen or fresh raspberries or strawberries
- 50g caster sugar
- 1 tbsp lemon juice
Step-by-Step Instructions: Creating Your Masterpiece
With our ingredients gathered, it is now time to breathe life into our spooky creation. Follow these instructions closely, and you will soon have a magnificent dessert to be proud of.
Prepare the Chocolate Biscuit Base
First, we’ll craft our dark, crumbly foundation. Blitz your chocolate biscuits in a food processor until they are reduced to fine crumbs. If you don’t own a food processor, simply place them in a sturdy, sealed bag and crush them with a rolling pin—it’s a wonderfully therapeutic task! Decant the crumbs into a bowl, add the melted butter and optional cocoa powder, and stir until the mixture is thoroughly moistened and has the consistency of wet sand. Press this mixture firmly and evenly into the bottom of a 23cm (9-inch) springform tin with the back of a spoon. Place the tin in the refrigerator to set while you move on to the filling.
Whip Up the Red Velvet Filling
In a large bowl, use an electric mixer to beat the room-temperature cream cheese until it is perfectly smooth and lump-free. Add the sifted icing sugar and vanilla extract, beating again until completely combined. Now, incorporate the sifted cocoa powder. Here comes the transformation: add the red gel food colouring, just a small amount at a time, mixing until you reach a rich, deep red that you are happy with. In a separate, clean bowl, whip the cold double cream until it holds soft peaks—take care not to overdo it. Gently fold this whipped cream into the red velvet mixture until it is just combined, aiming to maintain a light, airy texture.
Assemble and Chill Your Cheesecake
Take your chilled biscuit base out of the fridge. Carefully spoon the beautiful red velvet filling over it, using a spatula or the back of a spoon to spread it into an even layer. Create a smooth surface for a polished look. Cover the tin with cling film and return it to the fridge to set for a minimum of 6 hours, though overnight is ideal. This chilling period is absolutely vital for the cheesecake to become firm.
Craft the ‘Bloody’ Berry Coulis
While your cheesecake is chilling, we can prepare the topping for our bloody cheesecake recipe. In a small saucepan, combine the berries, caster sugar, and lemon juice over a medium heat. Stir periodically as the contents come to a gentle simmer. Allow it to bubble away for about 5-7 minutes, by which point the berries will have softened and the sauce will have started to thicken. For a perfectly smooth, blood-like effect, push the sauce through a fine-mesh sieve into a clean bowl to strain out any seeds. Let the coulis cool down to room temperature before you use it.
Create the Final Vampire Bite Effect
Now for the final, show-stopping touch! Once the cheesecake is completely set, gently run a palette knife around the inside edge of the tin before releasing the springform mechanism. To form the bite marks, take a thick straw or the handle of a wooden spoon and carefully press two indentations into the top of the cheesecake, keeping them about an inch apart. Drizzle some of the cooled berry coulis into these holes, allowing it to overflow and trickle down the sides for a deliciously gruesome finish. Serve straight away and prepare for gasps of delight!
Pro Tips for the Perfect Vampire Bite Red Velvet Cheesecake
We want your cheesecake to turn out perfectly. Here are some of our favourite professional tips, gathered over time, to help you achieve a flawless result on every occasion.
- Room Temperature is Key: For the filling, it is crucial that your cream cheese is at room temperature. This is our top secret for achieving a silky, lump-free texture. Cold cream cheese simply won’t beat as smoothly.
- Use Full-Fat Ingredients: This is certainly not an occasion for low-fat substitutes! Full-fat cream cheese and double cream are non-negotiable for helping the cheesecake set correctly and for giving it that wonderfully rich and creamy mouthfeel.
- Gel Food Colouring is Best: Liquid food colourings have a tendency to affect the consistency of the cheesecake filling. A concentrated gel colouring, on the other hand, delivers an intense, deep red shade without introducing unwanted moisture.
- Patience is a Virtue: Arguably the most challenging part of making this dessert is the waiting time. Resist the urge to slice into it too early. Chilling it overnight guarantees it will be perfectly firm and easy to serve.
- For a Clean Slice: To achieve those satisfyingly neat slices, dip a long, sharp knife into hot water and wipe it clean between each cut. This simple trick stops the cheesecake from clinging to the blade. For more general tips, this guide to making the perfect cheesecake from BBC Good Food is an excellent resource.
Customisation and Variations
Although we are rather fond of this recipe just as it is, we always encourage a bit of creative flair! If you are seeking other impressive dessert recipes, why not give our light and fluffy Cloud Cake Recipe a go after you have perfected this one?
- Vary the Base: While a dark chocolate base provides a wonderful contrast, you could easily substitute it with classic digestives, ginger nuts for a touch of warmth, or even a buttery shortbread base.
- Quick Coulis: If you find yourself pressed for time, a good-quality, shop-bought raspberry or strawberry sauce will work well as a replacement for the homemade coulis.
- Add a Boozy Kick: For a grown-up twist, consider adding a splash of Chambord (a raspberry liqueur) or a cherry brandy to the berry coulis once it has cooled slightly.
Frequently Asked Questions (FAQ)
Can I make this cheesecake ahead of time?
Of course! That’s one of the most convenient aspects of this recipe. You can prepare the cheesecake up to two days before you need it. Simply keep it well-covered in the refrigerator and then add the “vampire bite” coulis right before you plan to serve it for the most dramatic impact.
How do I store leftover cheesecake?
Any leftovers should be kept in an airtight container in the fridge, where they will stay fresh for up to 3 days. You might find the biscuit base softens a little over time, but it will remain just as delicious.
Can I use a different type of biscuit for the base?
Yes, please feel free to experiment! Oreos (cream filling included) are fantastic for an intensely dark and sweet base. Ginger nuts would introduce a lovely, spicy note, while plain digestives are a great option if you’d prefer a milder chocolate flavour.
Why isn’t my no-bake cheesecake setting?
The usual culprits are not using full-fat cream cheese and double cream, or simply not allowing it to chill for long enough. Over-whipping the double cream can also affect its ability to stabilise the mixture. Make sure you only whip it to soft peaks before folding it through the filling.
Conclusion: Your Spooktacular Centrepiece Awaits
So, there we have it—our complete guide to making a truly sensational and delicious vampire bite red velvet cheesecake. It is a wonderfully fun and dramatic dessert that proves spooky can also be incredibly elegant. The trio of the dark chocolate base, vibrant red filling, and glistening berry “blood” ensures it will be a smash hit for any event that needs a little theatrical flair. If biscuits are more your thing, be sure to have a look at our Blueberry Heaven Cookies The Definitive Recipe For Soft Chewy Perfection for another treat that’s sure to please a crowd.
We truly hope you feel inspired to unleash your inner creative baker and give this recipe a go. It is about more than just following steps; it’s about crafting something memorable and enjoyable. We would love to hear how your own creation turns out, so please do share your results in the comments below—we can’t wait to see your spooky masterpieces!