The Perfect No Bake Raspberry Cheesecake: An Effortless Showstopper Dessert
Have you been searching for an exceptional dessert that delivers spectacular results without any fuss? Perhaps something that appears utterly stunning, tastes heavenly, and requires absolutely no oven time? If you’re eagerly agreeing, then you’ve come to the right place. We’re delighted to walk you through our treasured, detailed approach to creating the most exquisite No Bake Raspberry Cheesecake you’ll ever taste. This is set to become your go-to dessert for warm-weather entertaining, celebratory dinners, or whenever you crave something truly remarkable.
Forget any concerns about complex techniques or those frustrating cheesecake cracks. Our recipe celebrates the sheer pleasure of bringing together quality ingredients to create something magical. It’s a delightful dance of contrasts: the crisp, golden biscuit foundation, the cloud-like smooth filling, and the vibrant burst of tangy raspberry topping. Simply put, it’s a dessert that captures hearts with every bite.
Why We Adore This Easy No Bake Cheesecake
This recipe holds a special place in our hearts for countless reasons, and we’re confident it’ll become equally cherished in your home. It’s brilliantly uncomplicated, making it ideal for beginners, whilst the outcome is so stunning that seasoned bakers will be thoroughly impressed. Here’s what makes it truly exceptional:
- No Oven Required: A chilled dessert is a blessing, particularly during hot weather or when your oven is busy with other dishes. This cheesecake sets beautifully in the refrigerator, keeping your kitchen comfortable and your experience enjoyable.
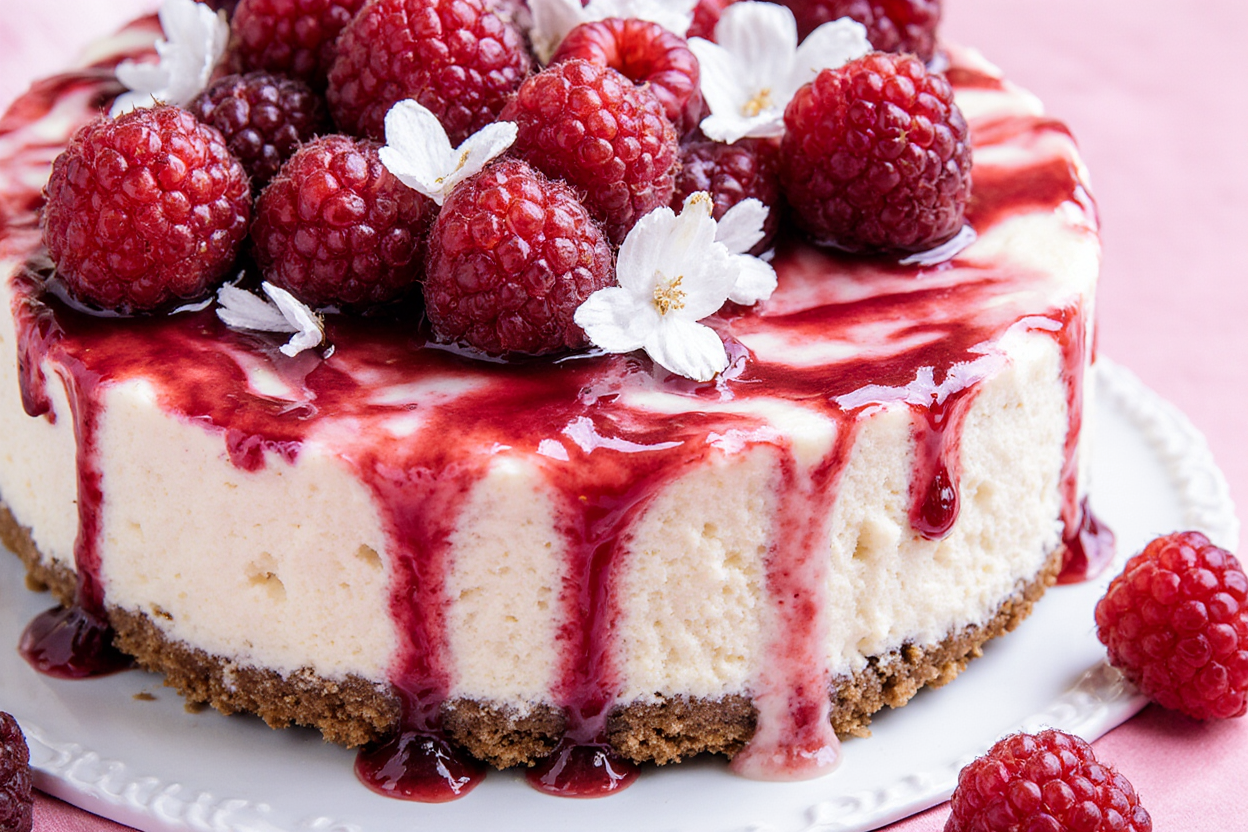
- Stunningly Beautiful: The dramatic interplay between the ruby-red raspberry swirl and the pristine white cheesecake creates visual magic. It has all the elegance of a professional patisserie creation, yet our technique is refreshingly simple.
- Harmonious Flavour Profile: The rich, slightly tart cream cheese base is perfectly complemented by the bright sweetness of the raspberry layer. Combined with the satisfying texture of a buttery biscuit base cheesecake, every forkful delivers pure satisfaction.
- Ideal for Entertaining: This dessert is a lifesaver for hosts, as it actually improves when made in advance. This gives the components time to meld beautifully and ensures a perfect set, freeing you to focus on your guests.
Essential Ingredients for Your No Bake Raspberry Cheesecake
Great desserts begin with quality ingredients. This cheesecake requires just a select few pantry staples that unite to create something extraordinary. We suggest preparing everything in advance—what professional chefs term ‘mise en place’—to ensure a smooth, relaxed cooking experience.
For the Buttery Biscuit Base
- Digestive Biscuits: 300g (about 20 biscuits)
- Unsalted Butter: 150g, melted
For the Creamy Cheesecake Filling
- Full-Fat Cream Cheese: 600g, at room temperature
- Icing Sugar: 150g, sifted
- Double Cream: 300ml, cold
- Vanilla Extract: 1 teaspoon
For the Vibrant Raspberry Swirl
- Raspberries: 200g (fresh or frozen)
- Caster Sugar: 50g
- Lemon Juice: 1 tablespoon
An important note about your choices: using full-fat cream cheese and double cream is essential. Lower-fat versions have excess moisture and insufficient richness to create the proper structure. To achieve that luxurious, velvety consistency we’re after, the full-fat options are crucial.
Step-by-Step Guide: How to Make the Perfect No Bake Raspberry Cheesecake
Now for the exciting part: creating your cheesecake! We’ve organised everything into manageable steps. Follow our guidance, and you’ll soon have a magnificent dessert chilling in your refrigerator.
Step 1: Prepare the Biscuit Base
- Crush the Biscuits: Place the digestive biscuits in your food processor and blitz until they’re reduced to fine crumbs. Alternatively, seal them in a sturdy bag and bash them with a rolling pin—it’s surprisingly satisfying!
- Mix with Butter: Tip the crumbs into a bowl and add the melted butter. Mix thoroughly until all the crumbs are moistened and the mixture resembles wet sand.
- Form the Base: Transfer the mixture to a 20cm (8-inch) springform tin. Using a spoon’s back or a flat-bottomed tumbler, compress the crumbs firmly into an even layer, ensuring the edges are well-packed.
- Refrigerate: Place the tin in the fridge for at least 30 minutes to firm up whilst you prepare the remaining elements.
Step 2: Create the Luscious Raspberry Coulis
- Heat the Fruit: Combine the raspberries, caster sugar, and lemon juice in a small pan. The lemon juice enhances the berry flavour whilst helping the natural pectin activate. For fascinating insights into these berries, explore this comprehensive guide on their nutritional value.
- Simmer and Crush: Set the pan over medium heat. As the berries warm, they’ll break down and release their liquid. Crush them gently with your spoon and let the mixture bubble for 5-7 minutes until nicely reduced.
- Strain if Desired: For a silky-smooth finish without seeds, press the sauce through a fine sieve using a spoon’s back. While optional, this creates an especially elegant creamy raspberry dessert.
- Allow to Cool: Let the coulis reach room temperature completely. This is crucial—warm sauce would melt your filling.
Step 3: Whip Up the Creamy Cheesecake Filling
- Cream the Cheese: Using electric beaters, whisk the softened cream cheese with the sifted icing sugar in a large bowl until perfectly smooth. Room-temperature cream cheese is your secret weapon for achieving that flawless consistency.
- Whisk the Cream: In a separate, spotless bowl, beat the chilled double cream until it forms gentle peaks. Take care not to overbeat—you want it thick and stable but still soft and foldable.
- Fold Together: Stir the vanilla into the cream cheese mixture, then carefully fold in the whipped cream using a large spoon or spatula. Work gently to preserve the airiness, combining just until unified. This delicate handling ensures a wonderfully light result.
Step 4: Assembling Your Masterpiece
- Add the Filling: Remove your set base from the refrigerator. Carefully dollop the cheesecake mixture over it, spreading with a spatula to create a smooth, level surface.
- Dot with Coulis: Drop small spoonfuls of your cooled raspberry sauce across the cheesecake’s surface in a random pattern.
- Make the Swirl: Take a skewer or knife tip and draw it through the raspberry dots and cream, creating an artistic marbled design. Restraint is key—just a few graceful movements produce the most elegant results.
Step 5: The All-Important Chill
- Exercise Patience: Cover the cheesecake (a plate works brilliantly to prevent cling film touching your beautiful swirls) and refrigerate for at least 6-8 hours. For optimal texture and flavour development, we highly recommend an overnight rest.
- Unveil and Enjoy: When serving time arrives, slide a thin knife between the cheesecake and tin sides to loosen it. Carefully open the springform mechanism, transfer to your chosen platter, cut into wedges, and await the inevitable praise!
Tips and Tricks for Cheesecake Perfection
We want to ensure your cheesecake turns out brilliantly every time. Here are our most valuable insights from years of making this dessert:
- Room Temperature Cream Cheese: This bears repeating—properly softened cream cheese is non-negotiable. It ensures your mixture combines smoothly without any unwanted lumps.
- Pre-Chill Your Equipment: Here’s a professional tip! Placing your mixing bowl and beaters in the freezer beforehand helps the cream whip faster and achieve better volume.
- Professional Slicing: For those magazine-worthy portions, warm your knife blade in hot water and dry it between cuts. This prevents dragging and gives you pristine edges.
- Choose the Right Tin: A springform tin is absolutely essential for cheesecakes. The removable sides mean you can present your creation perfectly without any risk of damage.
Fun Variations to Try
After mastering this classic version, why not explore some creative adaptations? This versatile recipe provides an excellent canvas for various flavour adventures.
- Alternative Bases: Replace the digestives with ginger biscuits for a subtle heat, or try shortbread for extra butteriness. Dark chocolate biscuits create a decadent twist too.
- Mixed Berry Medley: This technique works beautifully with strawberries, blackberries, or blueberries too. For blueberry enthusiasts, our Tasty Blueberry Cheesecake Swirl Cookies Delicious Easy are another must-try.
- White Chocolate Addition: For ultimate luxury, gently melt 100g of quality white chocolate. Let it cool slightly before incorporating it into the cream cheese base, just before folding in the cream.
- Additional Fruity Treats: If berry desserts are your passion, you’ll adore our Blueberry Heaven Cookies The Definitive Recipe For Soft Chewy Perfection too!
Frequently Asked Questions (FAQ)
Can I use fresh or frozen raspberries for the coulis?
Absolutely, both work wonderfully. Frozen berries can go straight into the pan without defrosting. They might produce slightly more juice, so simply simmer for an additional minute or two until you achieve the right consistency.
Why is my no bake cheesecake not setting?
This common concern usually stems from three possibilities. Firstly, full-fat dairy products are crucial for proper setting. Secondly, gentle folding preserves the cream’s structure—vigorous mixing can deflate it. Finally, patience is vital—a minimum 6-hour chill is needed, though overnight yields superior results.
How long does this no bake raspberry cheesecake last in the fridge?
When properly covered and refrigerated, your cheesecake stays fresh for up to 4 days. The base gradually softens during storage, so we recommend enjoying it within the first 48 hours for optimal texture.
Can I freeze this cheesecake?
Yes indeed! This dessert freezes exceptionally well, whether as a whole or in individual portions. Wrap tightly in cling film followed by foil for protection. It keeps for up to 3 months frozen. Defrost overnight in the refrigerator—the texture might be marginally softer but remains delicious.
Can I make this recipe gluten-free?
Certainly! Simply swap the digestive biscuits for your preferred gluten-free variety. The remaining ingredients are naturally gluten-free, though we always recommend verifying the labels on your cream cheese and vanilla extract.
Conclusion: Your New Favourite Dessert
And there we have it: your comprehensive guide to crafting an absolutely stunning, utterly delicious, and remarkably easy no bake cheesecake that’s destined to become a household favourite. With its crisp foundation, divine creamy centre, and zingy raspberry accent, it’s an ideal dessert for every occasion throughout the year. We’ve shared our complete method and insider secrets to guarantee your success.
We sincerely hope you find as much joy in creating—and devouring—this dessert as we do. We’d be absolutely delighted to see your creations! Please share your photos and tag us on social media, or leave a comment to let us know how yours turned out. Enjoy your no-bake adventure!


