Snowball Cookies Recipe Melt in Your Mouth

Are you on the hunt for that quintessential festive treat? The one that perfectly captures the spirit of a cosy winter’s night, complete with a crackling fire and a comforting hot chocolate? For us, that feeling is embodied by a batch of wonderfully delicate, powder-dusted snowball cookies. We know that not all recipes are created equal; some yield biscuits that are too firm, too bland, or simply miss that signature crumble. So, how does one achieve that heavenly, buttery texture that simply dissolves on your tongue? We believe we’ve found the answer. We’re thrilled to share our definitive Snowball Cookies Recipe Melt in Your Mouth, a guide to creating nutty, buttery perfection with every single bake.
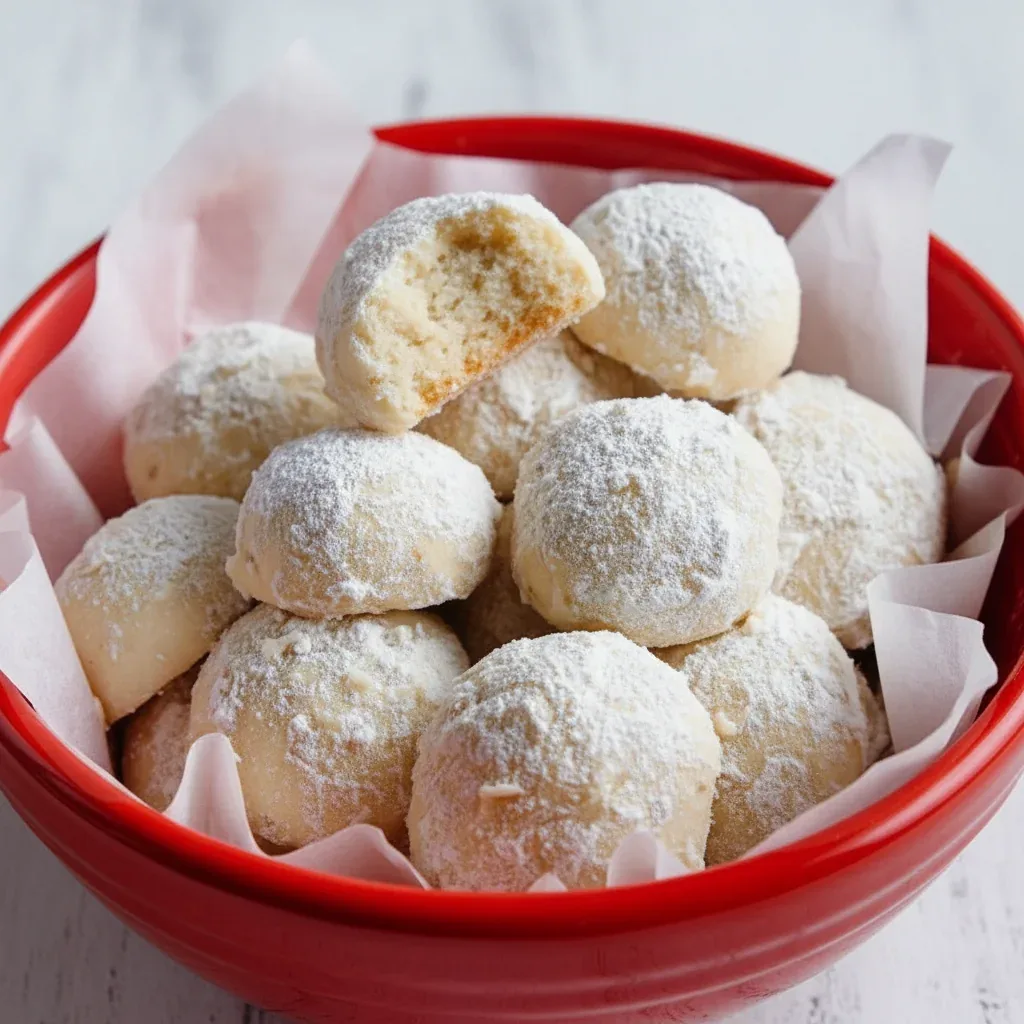
These delightful little spheres, which also go by names like Russian Tea Cakes or Mexican Wedding Cookies, are an absolute must-have on our holiday baking agenda. Their charm lies in their simplicity, calling for just a few staple ingredients, yet the result is a biscuit that tastes and feels exceptionally special. While our festive tables often feature hearty mains, such as a delicious Garlic Parmesan Chicken Pasta Recipe, it’s these sweet morsels that truly announce the arrival of the holiday season. Come along as we guide you through each stage, revealing our tried-and-tested secrets for the most tender Snowball Cookies you’ve ever had the pleasure of tasting.
Why You’ll Love This Recipe
- Effortlessly Simple to Make: Free from complex steps or specialised gadgets, this recipe is ideal for bakers of every skill level. It’s also a fantastic way to get children involved in the kitchen!
- Unbeatable Melt-in-the-Mouth Texture: We’ve carefully balanced the butter, flour, and icing sugar to produce a cookie with a delicate, shortbread-like quality that is simply divine.
- Wonderful for Gifting: Presented in a clear cellophane bag or a decorative tin finished with a festive ribbon, these cookies make for a thoughtful and tasty homemade present for your loved ones.
- A True Holiday Classic: These are the ultimate Holiday Cookies. Their snowy white appearance makes them a beautiful centrepiece for any festive biscuit selection or dessert spread.
- Fantastically Adaptable: While we adore the traditional pecan version, you can easily put your own spin on these cookies by using different nuts, adding warm spices, or incorporating a touch of citrus zest.
Ingredients
- 230g (1 cup) Unsalted Butter, softened to room temperature
- 60g (1/2 cup) Icing Sugar, plus extra for rolling
- 1 tsp Vanilla Extract
- 1/2 tsp Almond Extract (optional, but recommended)
- 240g (2 cups) Plain Flour
- 1/4 tsp Salt
- 120g (1 cup) Pecans or Walnuts, very finely chopped
- An additional 120g (1 cup) Icing Sugar, for coating
The magic of this Snowball Cookies Recipe is rooted in its straightforward list of ingredients, many of which you may already have on hand. For the most delicious outcome, we find that using good quality butter makes a noticeable difference.
- 230g (1 cup) Unsalted Butter, softened to room temperature
- 60g (1/2 cup) Icing Sugar, plus extra for rolling
- 1 tsp Vanilla Extract
- 1/2 tsp Almond Extract (optional, but recommended)
- 240g (2 cups) Plain Flour
- 1/4 tsp Salt
- 120g (1 cup) Pecans or Walnuts, very finely chopped
- An additional 120g (1 cup) Icing Sugar, for coating
Step-by-Step Guide to the Perfect Snowball Cookies
By following our guide closely, you’ll be rewarded with dozens of flawless, powdery delights. The secret to their incredible texture lies in a couple of key stages, particularly the chilling time and our double-dusting technique!
Step 1: Prepare the Nuts and Dry Ingredients
To begin, let’s get our components in order. If you have whole nuts, we recommend toasting them in a dry frying pan over a medium heat for 3-5 minutes until they release their aroma. This quick step significantly deepens their flavour. Allow them to cool down fully before chopping them as finely as possible. A food processor is excellent for this, but a good knife and a bit of effort work just as well. In a separate bowl, whisk the plain flour with the salt to ensure it is distributed evenly, which is vital for balancing the overall sweetness.
Step 2: Cream the Butter and Sugar
Using a stand mixer with a paddle attachment or an electric hand mixer, beat the softened unsalted butter in a large bowl on medium speed for about 2 minutes, or until it becomes light and creamy. This creaming action incorporates air, which is essential for achieving a light-textured cookie. For those interested in the science, King Arthur Baking has an excellent guide. Next, add the 60g of icing sugar, the vanilla extract, and the almond extract if you’re using it. Continue to beat for another 2-3 minutes, until the mixture is beautifully pale and fluffy.
Step 3: Combine and Chill the Dough
On a low speed, gradually incorporate the flour mixture into the creamed butter, mixing only until it is just combined. It’s important not to overmix here, as this can develop gluten and lead to tougher cookies. Lastly, use a spatula to fold in the finely chopped nuts, ensuring they are spread evenly through the dough. The dough will feel soft. Shape it into a flat disc, wrap it securely in cling film, and let it chill in the fridge for a minimum of one hour (or up to two days). Please don’t skip this part! Chilling allows the butter to solidify, preventing the cookies from spreading out in the oven and helping them maintain their signature round shape.
Step 4: Shape and Bake
Once you are ready to bake, preheat your oven to 180°C (160°C Fan / Gas Mark 4) and prepare two large baking trays by lining them with parchment paper. Take the chilled dough from the fridge. Use a spoon to scoop out tablespoon-sized portions and roll them between your hands to create neat 1-inch balls. Arrange them on the prepared trays, leaving about 2 inches of space between each one. Bake for 12-15 minutes. They are ready when the bottoms have turned a pale golden-brown colour, while the tops should still be quite pale.
Step 5: The Essential Double Dusting
This is the trick to achieving that perfect, snowy exterior! Allow the baked cookies to cool on the tray for approximately 5 minutes—they need to be warm, but not piping hot. While they are still warm, carefully roll each one in a bowl filled with icing sugar for a light, initial coating. The residual heat from the cookie helps this first layer of sugar melt slightly, creating a perfect base for the second layer to adhere to. Transfer the coated cookies to a wire rack to cool down completely. Once they’ve reached room temperature, roll them in the icing sugar once more for a thick, generous, and powdery finish that looks as good as it tastes.
Top Tips for Success
To ensure your baking adventure is a triumph, we suggest keeping these useful tips in mind. They are the small details that elevate a good cookie to an exceptional one.
- Ensure Your Butter is at Room Temperature: The butter should be soft enough for your finger to make an indent, but not so soft that it appears greasy. This is vital for the creaming stage.
- Finely Chop Your Nuts: If the nut pieces are too large, they can compromise the structure of these delicate cookies, causing them to crumble. A fine, almost mealy consistency is ideal.
- Uniform Size is Key: Aim to make all your cookie balls roughly the same size. This ensures they bake through evenly. Using a small ice cream scoop can help with consistency.
- Don’t Overbake: These cookies are intended to be pale and delicate. Remove them from the oven as soon as the bottoms are a light gold. Overbaking will result in a dry, hard texture.
Planning Your Festive Menu
These beautiful snowball cookies provide a fantastic end to a festive meal. When we design our holiday menus, we aim to create a balance between rich main courses and light, enchanting desserts. Following a flavourful dish like our Sticky Chicken Rice Bowls with these delicate cookies makes for a wonderfully rounded and memorable dining experience to share with your loved ones.
FAQ
Conclusion: Your New Go-To Holiday Bake
And there you have it—our complete guide to making the most wonderful, buttery, and tender snowball cookies that truly deliver on their melt-in-your-mouth reputation. This timeless Cookies Recipe is so much more than a simple sweet; it’s an opportunity to create cherished memories, a delightful homemade gift, and a perfect way to spread a little joy throughout the festive season.
We are certain that after you’ve tried this recipe, it will earn a permanent place in your family’s holiday traditions. So, what are you waiting for? It’s time to put on your apron, preheat the oven, and bake some wonderful memories! We would be delighted to hear how you get on, so please feel free to leave a comment and a rating below to share your baking story with our community.
Meta Description
Create the most delightful festive treats with our Snowball Cookies Recipe Melt in Your Mouth! Follow our simple steps for buttery, nutty cookies that are incredibly tender. The perfect holiday bake for sharing and gifting.
Recipe Card
Ingredients
- 230g (1 cup) Unsalted Butter, softened to room temperature
- 60g (1/2 cup) Icing Sugar (for the dough)
- 1 tsp Vanilla Extract
- 1/2 tsp Almond Extract (optional)
- 240g (2 cups) Plain Flour
- 1/4 tsp Salt
- 120g (1 cup) Pecans or Walnuts, very finely chopped
- 120g (1 cup) Icing Sugar (for coating)
Instructions
- Prepare Ingredients: If using whole nuts, toast them in a dry pan for 3-5 minutes until aromatic, then let cool and chop very finely. In a separate bowl, whisk together the plain flour and salt.
- Cream Butter & Sugar: In a large bowl using an electric mixer, beat the softened butter for 2 minutes until light and creamy. Add the 60g of icing sugar, vanilla extract, and almond extract (if using). Beat for another 2-3 minutes until pale and fluffy.
- Combine Dough: Set the mixer to low speed and gradually add the flour mixture, mixing only until just combined. Use a spatula to fold in the finely chopped nuts.
- Chill the Dough: Shape the dough into a flat disc, wrap it tightly in cling film, and refrigerate for at least 1 hour, or up to 2 days. Do not skip this step.
- Shape & Bake: Preheat your oven to 180°C (160°C Fan / Gas Mark 4). Line two baking trays with parchment paper. Scoop tablespoon-sized portions of the chilled dough and roll them into 1-inch balls. Place them on the prepared trays, leaving about 2 inches of space between them.
- Bake Cookies: Bake for 12-15 minutes. The cookies are done when the bottoms are light golden-brown, but the tops remain pale.
- First Dusting: Let the cookies cool on the baking tray for 5 minutes. While they are still warm, gently roll each one in a bowl containing the 120g of icing sugar for coating. Place them on a wire rack to cool completely.
- Second Dusting: Once the cookies have cooled to room temperature, roll them in the icing sugar once more for a thick, generous, and perfectly snowy finish.


