Salted Honey Pie: A Perfect Blend of Sweet and Salty
Are you on the hunt for a pudding that offers more than just straightforward sweetness, something with a depth of character that’s both fascinating and utterly delicious? A bake that expertly walks the line between sugary indulgence and a satisfying savoury note? If that sounds like you, then allow us to introduce you to your next great love. We’re talking about the magnificent salted honey pie: a perfect blend of sweet and salty that has captured the hearts of bakers everywhere. This is a dessert that truly surprises, marrying a decadent, wobbly, honey-custard filling with a crisp, buttery pastry and a wonderfully sharp burst of sea salt. Set aside any preconceptions about custard tarts; this is an experience all its own.
Within this guide, we will share everything required to recreate this stunning dessert in your own kitchen. We are providing our own meticulously tested recipe, our best advice for a perfect result, and clear answers to any questions you might have. Prepare yourself to be completely smitten with your new favourite treat.
What Makes This Honey Pie Recipe So Special?
At its core, this may be a custard pie, but it’s quite unlike any you have tried before. The true enchantment comes from the elegant simplicity of the ingredients and the remarkable complexity of the final taste. Here is what makes it such a standout bake:
- The Flavour Profile: Naturally, the honey is the true hero of this pie. It lends a profound, floral sweetness that is a world apart from standard caster sugar. This is then exquisitely counteracted by a good pinch of flaky sea salt, which masterfully cuts through the richness and amplifies every other flavour. The outcome is a taste that is at once comforting and wonderfully refined.
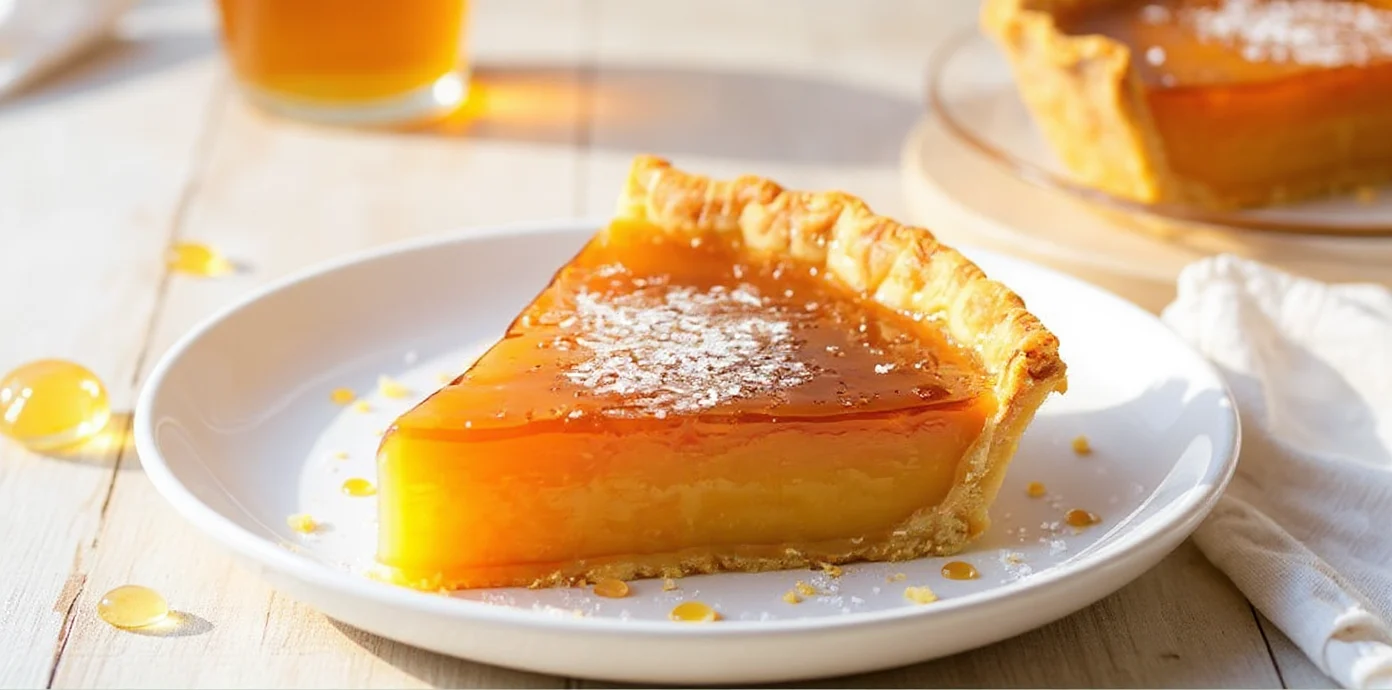
- The Texture Journey: A sublime salted honey pie is a true study in contrasting textures. It all begins with a buttery, flaky pie crust that yields with a satisfying crumble. This then reveals a silky, smooth, and delicately wobbly custard that simply melts on the tongue. During baking, the top develops a slightly chewy, caramelised quality, introducing another superb layer to the overall experience.
- The “Wobble”: The hallmark of a perfectly baked honey pie is its characteristic wobble. When you retrieve it from the oven, the very centre should still have a gentle quiver. As it rests and cools, it settles into the most divine, luscious consistency—rich yet never heavy.
The Essential Ingredients for the Perfect Salted Honey Pie
Exceptional baking always begins with high-quality ingredients. Although this recipe calls for common pantry items, their quality will significantly influence the final outcome. We have detailed everything you will need for both the pastry and that heavenly filling.
For the All-Butter Flaky Pie Crust
- 200g plain flour, plus extra for dusting
- 1/2 tsp fine sea salt
- 140g cold unsalted butter, cubed
- 60-80ml ice-cold water
- 1 tbsp apple cider vinegar (our secret for a tender crust!)
For the Silky Salted Honey Filling
- 170g unsalted butter, melted
- 200g caster sugar
- 250g good-quality runny honey
- 1 tsp vanilla extract
- 4 large free-range eggs
- 60ml double cream
- 2 tbsp cornflour
- 1 tsp flaky sea salt (like Maldon), plus extra for sprinkling
A Note on Your Honey and Salt
The character of your pie is significantly shaped by the honey you select. A light wildflower or orange blossom honey will impart a gentle, floral flavour. For something with a more powerful and intricate taste, you migh experiment with a darker variety such as heather or chestnut honey. We suggest using a high-quality runny honey to achieve the best consistency. Regarding the salt, it must be flaky sea salt. Its large crystals provide a superior flavour and add a lovely, subtle crunch when scattered over the top.
How to Make Our Irresistible Salted Honey Pie: Step-by-Step
Right then, shall we get baking? We have organised the method into clear, straightforward stages. Please don’t feel daunted by making your own pastry; our technique is very reliable and produces wonderful results every time. Just as careful measurements are crucial in our Blueberry Heaven Cookies The Definitive Recipe For Soft Chewy Perfection, they are essential for getting the perfect set on this custard pie.
Step 1: Prepare the Flaky Pie Crust
- In a spacious bowl, whisk the flour and salt together. Tip in the cold, cubed butter.
- Using your fingertips or a pastry blender, work the butter into the flour until you have a texture like coarse breadcrumbs, with some larger, pea-sized lumps of butter still visible. It is these pockets of butter that create the flaky layers.
- In a small jug, combine the apple cider vinegar with 60ml of ice-cold water. Drizzle this liquid into the flour mixture bit by bit, using a fork to toss everything together until a shaggy dough begins to form. If it appears too dry, add another tablespoon or two of water, but take care not to make it sodden.
- On a lightly floured work surface, gently knead the dough just once or twice to form a cohesive disc. Encase it in cling film and allow it to rest in the fridge for a minimum of one hour.
- Once properly chilled, roll the dough out on your floured surface into a circle approximately 3mm thick. Gently ease it into a 23cm (9-inch) pie dish, trimming off the excess. Crimp the rim for a decorative finish. Prick the bottom with a fork, then pop it into the freezer for 15 minutes to firm up.
- Preheat your oven to 200°C (180°C Fan/Gas Mark 6). Line the chilled pastry case with baking parchment and weigh it down with baking beans or uncooked rice. Bake for 15-20 minutes.
- Gently lift out the parchment and beans, then pop the crust back in the oven for a further 5-7 minutes, or until the base is a light golden brown. This step, known as ‘blind baking’, is vital for preventing a soggy bottom. Set it aside to cool a little as you prepare the filling.
Step 2: Create the Luscious Honey Filling
- First, lower your oven temperature to 175°C (155°C Fan/Gas Mark 4).
- In a large mixing bowl, whisk the melted butter and caster sugar together until they are thoroughly combined.
- Next, whisk in the honey and vanilla extract. The mixture should appear wonderfully thick and glossy.
- Add the eggs, one by one, ensuring you whisk well after each addition until it is completely incorporated.
- Pour in the double cream, cornflour, and the teaspoon of flaky sea salt. Whisk vigorously until the filling is perfectly smooth, with no lumps of cornflour remaining.
- Carefully pour this glorious golden filling into your pre-baked pie crust.
Step 3: Bake to Perfection
- Gently transfer the pie onto a baking tray (this will catch any drips) and bake for 45-55 minutes.
- The pie is done when its edges are set and slightly puffed, while the centre maintains a distinct wobble (similar to a set jelly). It will continue to firm up as it cools. The surface should have turned a deep, burnished amber colour.
- Allow the pie to cool entirely on a wire rack for at least 3-4 hours. This stage is absolutely vital for the filling to set correctly. A little patience goes a long way!
- Right before you are ready to serve, scatter over a generous amount of extra flaky sea salt.
Top Tips for Pie Perfection
Are you hoping to make your salted honey pie an absolute triumph? We have compiled our most valuable tips to guide you towards success.
- Keep Everything Cold: To achieve the flakiest possible pastry, ensure your butter, water, and even your hands are kept as chilly as possible. This simple step prevents the butter from melting prematurely into the flour.
- Don’t Overwork the Dough: When you are making the crust, it is best to handle the dough as minimally as you can. Overworking it develops the gluten, which results in a tough pastry rather than a beautifully tender and flaky one.
- Protect Your Crust: If you find that the edges of your pie crust are catching and browning too quickly, you can shield them with a collar made of aluminium foil for the final 15-20 minutes of baking.
- Trust the Wobble: It can feel counterintuitive to take a wobbly pie out of the oven, but resist the urge to overbake it. A pie baked until completely firm will have a dry, overcooked custard. You must embrace the wobble; the residual heat will gently finish cooking the centre as it cools.
Let’s Talk Honey: Choosing the Best for Your Pie
Your choice of honey is what will elevate this bake from a simple custard pie recipe into something truly extraordinary. Different honeys possess the unique floral characteristics of the regions they originate from. To delve deeper into the amazing variety of honey produced here in the UK, we highly recommend paying a visit to the British Beekeepers Association website. It provides a treasure trove of information about how honey is produced and the different varieties available, helping you pick the ideal one for your future baking projects.
Storing and Serving Your Salted Honey Pie
This pie is at its most sublime when enjoyed at room temperature on the day of baking, as this is when its textures are at their absolute best. You can keep any leftovers in an airtight container in the fridge for up to 3 days. We suggest allowing it to return to room temperature for around 30 minutes before serving to enjoy its full flavour and texture.
We adore serving a slice all by itself, allowing its complex flavours to take centre stage. However, it is also heavenly with a spoonful of unsweetened whipped cream or a scoop of vanilla bean ice cream to provide a cool contrast to its richness.
Frequently Asked Questions (FAQ)
Can I use a shop-bought pie crust?
Of course! While we are very fond of our homemade all-butter crust, a high-quality, ready-made shortcrust pastry is a perfectly good substitute if you are pressed for time. Simply remember to blind-bake it as directed on the packaging before pouring in the filling.
Why did my pie filling split or look curdled?
This can sometimes occur if the pie has been baked for too long or at too high a temperature, which essentially causes the eggs in the custard to scramble. To avoid this, be sure to bake the pie at the lower temperature suggested and remove it from the oven as soon as the centre has that signature wobble.
Can I make this pie ahead of time?
You can certainly get a head start. The pie dough can be prepared up to two days in advance and kept well-wrapped in the fridge. You could also blind-bake the crust the day before. For the very best texture, however, we do recommend baking the filled pie on the day you wish to serve it.
A Sweet and Salty Masterpiece Awaits
And there you have it—our complete guide to creating the most sensational salted honey pie. It is a pudding that strikes a perfect chord between sophisticated flavour and comforting, familiar warmth. It stands as proof that the most unforgettable dishes can be crafted from the simplest ingredients, combined with a little care and a great deal of affection.
We genuinely feel this is a recipe that belongs in every home baker’s collection. If you enjoy unique and delightful desserts such as this, we are certain you will also adore our light and ethereal Cloud Cake Recipe. Now, the kitchen is yours! We encourage you to try this best salted honey pie recipe and experience the magic firsthand. We would be thrilled to see how yours turns out, so please do share your results with us in the comments or on social media!


