Ruths Chris Stuffed Chicken
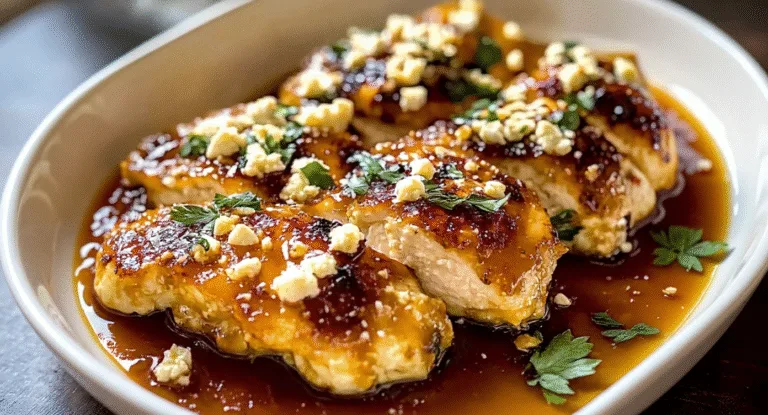
There are some restaurant meals that just stick with you. For me, the stuffed chicken at Ruth’s Chris Steak House is one of them. It’s that perfect balance of a tender, juicy chicken breast and an outrageously creamy, cheesy filling that spills out when you slice into it. It feels special, luxurious, and utterly decadent. After one particularly memorable anniversary dinner there, I was determined to bring that little piece of magic into my own kitchen. This recipe is the result of that determination, a lovingly crafted homage to the original.
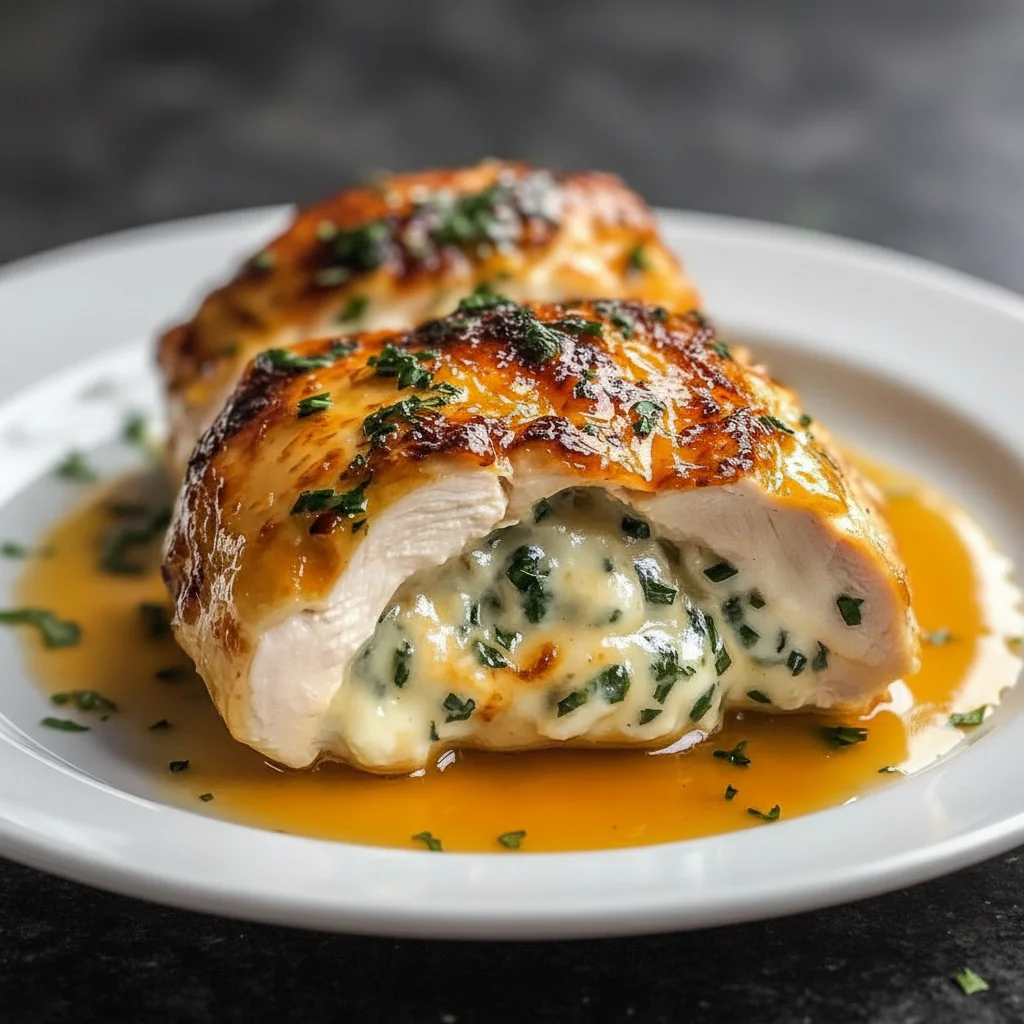
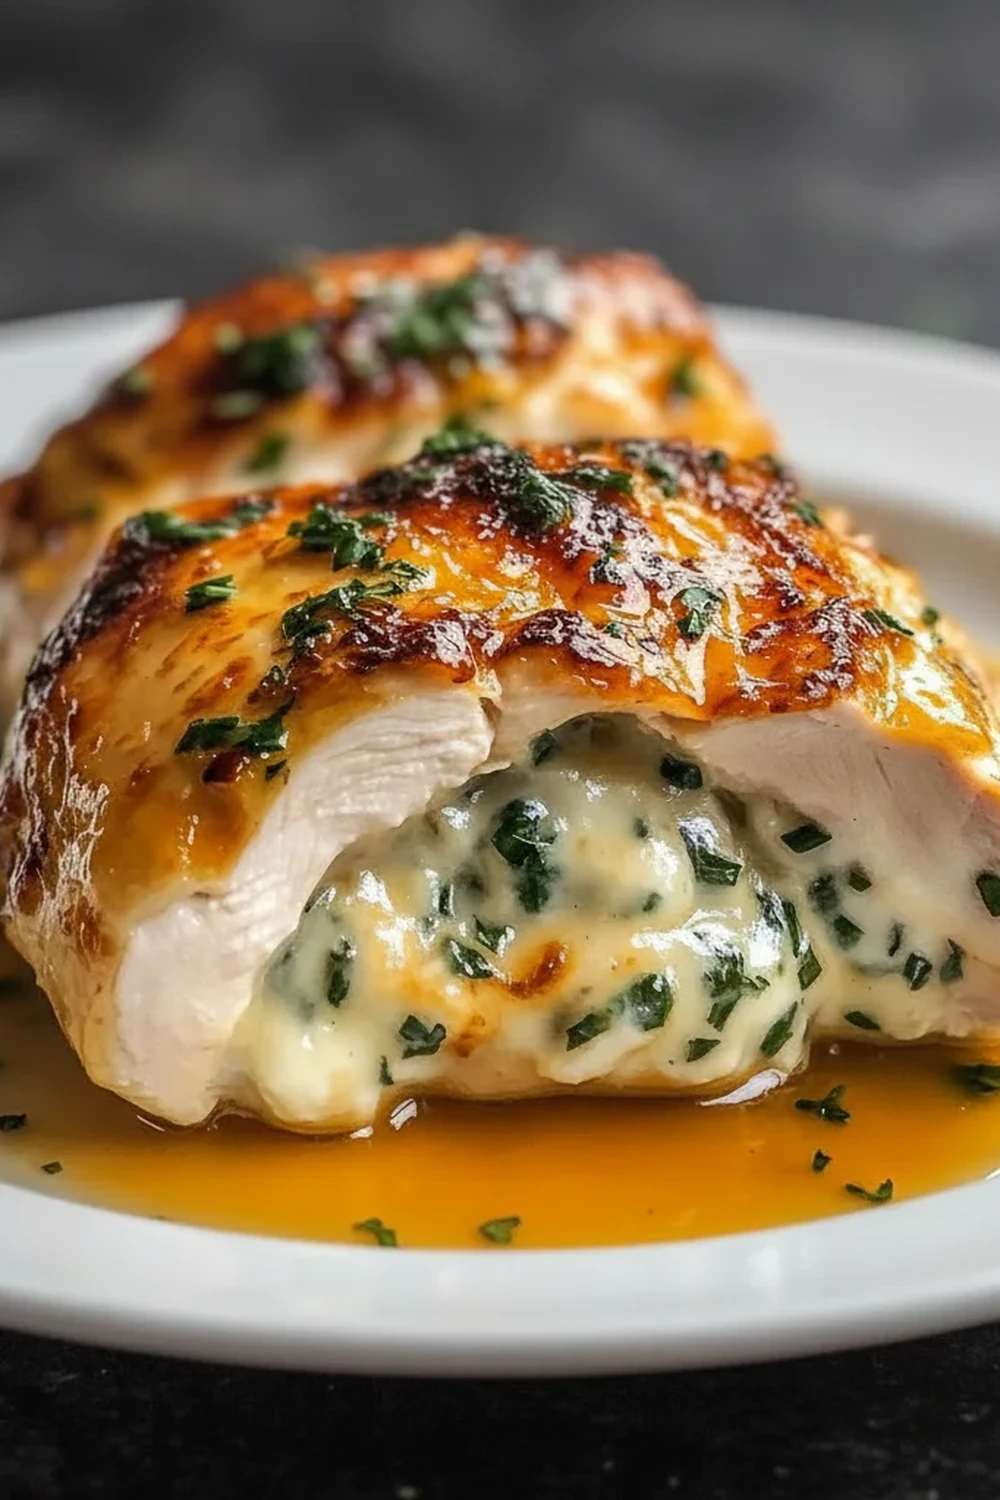
What we’re creating here is more than just a chicken dinner; it’s an experience. The chicken is pan-seared to a beautiful golden-brown before being baked, ensuring the outside has a lovely texture while the inside remains moist. The filling is a rich blend of three cheeses, wilted spinach, and a hint of garlic, which gets gloriously melty in the oven. To finish, we make a simple, elegant pan sauce with the fond (those delicious brown bits) left in the skillet. It elevates the entire dish from simply great to truly unforgettable.
This is the meal I turn to for a special ‘date night in’ or a celebratory family dinner. It has the feel of fine dining but comes together with straightforward steps in your own kitchen. Everyone who tries it asks for the recipe, and it always gets wonderful compliments. It’s a fantastic main course when you want to impress without spending hours over the hob. If you enjoy rich and flavourful chicken dishes, you might also like my Garlic Parmesan Chicken Pasta Recipe.
Recipe Overview
This Ruths Chris Stuffed Chicken copycat recipe delivers a tender chicken breast filled with a luscious spinach and three-cheese mixture, all finished with a simple, flavourful pan sauce. The key is searing the chicken first to lock in the juices and create a fantastic crust. After testing this recipe five times, I finally got the balance of cheeses and the cooking method just right to prevent the filling from leaking out while keeping the chicken perfectly cooked.
- Prep Time: 20 minutes
- Cook Time: 25-30 minutes
- Total Time: 45-50 minutes
- Servings: 4 people
- Difficulty: Medium
Why You’ll Love This Ruths Chris Stuffed Chicken
- Genuine Steakhouse Flavour: We’re not cutting corners. The combination of cream cheese, sharp cheddar, and nutty Parmesan creates a filling that is deeply savoury and satisfyingly rich, mimicking the beloved restaurant original.
- Ready in Under an Hour: From prepping the filling to pulling the golden chicken from the oven, the whole process comes together in about 50 minutes, making it achievable for a weeknight special.
- A Flexible Recipe: You can easily adapt the filling to your taste. Try adding finely chopped sun-dried tomatoes or sautéed mushrooms for a different twist. Some readers have even swapped the cheddar for Gruyère with brilliant results.
- Ideal for Special Occasions: This dish works beautifully for an anniversary dinner, a birthday celebration, or when hosting friends. It has an elegance that makes any meal feel a bit more grand.
- Family Tested and Approved: My husband, who is my toughest critic, said this was better than the restaurant version! It’s a recipe that feels indulgent and always makes our family dinner feel like a treat.
Ingredients You’ll Need
For this recipe, using good quality, full-fat cheeses makes all the difference to the texture and flavour of the filling. I always opt for a block of sharp cheddar and grate it myself, as pre-shredded cheese often contains anti-caking agents that can make the filling a bit grainy. The same goes for the Parmesan – a freshly grated wedge is best.
- 4 large boneless, skinless chicken breasts (about 200-225g each)
- 1 tbsp olive oil
- 2 tbsp unsalted butter, divided
- 1 clove garlic, minced
- 150g fresh spinach
- 120g full-fat cream cheese, softened
- 50g sharp cheddar cheese, freshly grated
- 30g Parmesan cheese, freshly grated
- 1/4 tsp salt, plus more for seasoning the chicken
- 1/4 tsp black pepper, freshly ground, plus more for seasoning
- 1/4 tsp onion powder
- 60ml dry white wine (like Sauvignon Blanc or Pinot Grigio)
- 120ml chicken stock
- 1 tbsp fresh parsley, finely chopped (for garnish)
Sara’s Tip: Ensure your cream cheese is properly softened to room temperature. This helps it combine smoothly with the other cheeses and spinach, preventing any lumps in your filling. I usually take it out of the fridge about an hour before I start cooking.
How to Make Ruths Chris Stuffed Chicken
The process is straightforward. We’ll prepare the filling, stuff the chicken, then give it a beautiful sear on the hob before finishing it in the oven. This two-stage cooking method is the secret to a juicy interior and a perfectly golden exterior.
- Prepare the Oven and Chicken: Preheat your oven to 200°C (180°C fan). Pat the chicken breasts completely dry with a paper towel. This is crucial for getting a good sear. Using a sharp knife, carefully slice a deep pocket into the thickest side of each chicken breast, being careful not to cut all the way through. Season the inside and outside of each breast generously with salt and pepper.
- Make the Cheese & Spinach Filling: In a medium-sized, oven-safe skillet, melt 1 tablespoon of butter over medium heat. Add the minced garlic and cook for about 30 seconds until fragrant. Add the fresh spinach in batches, stirring until it has completely wilted down. Squeeze out as much excess water from the spinach as possible and chop it finely.
- Combine the Filling Ingredients: In a bowl, mix the softened cream cheese, grated cheddar, grated Parmesan, chopped spinach, 1/4 tsp salt, 1/4 tsp pepper, and the onion powder. Stir until everything is well combined.
- Stuff the Chicken: Carefully divide the cheese mixture among the four chicken breasts, spooning it into the pockets you created. Don’t overfill them, as the cheese will expand and ooze out during cooking. I find that using a few toothpicks to seal the opening works wonders to keep most of the delicious filling inside.
- Sear the Chicken: Return your oven-safe skillet to a medium-high heat. Add the olive oil and the remaining tablespoon of butter. Once the butter is melted and sizzling, carefully place the stuffed chicken breasts in the pan. Sear for 3-4 minutes per side, until they are a deep golden brown.
- Bake to Perfection: Transfer the entire skillet to the preheated oven. Bake for 15-20 minutes, or until the chicken is cooked through. The most reliable way to check is with a meat thermometer; it should read 74°C at the thickest part of the chicken. For more detailed information on cooking chicken safely, you can consult the Food Standards Agency guidelines.
- Create the Pan Sauce: Remove the chicken from the skillet and let it rest on a cutting board. Place the skillet back on the hob over medium heat. Pour in the white wine to deglaze the pan, scraping up all the tasty browned bits from the bottom. Let it bubble and reduce by about half, which takes 1-2 minutes.
- Finish the Sauce and Serve: Pour in the chicken stock and let it simmer for another 2-3 minutes until the sauce has thickened slightly. Remove from the heat. Slice the chicken and serve immediately with the warm pan sauce drizzled over the top and a sprinkle of fresh parsley.
Tips From My Kitchen
- Temperature Control is Key: The single best way to avoid dry chicken is to use an instant-read digital thermometer. Chicken is perfectly cooked and juicy at an internal temperature of 74°C (165°F). Check the thickest part of the breast, avoiding the filling.
- The Secret Step for Flavour: Don’t skip searing the chicken before baking! I learned that this step not only creates a beautiful, crisp crust but also develops a deep, savoury base of flavour (the ‘fond’) in the pan, which is essential for making a truly delicious pan sauce.
- Make-Ahead Advice: You can prepare the cheese and spinach filling up to 24 hours in advance and keep it covered in the fridge. You can also stuff the chicken breasts in the morning, cover them, and refrigerate until you’re ready to cook that evening.
- Storing Leftovers: Any leftover stuffed chicken can be stored in an airtight container in the refrigerator for up to 3 days. Reheat gently in the oven at 160°C (140°C fan) or in the microwave until warmed through to prevent it from drying out.
Delicious Variations to Try
While this copycat recipe is fantastic as it is, it’s also a great base for your own creative touches. Here are a few ideas we’ve enjoyed:
- A Bit of Spice: Add 1/4 teaspoon of red pepper flakes to the cheese mixture for a gentle, warming heat that cuts through the richness of the cheese.
- Mushroom and Herb: Finely chop 100g of chestnut mushrooms and sauté them with the garlic and spinach. Add a teaspoon of fresh thyme leaves to the filling for an earthy, aromatic twist.
- Try it with Pork: This cheese filling works beautifully with thick-cut pork chops. Use the same method of creating a pocket, stuffing, and searing before baking. You may need to adjust the baking time slightly. If you like flavourful chicken, check out my Black Pepper Chicken.
What to Serve With Ruths Chris Stuffed Chicken
To complete your steakhouse-at-home experience, I recommend serving this chicken with sides that complement its richness without overpowering it.
- Creamy Mashed Potatoes: The ultimate pairing. The smooth, buttery mash is perfect for soaking up that incredible pan sauce.
- Steamed Asparagus or Green Beans: A simple, fresh green vegetable provides a lovely contrast in texture and colour. Try my simple Chicken Breast And Green Beans recipe as a guide for the side.
- Wine Pairing: A crisp, dry white wine like a Sauvignon Blanc or an unoaked Chardonnay cuts through the richness of the cheese beautifully. For red wine lovers, a light-bodied Pinot Noir would also work well.
Frequently Asked Questions
I truly hope you adore making this Ruths Chris Stuffed Chicken as much as my family and I enjoy eating it. It’s a recipe that brings a sense of occasion to the dinner table and proves you can create something truly special at home. If you try it, I would love to hear how it went for you – please leave a comment below and let me know! Happy cooking!
Ruths Chris Stuffed Chicken
Ingredients
Method
- Prepare the Oven and Chicken: Preheat your oven to 200°C (180°C fan). Pat the chicken breasts completely dry with a paper towel. This is crucial for getting a good sear. Using a sharp knife, carefully slice a deep pocket into the thickest side of each chicken breast, being careful not to cut all the way through. Season the inside and outside of each breast generously with salt and pepper.
- Make the Cheese & Spinach Filling: In a medium-sized, oven-safe skillet, melt 1 tablespoon of butter over medium heat. Add the minced garlic and cook for about 30 seconds until fragrant. Add the fresh spinach in batches, stirring until it has completely wilted down. Squeeze out as much excess water from the spinach as possible and chop it finely.
- Combine the Filling Ingredients: In a bowl, mix the softened cream cheese, grated cheddar, grated Parmesan, chopped spinach, 1/4 tsp salt, 1/4 tsp pepper, and the onion powder. Stir until everything is well combined.
- Stuff the Chicken: Carefully divide the cheese mixture among the four chicken breasts, spooning it into the pockets you created. Don't overfill them, as the cheese will expand and ooze out during cooking. I find that using a few toothpicks to seal the opening works wonders to keep most of the delicious filling inside.
- Sear the Chicken: Return your oven-safe skillet to a medium-high heat. Add the olive oil and the remaining tablespoon of butter. Once the butter is melted and sizzling, carefully place the stuffed chicken breasts in the pan. Sear for 3-4 minutes per side, until they are a deep golden brown.
- Bake to Perfection: Transfer the entire skillet to the preheated oven. Bake for 15-20 minutes, or until the chicken is cooked through. The most reliable way to check is with a meat thermometer; it should read 74°C at the thickest part of the chicken. For more detailed information on cooking chicken safely, you can consult the Food Standards Agency guidelines.
- Create the Pan Sauce: Remove the chicken from the skillet and let it rest on a cutting board. Place the skillet back on the hob over medium heat. Pour in the white wine to deglaze the pan, scraping up all the tasty browned bits from the bottom. Let it bubble and reduce by about half, which takes 1-2 minutes.
- Finish the Sauce and Serve: Pour in the chicken stock and let it simmer for another 2-3 minutes until the sauce has thickened slightly. Remove from the heat. Slice the chicken and serve immediately with the warm pan sauce drizzled over the top and a sprinkle of fresh parsley.
Notes
– Sara Gomez