The Ultimate Rhubarb Jam Recipe: Sweet, Tangy, and So Easy!
Have you ever wondered how to capture that wonderfully sharp, tangy flavour of fresh spring rhubarb and enjoy it all year round? Perhaps you’ve dreamt of spreading a spoonful of vibrant, jewel-toned jam on your morning toast, knowing you made it yourself? Well, you’re in the right place! We believe that making delicious, homemade rhubarb jam is not only incredibly rewarding but also surprisingly simple. With just a few ingredients and a bit of patience, you can create a truly special preserve that will brighten up your breakfasts and desserts.
Why We Love This Rhubarb Jam Recipe
There’s something truly satisfying about making your own preserves. The aroma that fills your kitchen as the rhubarb simmers and transforms is simply divine. This particular recipe is a favourite of ours because it perfectly balances the natural tartness of rhubarb with just the right amount of sweetness, creating a jam that is both refreshing and comforting. It’s an easy rhubarb jam that doesn’t require any special pectin if you get the consistency right, relying on the fruit and sugar to work their magic. We’ve honed this recipe to ensure success, even if you’re new to jam making.
Understanding Rhubarb: The Star of Our Jam
Before we dive into the recipe, let’s talk a little about rhubarb. Often mistaken for a fruit, Rhubarb is technically a vegetable, recognised for its long, celery-like stalks and tart flavour, though it’s commonly used in sweet dishes like pies and jams., fleshy, crimson stalks (petioles). The leaves are toxic because they contain high levels of oxalic acid, which can be harmful if ingested. so always discard them and only use the stalks. When cooked, rhubarb breaks down beautifully, releasing its unique tangy flavour that pairs wonderfully with sugar. For our jam, we recommend using fresh, firm stalks – the redder the stalk, the more vibrant the colour of your finished jam, though green-stemmed varieties are just as flavourful.
Ingredients for Your Delicious Rhubarb Jam
Gathering your ingredients is the first step to a successful jam-making session. We’ve kept it simple:
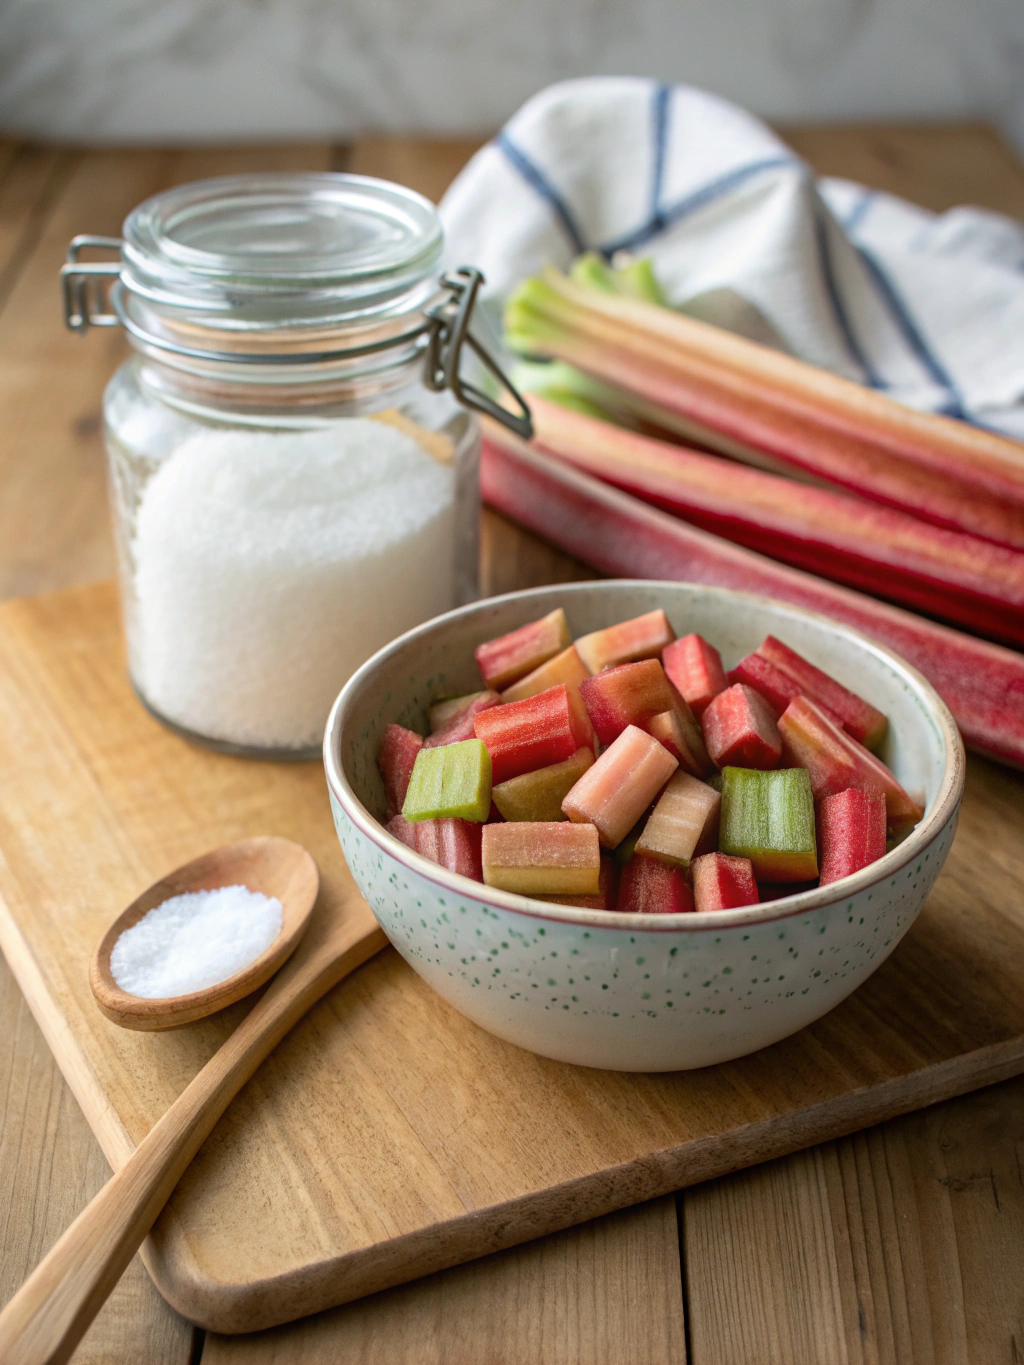
- 1 kg fresh rhubarb stalks, washed and trimmed
- 700g granulated sugar (you can adjust this slightly to your taste, see notes)
- Juice of 1 large lemon (about 50-60ml)
- Optional: 1 vanilla pod, split and scraped, or 1 tsp vanilla extract
- Optional: Small knob of butter (about 1/2 tsp) – to reduce foaming
Here’s what your key ingredients will look like:
A note on sugar: Sugar is crucial in jam making not just for sweetness, but also as a preservative and for helping the jam to set. While 700g per 1kg of fruit is a good starting point for rhubarb, if you prefer a tarter jam, you could reduce it slightly to 650g. However, reducing it too much can affect the set and shelf life.
Essential Equipment
You don’t need lots of fancy kit, but a few key items will make the process smoother:
- Large, heavy-bottomed saucepan or preserving pan (stainless steel or enamel, avoid aluminium or copper unless specifically designed for jam, as they can react with the fruit)
- Wooden spoon or heatproof spatula
- Measuring jug and weighing scales
- Jam thermometer (highly recommended for accuracy, but we’ll include a wrinkle test method too)
- Several small, sterilised jam jars with lids (about 4-5 x 250ml jars)
- Small plate, chilled in the freezer (for testing the set)
- Ladle or pouring jug
- Jam funnel (optional, but very helpful for mess-free filling)
Step-by-Step Guide to Making Your Rhubarb Jam
Let’s get started on creating your wonderful rhubarb preserve!
- Prepare the Rhubarb: Wash your rhubarb stalks thoroughly. Trim off any tough ends or blemishes. Chop the rhubarb into small pieces, about 1-2 cm (1/2 to 1 inch). The smaller the pieces, the quicker they will break down.
- Macerate the Rhubarb (Optional but Recommended): In your large saucepan, combine the chopped rhubarb and the granulated sugar. Stir well to ensure all the rhubarb is coated in sugar. Cover the pan and leave it to sit at room temperature for at least 2 hours, or even better, overnight in the fridge. This process, called maceration, draws out the rhubarb’s juices, helps the sugar dissolve, and can result in a jam with a more vibrant colour and tender fruit pieces.
- Add Lemon Juice (and Vanilla if using): If you macerated the rhubarb, you’ll see a lovely syrup has formed. Place the saucepan over a low heat. Add the lemon juice. If you’re using a vanilla pod, split it, scrape out the seeds, and add both the pod and seeds to the pan. Stir gently until all the sugar has completely dissolved. You can check this by lifting the spoon; if you see any sugar crystals, continue stirring over low heat. It’s important the sugar is fully dissolved before you increase the heat, to prevent a grainy jam.
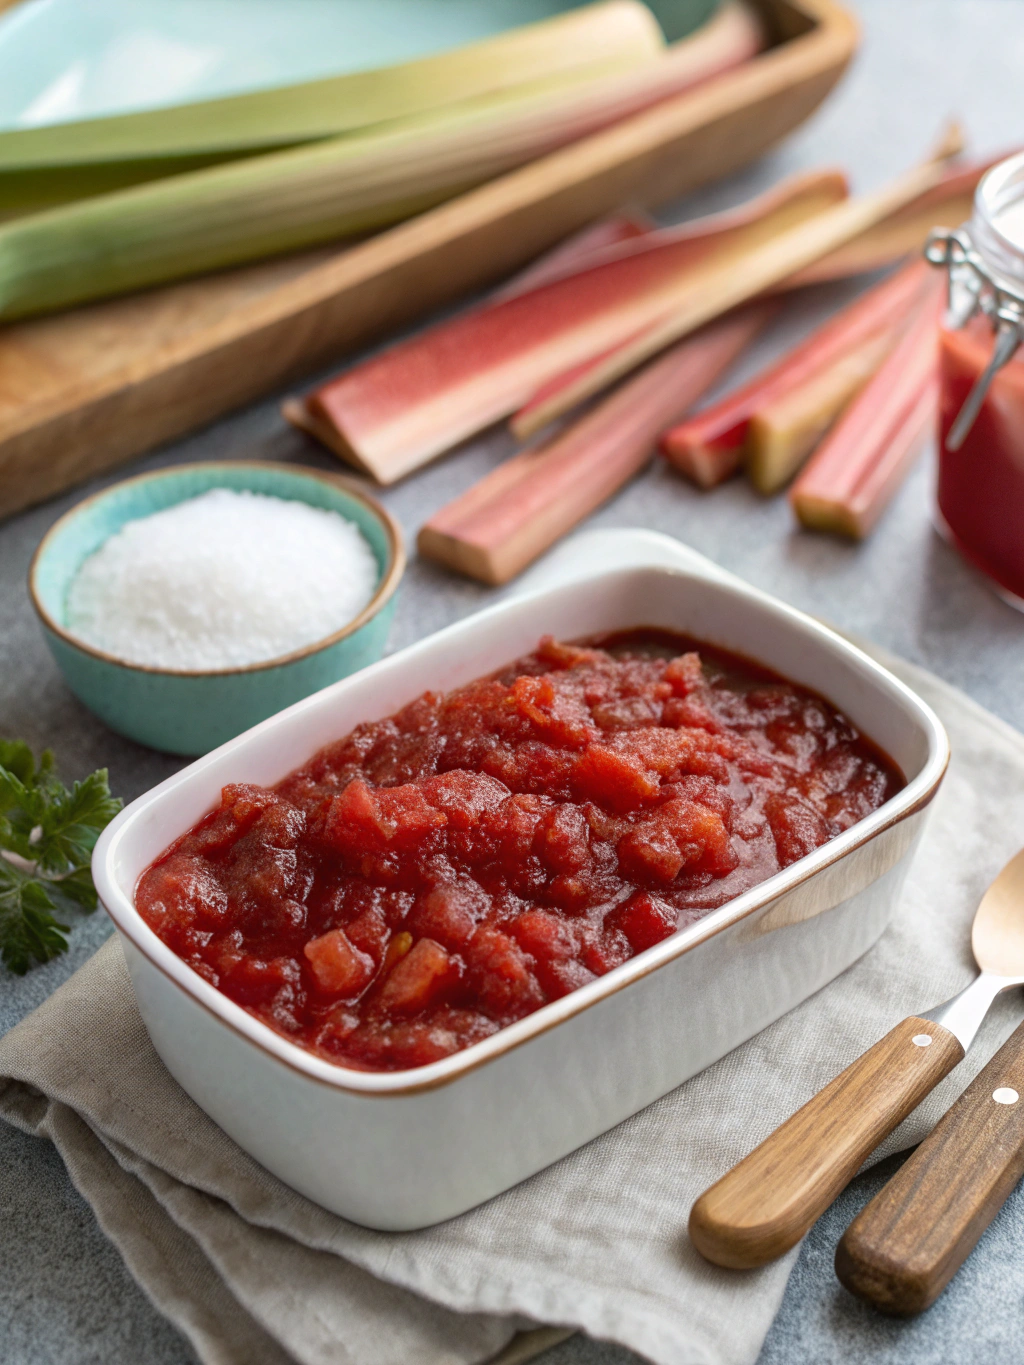
- Cook the Jam: Once the sugar is dissolved,Turn up the heat to medium and bring the mixture to a vigorous, rolling boil. – that’s a boil that continues to bubble even when you stir it. Stir frequently…to keep the jam from sticking into the bottom of the pan and burning. If you’re using a vanilla pod, you can remove it about halfway through the cooking process if you wish, or leave it in for a stronger flavour and remove it before jarring.
- Reach the Setting Point: This is the crucial part! The jam needs to reach 105°C (221°F) on a jam thermometer to set properly. This usually takes around 15-25 minutes of rolling boiling, but can vary depending on your rhubarb, pan, and hob. Stir occasionally to prevent sticking.
- Wrinkle Test (without a thermometer): A few minutes before the jam appears ready, take a chilled plate from the freezer. Place a spoonful of jam onto the plate & return it to the freezer for 1 minute. Then, gently push the jam with your finger—if it wrinkles, the jam has set. If it stays runny, cook for a few more minutes and repeat the test.
- Skim off Scum (Optional): During boiling, some scum or foam may form on the surface. You can skim this off with a slotted spoon for a clearer jam. Alternatively, once the jam has reached setting point and you’ve removed it from the heat, stir in the small knob of butter (if using) – this helps to dissolve most of the foam. Let the jam sit for 10-15 minutes off the heat before jarring; this helps the fruit pieces distribute evenly and reduces further foam.
- Jar the Jam: ladle or pour the hot jam into the warm, sterilised jars, leaving about 1cm (1/2 inch) headspace at the top. A jam funnel makes this much neater.Use a clean, damp cloth to wipe away any spills from the rims of the jars before sealing.
- Seal the Jars: Seal the jars immediately with sterilised lids. If using two-part lids, screw the bands on until fingertip tight. As the jam cools, you should hear the satisfying ‘pop’ of the lids sealing.
- Cool and Store: Let the jars cool completely at room temperature without moving them. Once cooled, check the seals—the lids should be slightly concave and shouldn’t move when pressed. Label each jar with the contents and date, then store them in a cool, dark location.
Watch: How to Make Easy Rhubarb Jam
Sometimes, seeing is believing! Here’s a helpful video that walks you through a similar process for making rhubarb jam. It’s great for visual learners and offers some extra tips:
Tips for the Best Rhubarb Jam Success
- Sterilise Jars Properly: This is vital for preventing mould and ensuring your jam lasts. We wash jars and lids in hot soapy water, rinse well, then place them (jars upright, lids separate) on a baking tray in a preheated oven at 140°C (275°F/Gas Mark 1) for at least 20 minutes. Keep them warm until you’re ready to fill them.
- Don’t Rush the Sugar Dissolving: Ensure all sugar crystals are melted before boiling to avoid a grainy texture.
- Use a Wide Pan: A wider pan provides a larger surface area, which helps the water evaporate more quickly and speeds up the setting process.
- Patience with the Set: Don’t be tempted to over-boil if you’re unsure. Use the wrinkle test or thermometer. Over-cooked jam can be too thick or taste burnt.
- Avoid Doubling Large Batches: If you want to make more jam, it’s generally better to make two separate batches rather than doubling a large recipe in one go. Very large quantities can take much longer to reach setting point and may not set as well.
Flavour Variations to Try
While classic rhubarb jam is delicious on its own, here are a few ideas to spice things up:
- Ginger Rhubarb Jam: Add 1-2 tablespoons of finely chopped crystallised ginger or 1-2 teaspoons of ground ginger along with the rhubarb and sugar.
- Strawberry Rhubarb Jam: Replace up to half the rhubarb with hulled and halved strawberries. This is a classic combination!
- Orange Rhubarb Jam: Add the zest of one orange along with the lemon juice for a citrusy twist.
- Cardamom Rhubarb Jam: Add the seeds from 3-4 crushed green cardamom pods for an aromatic, slightly exotic flavour.
Storage and Canning Rhubarb Jam
When stored in a cool, dark, and dry place, properly sealed and sterilised jars of rhubarb jam can last for at least a year, if not longer. After opening, keep the jam refrigerated and use it within 4 to 6 weeks.
If you’re new to canning or want to ensure long-term shelf stability with absolute certainty, especially if you’ve reduced sugar significantly or are using different jar types, you might consider water bath canning. This involves processing the filled and sealed jars in boiling water for a specific time. For comprehensive guidance on home canning, we always recommend consulting trusted resources like the National Center for Home Food Preservation.
Serving Suggestions for Your Homemade Rhubarb Jam
Now for the best part – enjoying your creation! Here are some of our favourite ways to use this delightful jam:
- Spread generously on warm toast, crumpets, or English muffins.
- Serve with freshly baked scones and clotted cream for a quintessential British treat.
- Swirl into plain yoghurt or porridge for a flavourful breakfast boost.
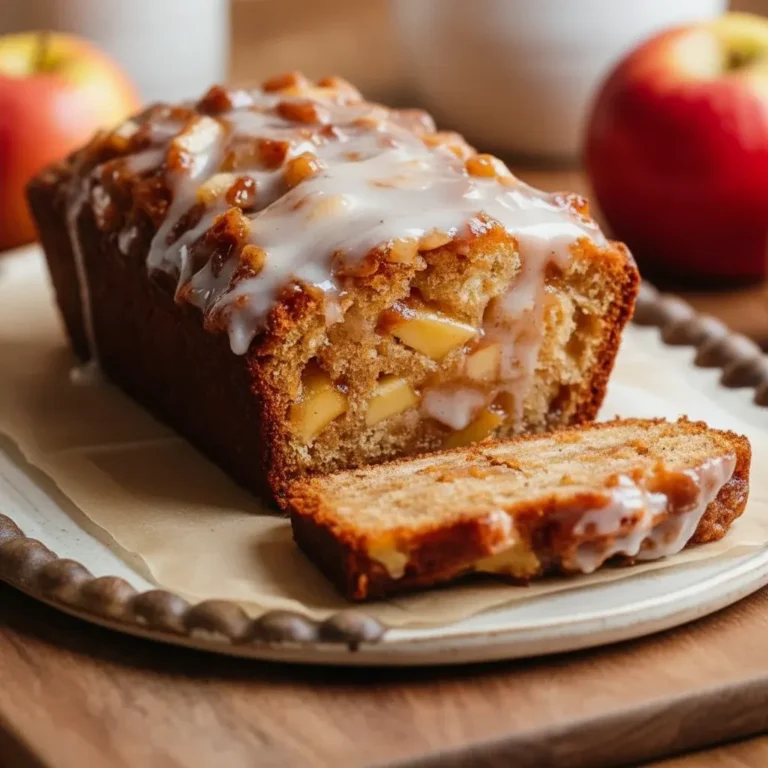
- Use as a filling for Victoria sponge cakes or other layered cakes. Imagine a dollop of this vibrant jam alongside a slice of our Applesauce Cake Recipe for a fruity delight!
- It can even be a wonderful accompaniment to a rich Sour Cream Pound Cake Recipe.
- Warm it slightly and use as a glaze for roast pork or chicken.
- Spoon over vanilla ice cream for a simple yet elegant dessert.
- Use as a base for tart fillings or in jam tarts.
Frequently Asked Questions (FAQ)
Can I use frozen rhubarb for this jam recipe?
Yes, you absolutely can! There’s no need to thaw it first; just add it to the pan with the sugar. It might release a bit more water, so your cooking time to reach the setting point could be slightly longer. Keep an eye on it and use a thermometer or the wrinkle test.
My rhubarb jam didn’t set. What can I do?
Don’t worry, this can sometimes happen. The most common reasons are not enough cooking time, too little sugar, or not enough natural pectin (though rhubarb usually has enough). You can try re-boiling the jam for another 5-10 minutes, testing for a set again. If it still doesn’t set, you can either use it as a delicious rhubarb sauce or compote, or you can add commercial pectin according to the package instructions (this usually involves adding the pectin and re-boiling).
How do I know if my jam jars have sealed properly?
Once the jars have cooled completely, the lid should be slightly concave (curved inwards). If you press the centre of the lid, it should not ‘pop’ or flex up and down. If a jar hasn’t sealed, store it in the fridge and use it within a few weeks.
Can I reduce the amount of sugar in this rhubarb jam recipe?
Sugar plays a vital role in jam setting and preservation. While you can slightly reduce the sugar (we suggest not going below 600-650g for 1kg of rhubarb), reducing it too much will affect the set and shorten its shelf life. If you want a much lower sugar version, look for specific low-sugar jam recipes that often use commercial pectin designed for low-sugar applications.
Why is my rhubarb jam very dark/brown?
This can happen if the jam is overcooked, if you used very dark brown sugar (which we don’t recommend for this recipe if you want a vibrant colour), or sometimes if you used an aluminium pan that reacted with the fruit. Using red-stalked rhubarb helps achieve a brighter red colour. Cooking for the correct amount of time until it just reaches the setting point is key.
How long does homemade rhubarb jam last?
If properly sterilised, sealed, and stored in a cool, dark place, your rhubarb jam should last for at least 12 months, often longer. Once opened, it should be kept in the refrigerator and used within 4-6 weeks.
Conclusion: Enjoy Your Homemade Rhubarb Delight!
We hope you’re now feeling inspired and confident to try our rhubarb jam recipe. There’s a special kind of joy in transforming simple ingredients into something so delicious and versatile. Whether you’re a seasoned jam-maker or a complete beginner, this recipe offers a straightforward path to a truly delightful homemade treat.
Imagine the satisfaction of opening a jar of your own vibrant rhubarb jam on a cold winter’s day, bringing a taste of spring to your table. So, roll up your sleeves, gather your rhubarb, and get ready to fill your kitchen with the wonderful aroma of simmering fruit and sugar.
We’d love to hear how your rhubarb jam turns out! Feel free to share your experiences, variations, or any questions you might have in the comments below. Happy jam making!