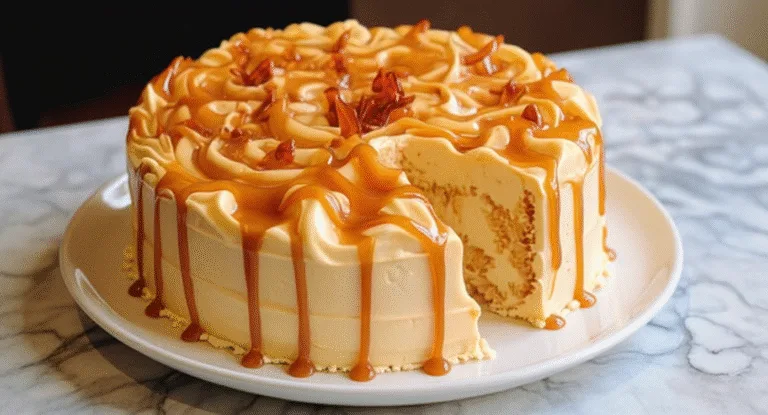
Red Velvet Oreo Cheesecake: A Truly Spectacular Treat
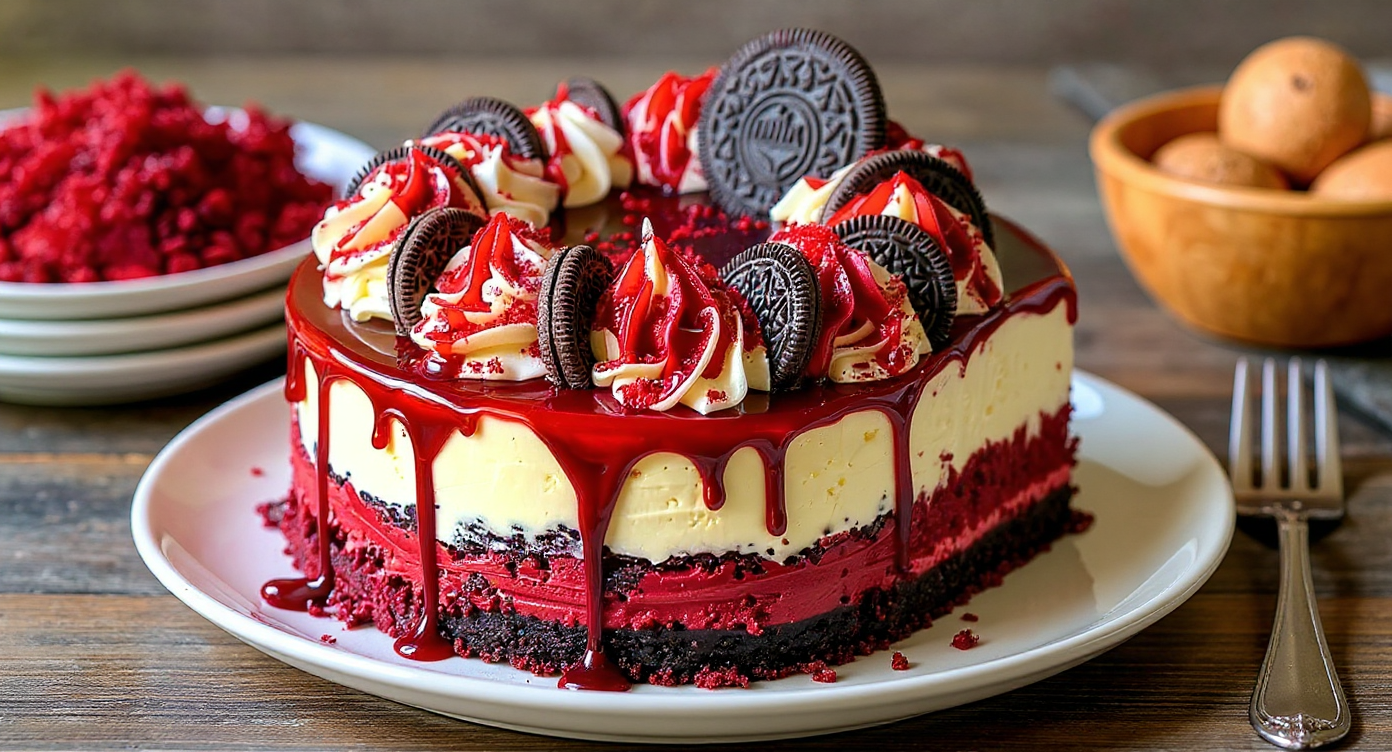
Have you ever imagined a single dessert that captures the tangy sophistication of red velvet cake, the luxurious creaminess of a classic cheesecake, and the beloved chocolatey crunch of Oreo biscuits? This may sound like a baker’s fantasy, but we are here to show you that it is not only entirely possible but also a genuine pleasure to create at home. We are, of course, referring to the red velvet Oreo cheesecake. This creation is more than just a dessert; it is a memorable event. It serves as the stunning centrepiece for a birthday, the perfect conclusion to a special dinner, or simply the most wonderful indulgence for a quiet night in. Come with us as we walk you through each stage of making this incredible masterpiece.
What Makes This Red Velvet Oreo Cheesecake So Special?
Before we get our mixers out, let’s explore precisely why this recipe is destined to become a firm favourite. This is no ordinary cake; it is a harmonious blend of three of the most adored sweet treats in the world. Here is why we are certain you will fall for it:
- A Perfect Harmony of Flavours: The rich, slightly cocoa-infused tang of the red velvet layer beautifully balances the sweet, smooth cheesecake filling. Providing a delightful contrast in texture, the dark chocolate Oreo base cuts through the richness with its satisfying crunch.
- An Absolute Showstopper: With its vibrant deep red hue, contrasting dark biscuit base, and pristine creamy topping, this cheesecake is as visually stunning as it is delicious. It is guaranteed to elicit oohs and aahs from anyone who sees it.
- Surprisingly Simple to Make: Although it has the appearance of a dessert from an artisan patisserie, our recipe relies on straightforward methods. We have broken down the process into clear, easy-to-follow steps, ensuring even baking novices can proceed with confidence.
- Ideal for Every Celebration: Be it for Valentine’s Day, a festive Christmas gathering, or simply a ‘just because’ moment, this dessert is always a fitting choice. It feels special, decadent, and utterly delightful.
The Essential Ingredients for Your Cheesecake
The secret to an exceptionally magnificent cheesecake is using high-quality, full-fat ingredients. Doing so guarantees the most intense flavour and the silkiest texture possible. Here is a list of what you will need to have ready before you start.
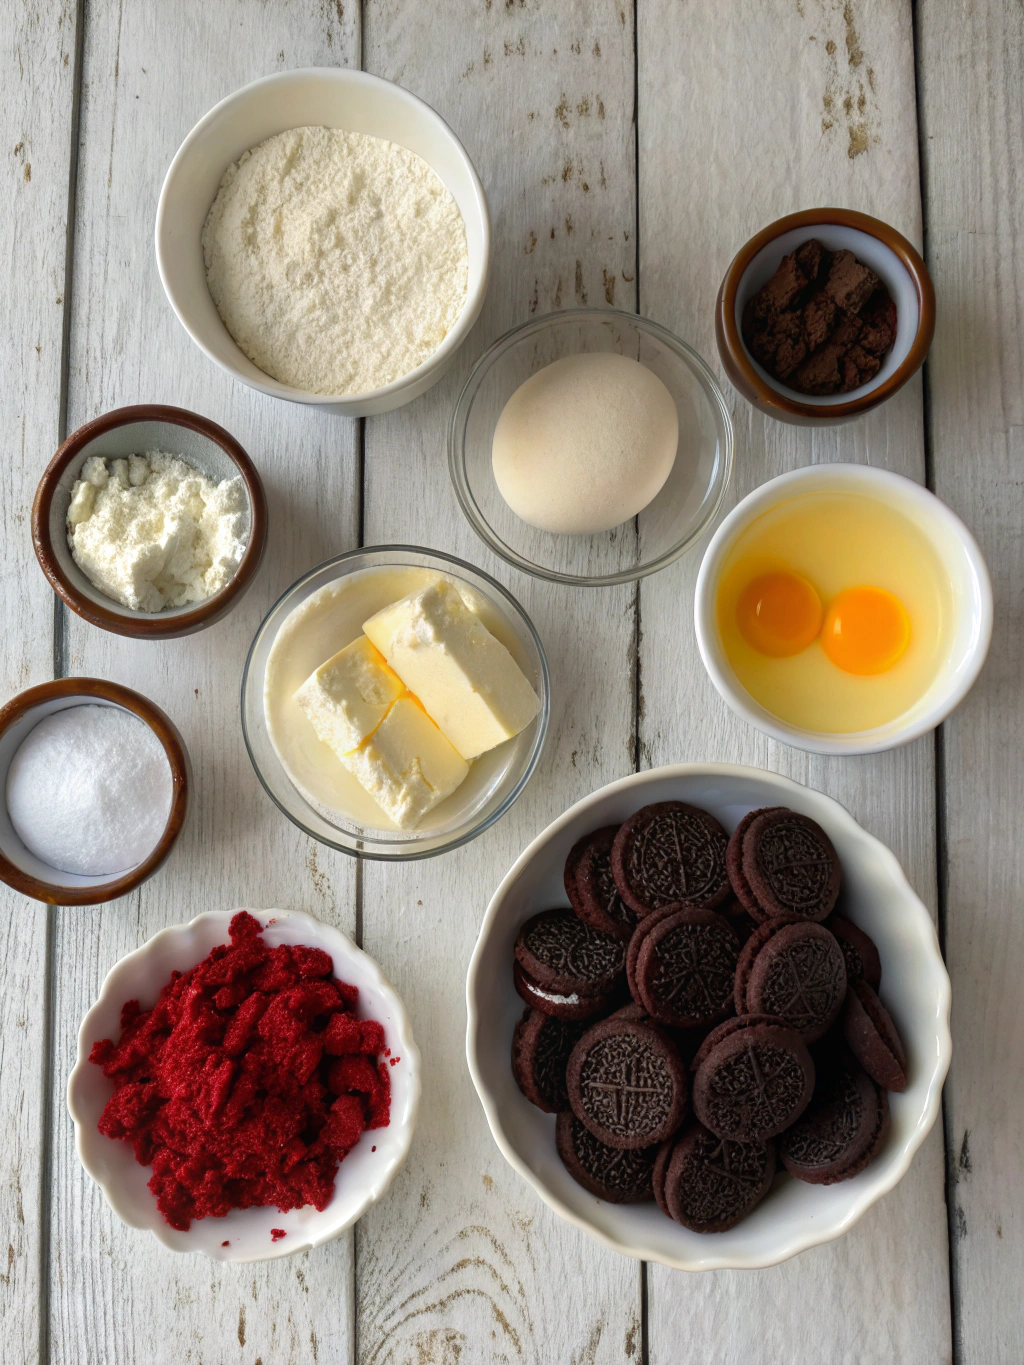
For the Oreo Crust
- 300g Oreo biscuits (the whole biscuit, filling and all)
- 115g unsalted butter, melted
For the Red Velvet Cheesecake Filling
- 900g full-fat cream cheese, at room temperature
- 250g caster sugar
- 3 large eggs, at room temperature
- 1 large egg yolk, at room temperature
- 240ml soured cream, at room temperature
- 2 tablespoons unsweetened cocoa powder
- 2 teaspoons vanilla extract
- 1 tablespoon white vinegar
- 1-2 tablespoons red gel food colouring (gel provides a much more vibrant colour than liquid)
For the Cream Cheese Frosting & Garnish
- 225g full-fat cream cheese, softened
- 120g icing sugar, sifted
- 1 teaspoon vanilla extract
- 120ml double cream, cold
- Extra Oreo biscuits for crushing and decorating
Step-by-Step Guide to Making the Perfect Red Velvet Oreo Cheesecake
Are you ready to craft your dessert masterpiece? Follow our detailed red velvet cheesecake recipe with care, and a flawless creation will be your reward. We find it helpful to read through all the stages before beginning.
Preparing the Oreo Crust
To begin, preheat your oven to 175°C (160°C Fan/Gas Mark 4). Lightly grease a 23cm (9-inch) springform cake tin and line the base with baking parchment. For the ultimate Oreo crust cheesecake, place the Oreo biscuits into a food processor and pulse them into fine crumbs. Alternatively, put them in a sealed bag and crush them with a rolling pin. Combine the crumbs with the melted butter, mixing until they are uniformly damp. Transfer the mixture to your prepared tin, pressing it down firmly and evenly across the bottom. The flat base of a glass works well for creating a smooth surface. Bake for 10 minutes, then remove from the oven and allow it to cool completely.
Creating the Silky Red Velvet Filling
In a large mixing bowl, use an electric mixer on a low setting to beat the room-temperature cream cheese until it is perfectly smooth and lump-free. This is a vital step for achieving a silky texture! Gently incorporate the caster sugar, mixing only until it is combined. Remember to scrape down the sides of the bowl. Add the eggs and the egg yolk one by one, mixing on low speed just until each is incorporated. Take care not to overbeat, as this is a common cause of cracking. In a separate, smaller bowl, whisk the soured cream, cocoa powder, vanilla extract, and white vinegar together. Add this to the cream cheese batter, followed by the red gel food colouring. Mix on a low speed until everything is well blended and you have a beautifully vibrant red batter.
Baking to Perfection
Pour the gorgeous red filling onto your cooled Oreo crust. To help prevent any cracks from forming, we strongly suggest using a water bath (also known as a bain-marie). Securely wrap the outside of your springform tin with two layers of heavy-duty aluminium foil. Place this tin inside a larger roasting pan. Carefully pour boiling water into the roasting pan so that it comes about halfway up the sides of the cheesecake tin. Gently transfer the entire setup to your preheated oven. Bake for 60-70 minutes. The cheesecake is ready when the edges are set, but the centre still has a slight jiggle. Switch off the oven, prop the door open slightly, and let the cheesecake cool down completely inside the oven for at least one hour. This gradual cooling process is key to a flawless, crack-free top.
The Cooling and Chilling Process
After the cheesecake has fully cooled in the oven, carefully lift it out of the water bath and remove the foil. Let it continue to cool on a wire rack until it reaches room temperature. Next, cover it loosely with cling film and place it in the refrigerator to chill for a minimum of 6 hours, though overnight is ideal. This chilling period is absolutely essential; it allows the cheesecake to set properly and lets the flavours deepen and mature.
Decorating Your Masterpiece
When your cheesecake is perfectly chilled, it is time to prepare the topping. For the cream cheese frosting, beat the softened cream cheese with the sifted icing sugar and vanilla extract until the mixture is smooth. In another bowl, whip the cold double cream until it forms stiff peaks. Very gently, fold the whipped cream into the cream cheese mixture. You can either spread this delightful frosting over the top of the cheesecake for a rustic look or pipe it on for a more elegant finish. Garnish with a sprinkle of crushed Oreos or some whole mini Oreos right before you serve it.
Our Top Tips for Cheesecake Success
To help make sure your baking experience is a triumphant one, we have put together our very best advice. If you follow these pointers, you will be a cheesecake connoisseur in no time at all.
- Room Temperature is Key: To get a velvety, lump-free filling, it is crucial that your cream cheese, eggs, and soured cream are all at room temperature. We recommend taking them out of the fridge at least an hour before you plan to start mixing.
- Don’t Overmix: Overbeating the batter, particularly after the eggs are added, incorporates excess air, which is a primary reason for cracks appearing. Always mix on a low speed and stop as soon as the ingredients are just blended.
- Embrace the Water Bath: A water bath creates a moist, steamy environment within the oven. This allows the cheesecake to bake gently and evenly, which is excellent for preventing both cracks and dryness. You can delve deeper into the science of perfect cheesecakes with resources like BBC Good Food.
- Patience is a Virtue: The gradual cooling and extended chilling times are not optional. Rushing these stages can result in a cracked or poorly set cheesecake. It is best to plan ahead and allow the dessert the time it truly needs.
Frequently Asked Questions (FAQ)
Can I make this a no-bake red velvet cheesecake?
Although it is possible to adapt this into a no-bake recipe by leaving out the eggs and using a setting agent like gelatine, the final texture would be noticeably different. A baked cheesecake possesses a denser, richer, and creamier quality that is difficult to mimic. For the most authentic and delicious result, we highly recommend following the baking instructions.
How do I store my red velvet oreo cheesecake?
Your cheesecake must be stored in the refrigerator. Kept in an airtight container, it will stay fresh for up to 5 days. It also freezes beautifully! To freeze, place individual slices on a baking sheet until they are firm, then wrap each slice tightly in cling film and aluminium foil. They will keep in the freezer for up to 2 months. Simply thaw overnight in the fridge before serving.
Why did my cheesecake crack?
Cracks can be the bane of a baker’s existence! The most frequent causes are overmixing the batter (incorporating too much air), overbaking, or cooling the cheesecake too rapidly, which causes a temperature shock. Using a water bath and adhering to our slow cooling method will significantly minimise the chances of cracking.
Can I use a different biscuit for the crust?
Of course! While Oreos provide the classic flavour for this particular recipe, you could easily substitute them with digestive biscuits, chocolate digestives, or even Biscoff biscuits to create a completely different but equally delicious flavour combination.
Exploring Other Delicious Desserts
If this recipe has ignited your passion for creating indulgent desserts, we have a couple of other recipes we think you will love. Our Blueberry Heaven Cookies The Definitive Recipe For Soft Chewy Perfection offer a wonderful fruity burst in a deliciously soft, chewy form. For another impressive bake that is incredibly light, why not give our renowned Cloud Cake Recipe a try? It is a truly heavenly dessert that never fails to impress.
Conclusion: Your New Favourite Celebration Dessert
And so, there you have it—our complete guide to creating a red velvet oreo cheesecake that is as decadent and delicious as it is visually stunning. This recipe is a wonderful celebration of classic flavours, brought together in a way that feels both modern and incredibly special. By following our detailed steps and helpful tips, you can confidently bake a dessert that will have everyone begging you for the recipe.
So, what are you waiting for? It’s time to gather your ingredients, switch on the oven, and prepare to fall in love with what is sure to become your new signature celebration bake. We can assure you that the end result is worth every moment of effort. We would be delighted to see your amazing creations, so please feel free to share a picture and tag us on social media!