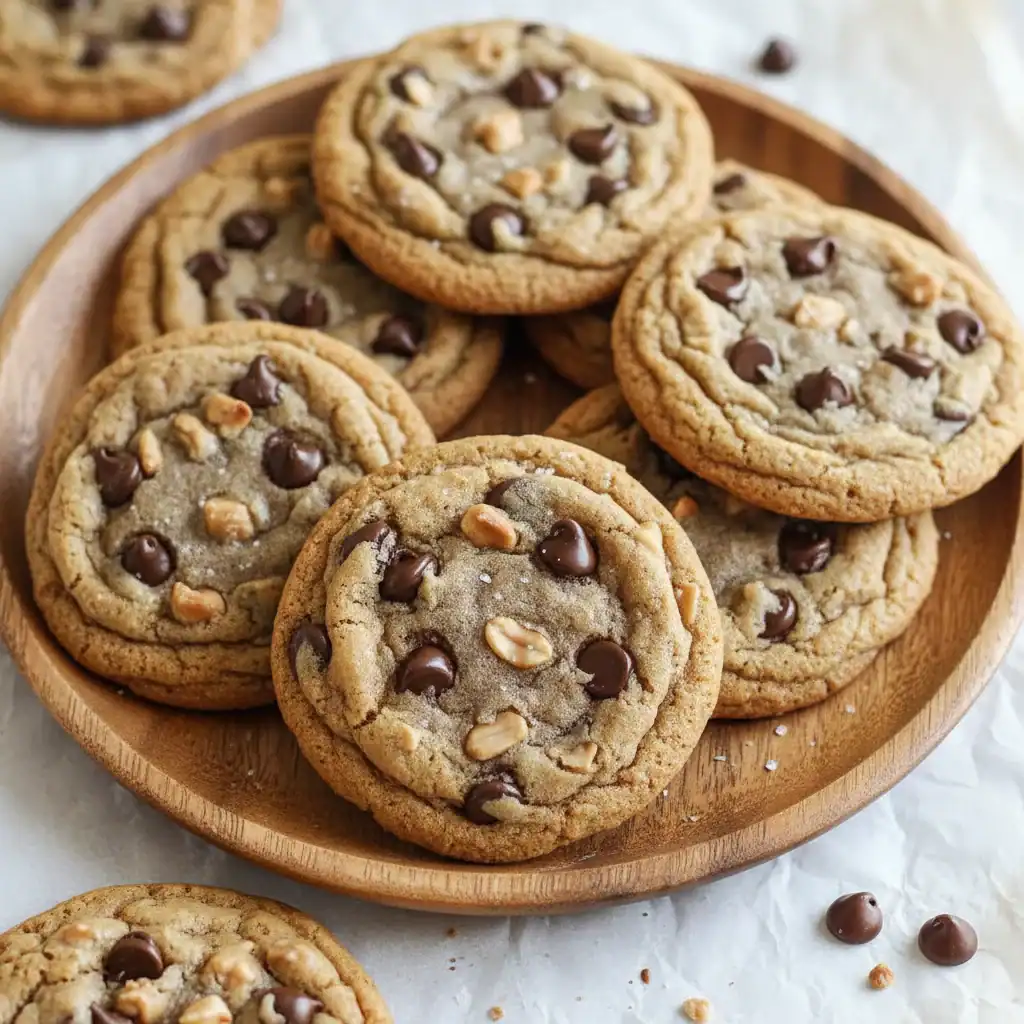
Peanut Butter Chocolate Chip Cookies
There are few things in life as genuinely comforting as the aroma of freshly baked cookies wafting from the kitchen. It’s a scent that promises warmth, a little bit of indulgence, and pure, simple joy. For me, that ultimate cookie is, without a doubt, the Peanut Butter Chocolate Chip Cookie. It’s the perfect marriage of salty and sweet, soft and chewy, with delightfully crisp edges. I’ve been making this exact recipe for over seven years, and it’s the one I always come back to when I need a guaranteed treat that everyone will love.
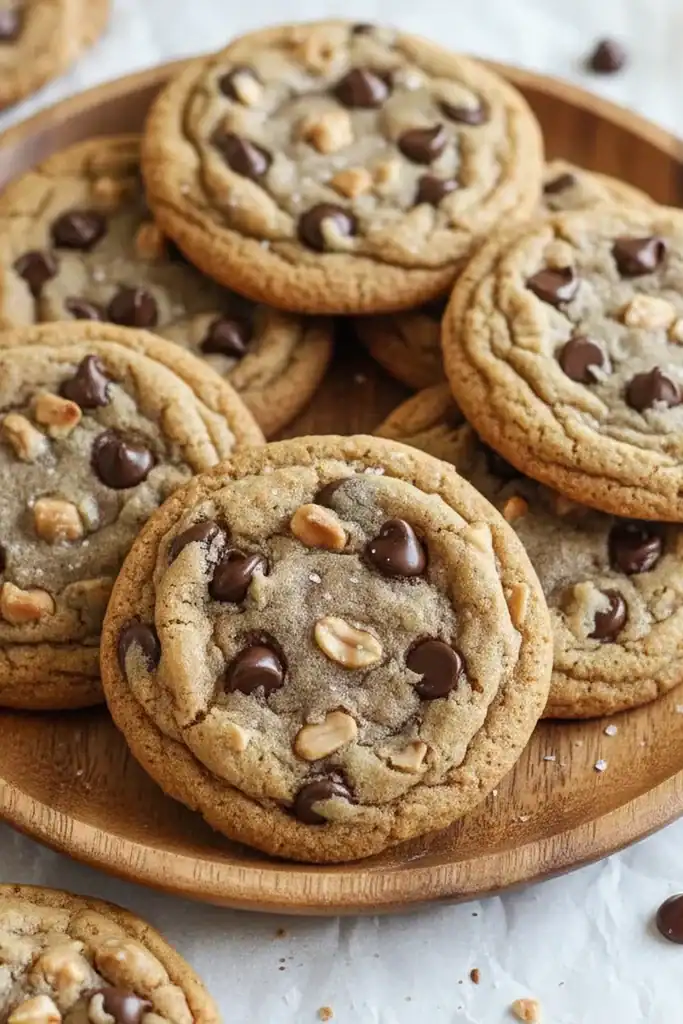
What makes these particular cookies so special is their texture. We achieve a wonderfully chewy centre by using a mix of sugars and ensuring the dough is properly chilled. This isn’t a dry, crumbly biscuit; it’s a substantial cookie with a satisfying bite. The creamy peanut butter provides a rich, nutty base that is perfectly balanced by the pockets of gooey, melted dark chocolate chips scattered throughout. They are substantial enough to be a proper dessert but also work beautifully for a mid-afternoon pick-me-up with a cup of tea.
This recipe is my go-to for school bake sales, weekend family gatherings, or just a quiet Tuesday evening when a sweet craving strikes. It’s straightforward to make and the results are consistently brilliant. If you’re a fan of that classic peanut and chocolate combination, I promise these cookies will become a firm favourite in your home, just as they have in mine.
Recipe Overview
This recipe produces consistently chewy, flavourful Peanut Butter Chocolate Chip Cookies with golden-brown edges and soft, gooey centres. The key is using room temperature ingredients and giving the dough a crucial chilling period, which prevents spreading and deepens the flavour. I’ve tested this with both smooth and crunchy peanut butter, and while both work, smooth gives you that classic, uniform texture we’re aiming for here.
- Prep Time: 20 minutes
- Chill Time: 1 hour
- Cook Time: 12 minutes
- Total Time: 1 hour 32 minutes
- Servings: Makes 24 cookies
- Difficulty: Easy
Why You’ll Love These Peanut Butter Chocolate Chip Cookies
- Incredible Texture and Flavour: The combination of soft light brown sugar and caster sugar creates a cookie that’s delightfully chewy in the middle with slightly crisp edges. The saltiness from the peanut butter cuts through the sweetness of the rich, dark chocolate chips beautifully.
- Comes Together in About 30 Minutes (plus chilling): The active preparation time is minimal. You can whip up the dough while the oven preheats, and the chilling time is completely hands-off.
- Flexible Recipe: Feel free to swap the dark chocolate chips for milk or white chocolate. You can also add a handful of chopped, roasted peanuts for extra crunch or a sprinkle of flaky sea salt on top before baking for a gourmet touch.
- Ideal for Any Occasion: These work wonderfully for packing into lunchboxes, bringing to a friend’s house, or simply stocking the biscuit tin for the week ahead. They also freeze exceptionally well, both as dough and as baked cookies.
- Family Tested: My kids absolutely adore these. I make this at least once a month – it’s become a family favourite, and they always disappear from the cooling rack within hours!
Ingredients You’ll Need
For the best results, I always recommend using good quality ingredients, especially the peanut butter and chocolate. I find that a commercial smooth peanut butter like Sun-Pat works better than natural, oily varieties, as it provides more stability to the dough. Using room temperature butter and eggs is non-negotiable for the perfect texture.
- 150g unsalted butter, softened to room temperature
- 170g smooth peanut butter
- 150g soft light brown sugar, packed
- 100g caster sugar
- 1 large free-range egg, at room temperature
- 1 tsp vanilla extract
- 250g plain flour
- 1 tsp bicarbonate of soda
- ½ tsp salt
- 200g dark chocolate chips (or a chopped dark chocolate bar)
Sara’s Tip: If you forget to take your egg out of the fridge ahead of time, simply place it in a bowl of warm (not hot) water for 5-10 minutes. This will bring it to room temperature quickly and ensure it incorporates smoothly into your butter and sugar mixture.
These cookies make a fantastic finale to a comforting family meal. If you’re planning your menu and need some dinner inspiration, our Garlic Parmesan Chicken Pasta Recipe is always a hit, or for something that feels a little special, you can’t go wrong with our Lemon Garlic Chicken.
How to Make Peanut Butter Chocolate Chip Cookies
The process for making these cookies is very straightforward. The most important part is the creaming of the butter and sugars, which incorporates air and creates a light-textured dough. Don’t be tempted to skip the chilling step – it’s what makes all the difference between a flat, greasy cookie and a perfectly chewy one.
- Cream the Butter and Sugars: In a large bowl, using an electric hand mixer or a stand mixer fitted with the paddle attachment, beat the softened butter, peanut butter, soft light brown sugar, and caster sugar on medium speed for 2-3 minutes until the mixture is light, pale, and fluffy. This step is crucial for the final texture, as explained by food science experts at Serious Eats.
- Add Wet Ingredients: Add the room temperature egg and vanilla extract to the bowl. Beat again on a low speed until just combined, scraping down the sides of the bowl with a spatula to ensure everything is incorporated evenly.
- Combine Dry Ingredients: In a separate medium bowl, whisk together the plain flour, bicarbonate of soda, and salt.
- Mix the Dough: Gradually add the dry ingredients to the wet ingredients in three additions, mixing on low speed until just combined after each. Be careful not to overmix at this stage; stop as soon as you no longer see streaks of flour.
- Fold in Chocolate: Add the dark chocolate chips and gently fold them into the dough using a spatula until they are evenly distributed.
- Chill the Dough: Cover the bowl with cling film and place it in the refrigerator to chill for at least 1 hour (or up to 48 hours). I find that a full hour is the minimum for the best results, as this solidifies the fat and prevents the cookies from spreading too much in the oven.
- Preheat and Prepare: When you’re ready to bake, preheat your oven to 180°C (160°C fan) and line two large baking trays with baking parchment.
- Shape the Cookies: Scoop out portions of dough (about 2 tablespoons each) and roll them into balls. Place them on the prepared baking trays, leaving about 5cm (2 inches) of space between each one to allow for spreading.
- Bake to Perfection: Bake for 10-12 minutes, or until the edges are golden brown and the centres look slightly underdone. They will continue to cook on the hot tray after you remove them from the oven.
- Cool Down: Let the cookies cool on the baking trays for 5-10 minutes before transferring them to a wire rack to cool completely. This helps them set and develop that perfect chewy texture.
Tips From My Kitchen
- Temperature Control is Key: Using softened, room temperature butter is essential. If it’s too cold, it won’t cream properly with the sugar. If it’s melted, your cookies will be greasy and flat. The same goes for the egg!
- The Secret Step: For perfectly round cookies with a lovely crinkled top, I learned that gently tapping the baking tray on the worktop a couple of times right after you take it out of the oven helps the cookies settle into a beautiful shape.
- Make-Ahead Magic: You can prepare the cookie dough and keep it in the fridge for up to 3 days. Alternatively, roll the dough into balls, place them on a tray, and freeze until solid. Then transfer the frozen dough balls to a freezer bag. You can bake them straight from frozen – just add 2-3 minutes to the baking time.
- Proper Storage: Store the cooled cookies in an airtight container at room temperature. They will stay fresh and chewy for up to 5 days. You can even pop a slice of bread in the container to help keep them soft.
Common Mistakes to Avoid
- Not Chilling the Dough: This is the most common mistake. Skipping the chilling time results in cookies that spread too much and become thin and crispy rather than thick and chewy. The chill time allows the butter to solidify, controlling the spread during baking.
- Overbaking: It’s tempting to leave the cookies in until they look completely ‘done’, but this is a mistake. For a chewy centre, you must pull them from the oven when the edges are set and golden, but the middle still looks a tiny bit soft. They will firm up as they cool on the tray.
– Using Melted Butter: Using softened, not melted, butter is critical. Melted butter will not cream correctly with the sugar to create the air pockets needed for a good texture, leading to dense, greasy cookies.
Delicious Variations to Try
While this recipe is fantastic as it is, it also serves as a brilliant base for experimentation. Here are a few variations we love in our house:
- The Triple Threat: Use a mix of dark, milk, and white chocolate chips for a more complex chocolate flavour in every bite.
- Extra Nutty: Swap the smooth peanut butter for crunchy and add 100g of chopped roasted peanuts to the dough along with the chocolate chips for an intense nutty crunch.
- Salty & Sweet: Just before baking, press a few extra chocolate chips into the top of each dough ball and sprinkle with flaky sea salt. This enhances the flavour immensely.
- Spice it Up: Add ½ teaspoon of ground cinnamon to the dry ingredients for a subtle, warming spice that complements the peanut butter wonderfully.
What to Serve With Peanut Butter Chocolate Chip Cookies
These cookies are a treat all on their own, but they can be made even better with the right pairing. Here are a few suggestions:
- A Cold Glass of Milk: The classic and unbeatable pairing. The creaminess of the milk is the perfect counterpoint to the rich cookie.
- A Scoop of Vanilla Ice Cream: Serve a warm cookie fresh from the oven with a scoop of quality vanilla bean ice cream for a truly decadent dessert.
- A Freshly Brewed Coffee: The slight bitterness of a good coffee or espresso cuts through the sweetness of the cookie, making it an ideal afternoon indulgence for adults.
Frequently Asked Questions
Peanut Butter Chocolate Chip Cookies
Ingredients
Method
- Cream the Butter and Sugars: In a large bowl, using an electric hand mixer or a stand mixer fitted with the paddle attachment, beat the softened butter, peanut butter, soft light brown sugar, and caster sugar on medium speed for 2-3 minutes until the mixture is light, pale, and fluffy. This step is crucial for the final texture, as explained by food science experts at Serious Eats.
- Add Wet Ingredients: Add the room temperature egg and vanilla extract to the bowl. Beat again on a low speed until just combined, scraping down the sides of the bowl with a spatula to ensure everything is incorporated evenly.
- Combine Dry Ingredients: In a separate medium bowl, whisk together the plain flour, bicarbonate of soda, and salt.
- Mix the Dough: Gradually add the dry ingredients to the wet ingredients in three additions, mixing on low speed until just combined after each. Be careful not to overmix at this stage; stop as soon as you no longer see streaks of flour.
- Fold in Chocolate: Add the dark chocolate chips and gently fold them into the dough using a spatula until they are evenly distributed.
- Chill the Dough: Cover the bowl with cling film and place it in the refrigerator to chill for at least 1 hour (or up to 48 hours). I find that a full hour is the minimum for the best results, as this solidifies the fat and prevents the cookies from spreading too much in the oven.
- Preheat and Prepare: When you're ready to bake, preheat your oven to 180°C (160°C fan) and line two large baking trays with baking parchment.
- Shape the Cookies: Scoop out portions of dough (about 2 tablespoons each) and roll them into balls. Place them on the prepared baking trays, leaving about 5cm (2 inches) of space between each one to allow for spreading.
- Bake to Perfection: Bake for 10-12 minutes, or until the edges are golden brown and the centres look slightly underdone. They will continue to cook on the hot tray after you remove them from the oven.
- Cool Down: Let the cookies cool on the baking trays for 5-10 minutes before transferring them to a wire rack to cool completely. This helps them set and develop that perfect chewy texture.
Notes
I truly hope you enjoy making (and eating!) these Peanut Butter Chocolate Chip Cookies as much as my family and I do. They are a simple bake but deliver such rewarding results. I’d love to hear how you get on, so please feel free to leave a comment below and let me know if you tried any delicious variations of your own!
Happy Baking,
Sara Gomez
Similar Posts
Olive Garden Zuppa Toscana Soup Copycat
Our Perfect Zuppa Toscana Soup (A Classic Olive Garden Copycat) Have you ever found yourself…
Gooey Coffee Caramel Cake – Indulgent & Moist
Discover the ultimate coffee lover’s dream with our mouthwatering Coffee Caramel Cake recipe. Perfectly balanced flavors and a rich, decadent texture make this the ultimate treat. Click now to learn how to bake this irresistible dessert.
8 Must-Try Roasted Pumpkin Seed Recipes
When you carve your pumpkin masterpiece for Halloween, what do you do with the pile…
French Butter Cake – Classic & Buttery Bliss
Indulge in the buttery, flaky goodness of the quintessential French Butter Cake. Learn the secrets to baking this decadent treat and elevate your dessert game.
Creamy One-Pot Chicken Gnocchi Soup
Our Ultimate Creamy Chicken Gnocchi Soup (An Olive Garden-Inspired Classic) Are you in search of…
Olive Garden Chicken Gnocchi Soup in 30 Minutes
Have you ever found yourself dreaming of that wonderfully comforting, creamy soup from your favourite…


