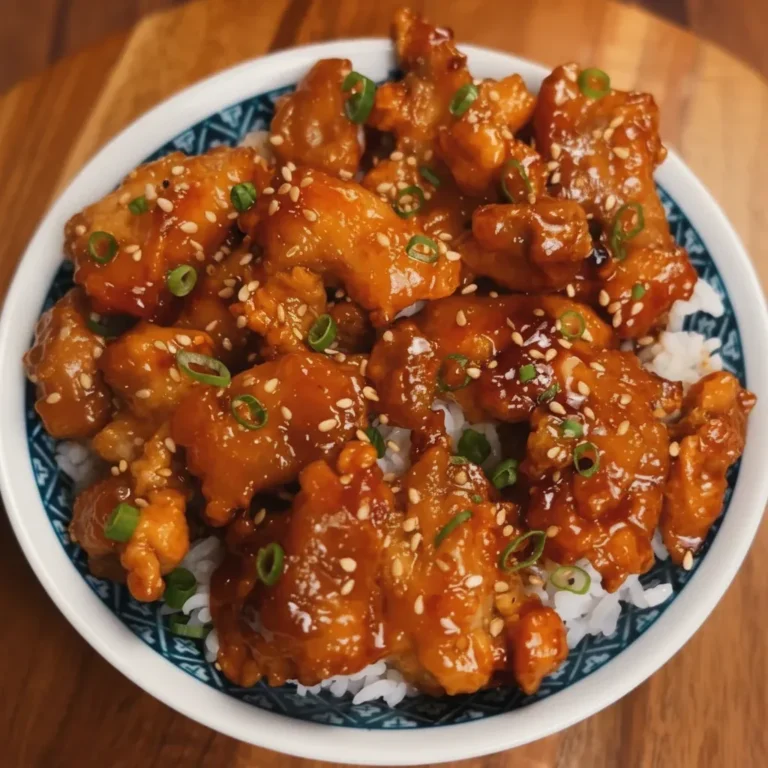
Perfect Pan-Fried Chicken Dumplings – Delicious & Easy!
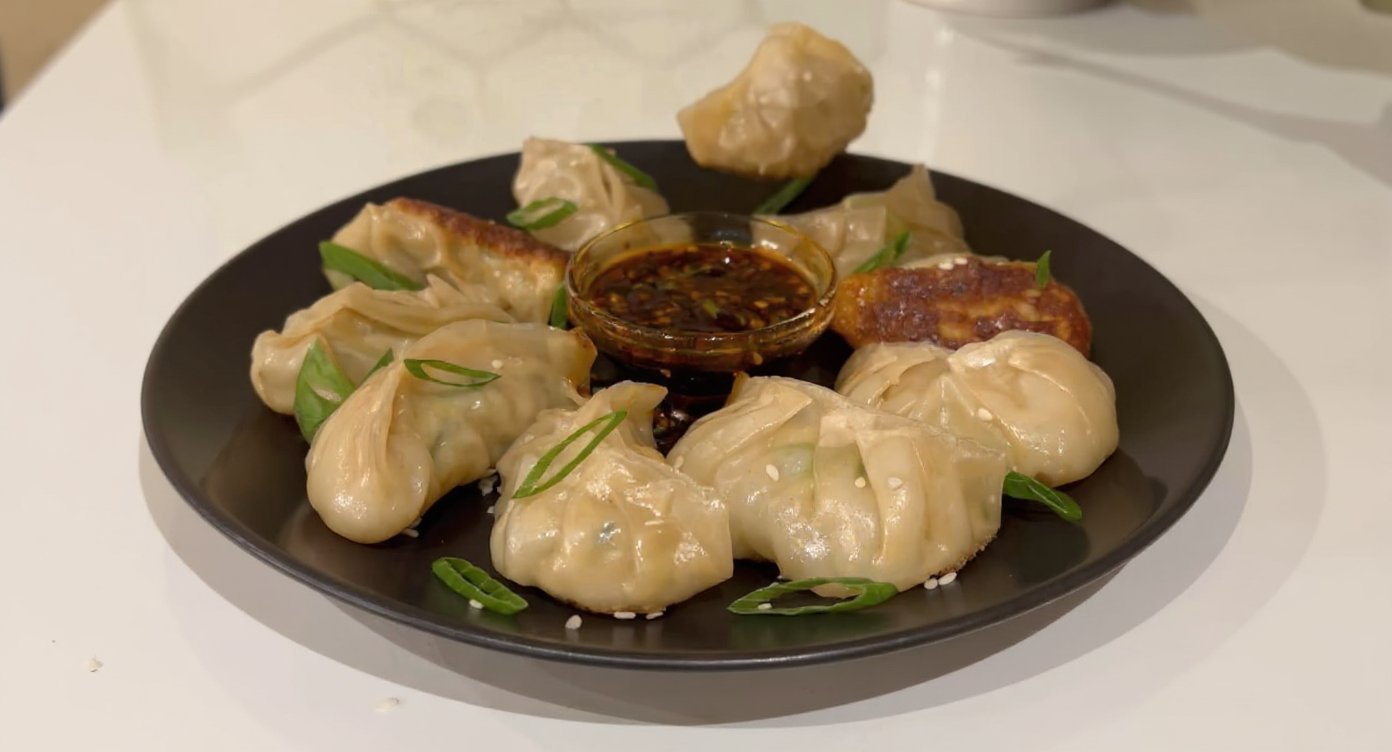
Can you picture it? That first bite into a flawlessly cooked dumpling, revealing a wonderfully crisp, golden base and a succulent filling that simply sings with flavour. It’s a true moment of culinary delight. For many of us, these gorgeous morsels are a takeaway treat reserved for special nights in. But what if we told you that creating these amazing Pan-Fried Chicken Dumplings in your very own kitchen is not only achievable but also surprisingly straightforward? We’re here to walk you through each part of the journey, from mixing the mouth-watering filling to mastering that signature crispy bottom. Prepare to delight yourself, your friends, and your family with what is sure to be your new favourite comfort food.
Why You’ll Love This Recipe
We are certain this will become a cherished recipe in your household, and here are just a few reasons why:
- A Symphony of Flavours: The blend of savoury chicken mince, fresh cabbage, and fragrant seasonings results in a filling that is deeply comforting and satisfyingly complex.
- Irresistible Texture Contrast: We will teach you the brilliant steam-fry technique that gives you a dumpling that is delicately steamed and soft on top, with a delightfully crunchy base.
- Surprisingly Simple to Make: Please don’t be put off by the folding process! We will demonstrate a straightforward, beginner-friendly method. It’s a wonderfully therapeutic activity for a quiet afternoon.
- Better Than Takeaway: When you make dumplings at home, you have complete control over the ingredients. You know precisely what goes into them—no mysterious fillings or unwanted extras, just fresh, wholesome goodness.
Essential Ingredients for Chicken Dumplings
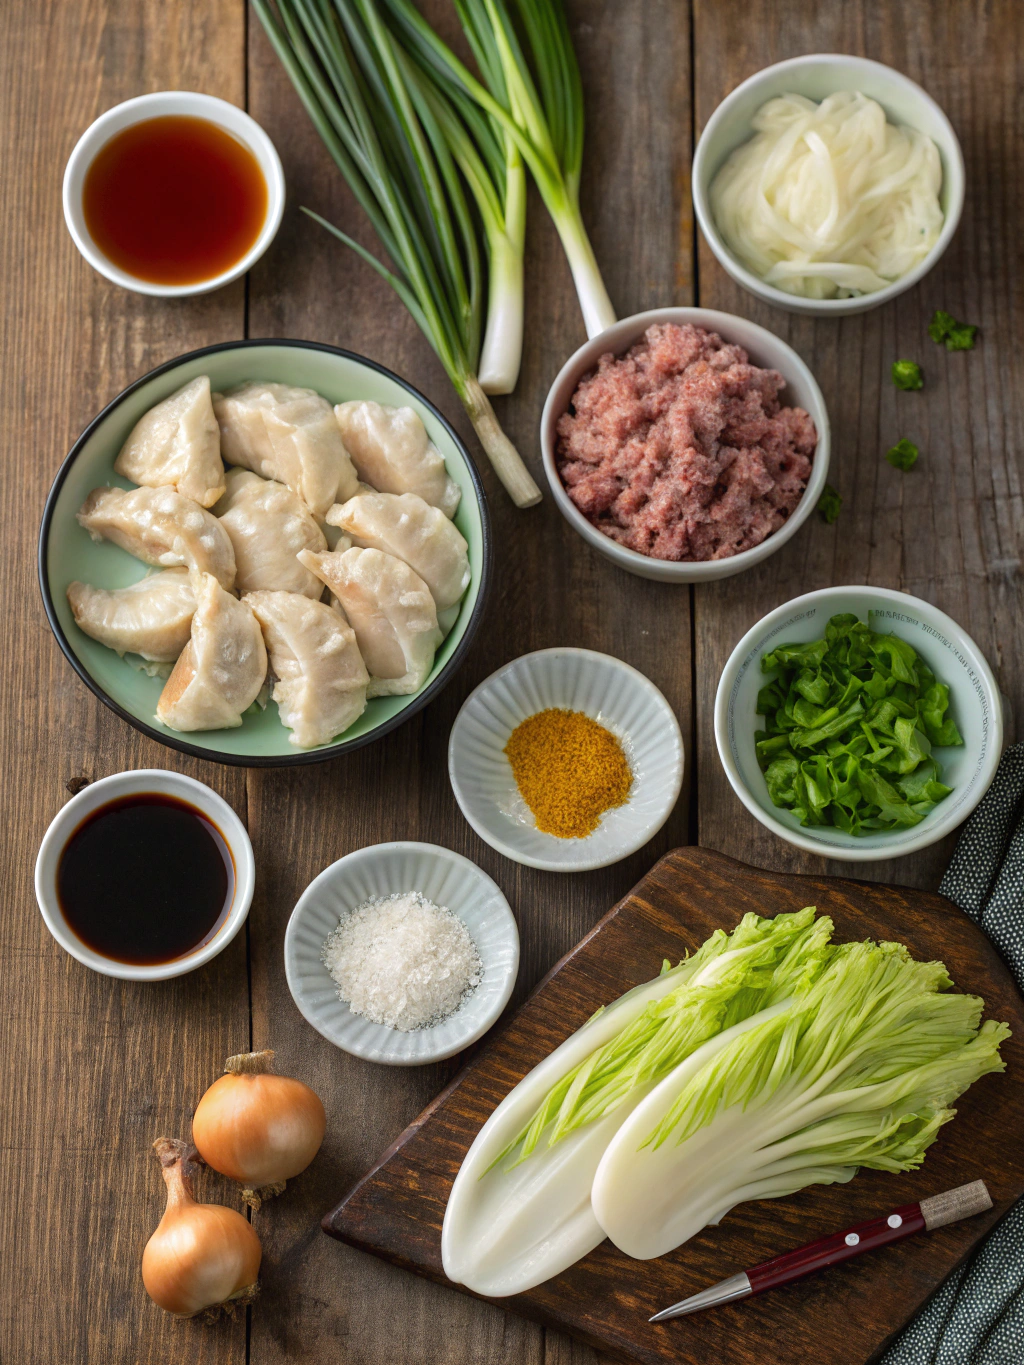
Before we embark on our cooking adventure, we must first gather our provisions. Utilising fresh, high-quality ingredients is the secret to a truly memorable dumpling. We’ve organised the list into three sections: the filling, the wrappers, and the wonderfully simple dipping sauce.
For the Chicken Filling:
- Chicken Mince: 500g of chicken mince (thigh mince offers the best flavour and moisture).
- Napa Cabbage: About 150g, finely shredded. This adds essential moisture and a hint of sweetness.
- Spring Onions: 3-4 stalks, finely chopped.
- Garlic: 2-3 cloves, minced.
- Ginger: 1-inch piece, peeled and finely grated.
- Light Soy Sauce: 2 tablespoons.
- Sesame Oil: 1 tablespoon.
- Shaoxing Wine (or Dry Sherry): 1 tablespoon (optional, but it imparts an authentic flavour).
- White Pepper: ½ teaspoon.
- Salt: ½ teaspoon, or to taste.
For Assembly and Cooking:
- Dumpling Wrappers: 1 packet (around 40-50 round wrappers). These can usually be found in the chilled aisle of most Asian food shops.
- Vegetable Oil: 2-3 tablespoons, for frying.
- Water: About 120ml (½ cup), for steaming.
For the Simple Dipping Sauce:
- Light Soy Sauce: 4 tablespoons.
- Rice Vinegar: 2 tablespoons.
- Sesame Oil: 1 teaspoon.
- Chilli Oil or Chilli Flakes: To your preference.
- Finely Chopped Spring Onion or Coriander: For garnish (optional).
A Step-by-Step Guide to Making Pan-Fried Chicken Dumplings
With our ingredients assembled, it’s time for the really enjoyable part! We will break this process down into four easy-to-follow stages: making the filling, folding the dumplings, cooking them perfectly, and mixing the dipping sauce.
Step 1: Prepare the Succulent Filling
The filling is the soul of any great dumpling. Our aim is to create a mixture that is moist, beautifully seasoned, and holds its shape well.
- Prepare the Cabbage: In a bowl, place your finely shredded Napa cabbage and sprinkle it with a little salt. Allow it to rest for 10-15 minutes. This step draws out surplus water, which is key to preventing soggy dumplings. Once rested, use your hands to firmly squeeze out as much liquid as you can.
- Combine the Ingredients: In a large mixing bowl, add the chicken mince, the squeezed cabbage, chopped spring onions, minced garlic, and grated ginger.
- Season and Mix: Pour the light soy sauce, sesame oil, Shaoxing wine (if you’re using it), white pepper, and salt into the bowl. Now, either with your hands or a spoon, mix it all together thoroughly. Stir briskly in one direction for a minute or so. This action helps bind the proteins in the chicken, resulting in a springier, more cohesive filling.
Step 2: How to Fold Dumplings (The Easy Way)
Folding dumplings might look like a delicate art, but we assure you it’s a skill that anyone can pick up. This basic pleating method is an excellent starting point for creating a lovely and secure homemade chicken gyoza.
- Set Up Your Station: On a clean work surface, arrange your bowl of filling, your packet of wrappers, and a small dish of water. Have a baking tray lined with baking parchment nearby to place your finished dumplings on.
- Fill the Wrapper: Take one wrapper and lay it in the palm of your non-dominant hand. Spoon approximately one heaped teaspoon of the chicken filling into its centre. Take care not to add too much, as this will make sealing the dumpling tricky.
- Moisten the Edge: Dip a finger into the water and trace it along the upper half of the wrapper’s edge. This moisture will act as a seal.
- Fold and Pleat: Fold the wrapper in half over the filling, forming a semi-circle. Pinch the very top centre to seal it. Now, working from one side of the central seal, create 2-3 small pleats by folding the front edge of the wrapper towards the middle and pressing it securely against the flat back edge. Do the same on the other side.
- Final Press: Gently push down on the completed dumpling so it can sit flat on its base. This is essential for achieving that perfectly crisp bottom. Place it on your parchment-lined tray and continue with the rest of the filling and wrappers.
Step 3: The Pan-Fry and Steam Method
This is the magical step that gives our chicken potstickers recipe its famous name. We fry, then steam, then fry one last time to get that signature texture.
- Heat the Pan: Take a large, non-stick frying pan with a lid and place it over a medium-high heat. Add 1-2 tablespoons of vegetable oil, swirling it to coat the pan’s base.
- Arrange the Dumplings: When the oil is shimmering, carefully place the dumplings in a single layer with their flat side down. Avoid crowding the pan; it’s better to cook them in batches if you need to. Let them fry for 2-3 minutes, until their bottoms are beautifully golden-brown and crisp.
- Add Water to Steam: Cautiously pour about 120ml (½ cup) of water into the pan—be ready for it to sizzle and steam instantly! Immediately place the lid on the pan and turn the heat down to medium-low.
- Steam to Cook: Allow the dumplings to steam for 6-8 minutes. You’ll know they’re ready when the wrappers look slightly translucent and the chicken filling is thoroughly cooked.
- Crisp Them Up Again: Take the lid off. The majority of the water should have boiled away. If a little liquid remains, turn the heat up to medium-high to let it evaporate. Let the dumplings continue to fry for another minute or two to make sure their bases are extra crispy.
Step 4: Whisk Up the Dipping Sauce
No dumpling experience is whole without the perfect dipping sauce! Luckily, this part could not be easier to prepare.
While the dumplings are cooking, find a small bowl. Pour in the soy sauce, rice vinegar, and sesame oil. Whisk them together until combined. If you enjoy a little spice, add a dash of chilli oil or a pinch of chilli flakes. For a fresh finish, garnish with spring onions or coriander. This perfect dumpling dipping sauce will elevate all the wonderful flavours of your creation.
Top Tips for the Best Crispy Chicken Dumplings
To help you achieve glorious results every single time, we’ve put together a few of our most valued, tried-and-tested tips.
- Don’t Skip Squeezing the Cabbage: We can’t stress this enough! It’s an essential step to stop the filling from becoming watery and turning the wrappers soggy.
- Use a Non-Stick Pan: This will make your cooking experience much more pleasant and prevent the tragedy of your crispy dumpling bottoms getting stuck to the pan.
- Don’t Overcrowd: Always give your dumplings some breathing room in the pan. If they are packed too tightly, they will simply steam rather than fry, and you won’t achieve those distinctively crisp bases.
- Batch Cook and Freeze: This recipe is ideal for making in larger quantities. You can freeze uncooked dumplings for a speedy and delicious meal another day. We explain how to do this in our FAQ section.
If you had fun preparing these dumplings, you might also appreciate the bold flavours in our recipe for Tasty Bang Bang Chicken Skewers, another superb dish that is wonderful for sharing.
Frequently Asked Questions (FAQ)
What’s the difference between dumplings, potstickers, and gyoza?
These names are often used as if they mean the same thing, but there are some small distinctions. “Dumpling” is a very broad term for any piece of dough wrapped around a savoury or sweet filling. “Potstickers” (or jiaozi in China) are a particular kind of pan-fried dumpling, so-named because they “stick to the pot” (or wok) as they fry. “Gyoza” are the Japanese equivalent of potstickers; they are generally made with thinner wrappers and can have a more prominent garlic flavour. To learn more about their history, you can read about Chinese jiaozi.
Can I make these gluten-free?
Of course! You can search for gluten-free dumpling wrappers, which are becoming much easier to find. To ensure the recipe is entirely gluten-free, you will also need to replace the soy sauce with tamari or another gluten-free alternative in both the filling and the dipping sauce.
How do I freeze dumplings for later?
This is an excellent way to prepare meals in advance! Arrange the freshly folded, uncooked dumplings on a parchment-lined baking sheet. Make sure they are in a single layer and not touching one another. Pop the sheet into the freezer for 1-2 hours until the dumplings are frozen solid. After this, you can move them into a freezer-safe bag or an airtight container. They’ll store well for up to 3 months. You can cook them directly from frozen; just add an extra 2-3 minutes to the steaming time.
Can I use an air fryer to cook them?
You can, though the final result will be quite different from the classic pan-fried version, as you won’t get that contrast of a soft, steamed top. If you’d like to try, lightly spray your dumplings with oil and air fry them at 190°C (375°F) for 8-10 minutes, flipping them over halfway through, until they are golden and fully cooked. They will be crispy all over, a bit like a miniature spring roll.
Conclusion: Your New Favourite Homemade Meal
And there we have it—your comprehensive guide to making the most delicious Pan-Fried Chicken Dumplings right from scratch. We’ve shown you how to create a filling bursting with flavour, shared an easy dumpling recipe for folding, and let you in on the secret to achieving that perfect crispy bottom. The feeling of satisfaction when you lift a batch of these golden-brown treats from the pan is wonderful, and the taste is even more rewarding.
So, the next time you’re searching for an enjoyable kitchen project or a comforting meal that never fails to please, we hope you’ll come back to this recipe. For another simple yet satisfying chicken dinner, why not take a look at The Ultimate Easy Creamy Chicken Tortilla Wraps?
We would be thrilled to see your masterpieces! Please give this recipe a go, and be sure to leave a comment below or tag us on social media to share your dumpling-making adventures. Happy cooking!