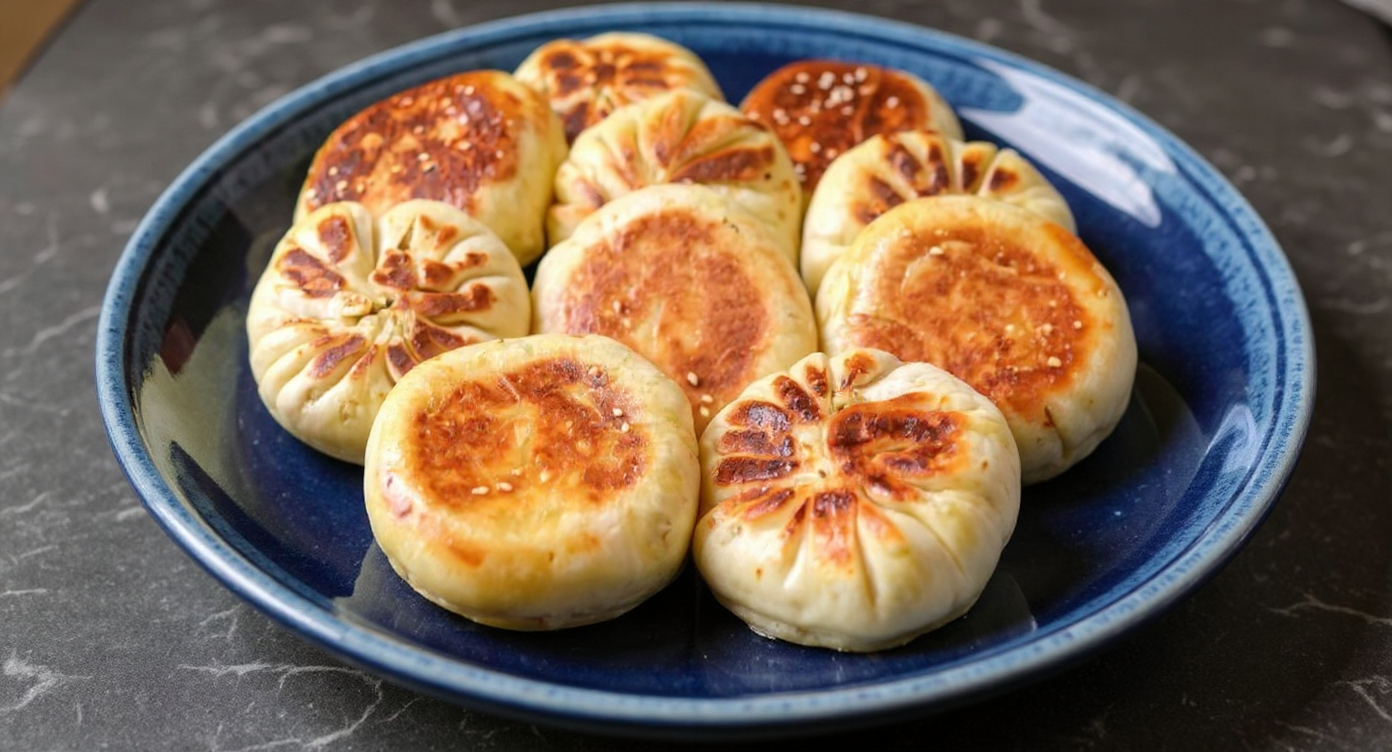
Tasty Pan-Fried Cabbage and Noodle Buns – Delicious & Easy!
Are you searching for that perfect snack? One that boasts a delightfully crispy base, a wonderfully soft and fluffy top, and a filling that’s packed with savoury, umami flavour? Imagine a single bite that evokes the vibrant atmosphere of a street food market, rich with comforting smells and tastes. If so, your search ends here. Join us as we embark on a culinary adventure to create the most delicious Pan-Fried Cabbage and Noodle Buns you’ve ever had, all from the comfort of your home.
This recipe is far more than a simple list of directions; it’s our complete guide to crafting a truly memorable dish. We will show you precisely how to achieve a beautifully risen, yeasted dough and how to balance the flavours of the vegetarian filling to perfection. Say goodbye to takeaways, as these homemade buns are fresher, more flavourful, and so much more satisfying to create yourself.
What Are Pan-Fried Cabbage and Noodle Buns?
These wonderful treats are a type of Chinese filled bun, commonly referred to as baozi. While many bao are simply steamed, our recipe is inspired by Sheng Jian Bao. This technique involves pan-frying the buns first to develop a superb golden-brown crust, before they are steamed in the very same pan. This clever two-stage cooking method delivers the best of both worlds: a crunchy bottom complemented by a soft, pillowy dome.
The filling is a modest but incredibly tasty mixture of finely sliced cabbage, delicate glass noodles, and fragrant seasonings. It is a classic vegetarian combination that stands as proof that you can achieve deep, satisfying flavours without any meat. These buns are ideal as a substantial snack, an impressive appetiser for guests, or even a light meal served with a simple dipping sauce.
Why You’ll Love This Recipe
We are certain that this recipe will quickly become a favourite in your household. Here are a few reasons why we believe you’ll adore these cabbage and noodle buns:
- Utterly Delicious: The textural contrast is simply sublime. That crispy base, the soft dough, and the savoury-sweet filling combine to create the perfect mouthful, every time.
- Surprisingly Simple: The thought of working with yeast dough can be daunting, but we have broken down each stage to make the process completely approachable for beginners. We’ll be with you every step of the way.
- Wholesome & Vegetarian: Filled with vegetables, this is a flavourful and fulfilling meat-free option that is sure to be enjoyed by all.
- A Real Crowd-Pleaser: Whether you’re preparing them for your family or presenting them at a party, these buns are guaranteed to vanish in moments. They look spectacular and taste even better!
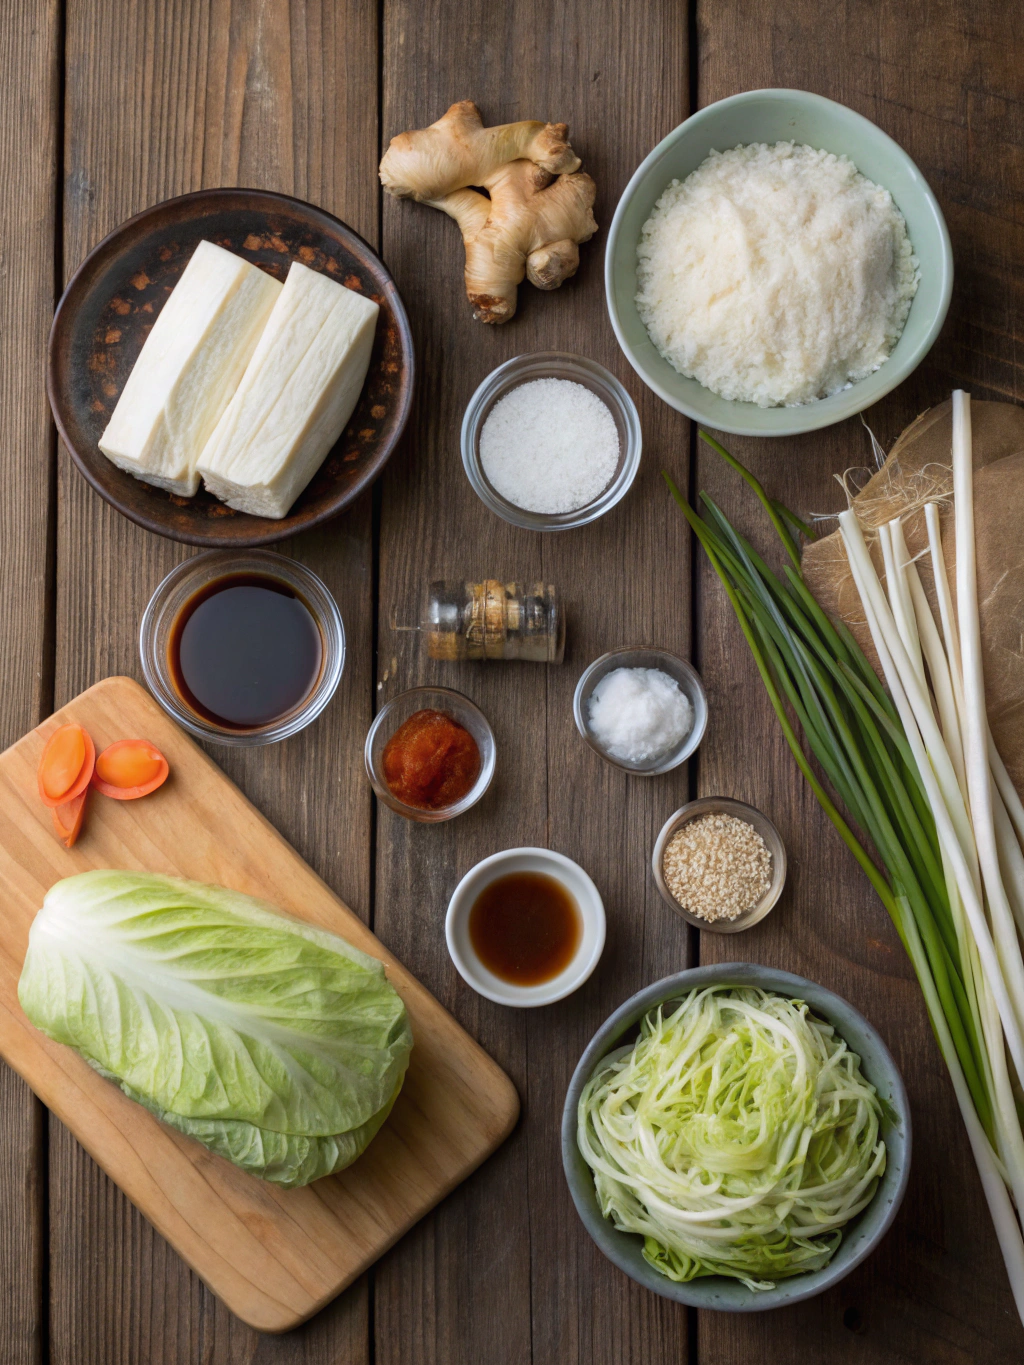
Essential Ingredients for Cabbage and Noodle Buns
To begin, we need to assemble our ingredients. We have separated them into two groups: one for the dough and one for the filling. Using the correct components is the first step towards achieving bun perfection!
For the Fluffy Dough:
- 400g plain flour (all-purpose flour)
- 4g instant dry yeast
- 1 tbsp caster sugar
- ½ tsp salt
- 220ml warm water (around 40°C or 105°F)
- 1 tbsp neutral oil (like vegetable or sunflower oil)
For the Savoury Filling:
- 50g glass noodles (also known as cellophane noodles or bean thread noodles)
- 2 tbsp neutral oil
- 2 cloves garlic, minced
- 1 tsp grated fresh ginger
- 300g white cabbage, finely shredded
- 1 large carrot, grated
- 3 spring onions, finely sliced
- 2 tbsp light soy sauce
- 1 tbsp oyster sauce (or vegetarian stir-fry sauce for a fully veggie option)
- 1 tsp sesame oil
- ½ tsp white pepper
- 1 tsp sugar
Step-by-Step Guide to Making Pan-Fried Cabbage and Noodle Buns
Ready to begin? Follow our detailed instructions with care, and you will be rewarded with flawless, golden-brown buns.
Step 1: Making the Fluffy Dough
- Activate the Yeast: In a small bowl, combine the warm water, caster sugar, and instant yeast. Stir it gently and leave it to stand for 5-10 minutes. You should see a foamy layer develop on the surface, which indicates that your yeast is active and ready for action.
- Mix the Dough: In a large mixing bowl, whisk the plain flour and salt together. Form a well in the centre, then pour in the yeast mixture along with the neutral oil. Use a spatula or wooden spoon to combine everything until a rough, shaggy dough is formed.
- Knead to Perfection: Tip the dough onto a lightly floured work surface. Knead for approximately 10-15 minutes by hand, or for 7-8 minutes in a stand mixer fitted with a dough hook. The dough is ready when it becomes smooth, soft, and elastic. For more on the science, you can read this fantastic guide to understanding how yeast works.
- First Proof: Lightly oil your mixing bowl, place the ball of dough inside, and turn it over so it’s lightly coated. Cover the bowl with a clean, damp tea towel or cling film. Allow it to rise in a warm, draught-free location for around 1-1.5 hours, or until it has doubled in volume.
Step 2: Preparing the Savoury Filling
While the dough is proofing, we can get on with making our delicious vegetarian buns filling. This gives it ample time to cool down before we start assembling the buns.
- Cook the Noodles: Put the glass noodles into a heatproof bowl and pour over boiling water to cover them. Let them soak for 5-7 minutes, or until they have softened. Drain them completely, then use scissors to snip them into shorter, 2-3 cm lengths.
- Sauté the Aromatics: Heat the oil in a large wok or frying pan over a medium-high heat. Add the minced garlic and grated ginger and stir-fry for about 30 seconds until their aroma is released.
- Cook the Vegetables: Add the shredded cabbage and grated carrot to the pan. Continue to stir-fry for 3-5 minutes, until the cabbage has softened and reduced in volume. You want it to be tender but still retain a little bite.
- Combine and Season: Add the prepared glass noodles and sliced spring onions to the pan. Pour over the light soy sauce, oyster sauce (or its vegetarian alternative), sesame oil, sugar, and white pepper. Stir everything together until thoroughly mixed. Cook for one more minute before taking it off the heat.
- Cool Down: Transfer the filling onto a plate or into a shallow bowl and spread it out. This will help it to cool much faster. It is vital that the filling is at room temperature before you start filling the buns, as any warmth could melt the dough.
Step 3: Assembling the Buns
When your dough has doubled in size and the filling is completely cool, we reach the most enjoyable part: assembling your homemade bao.
- Divide the Dough: Gently press down on the risen dough to release the air. Move it to a lightly floured surface and roll it into a long cylinder. Cut the log into 12-14 evenly sized pieces.
- Shape the Wrappers: Take a piece of dough and shape it into a ball. With a small rolling pin, roll it into a circle roughly 10cm (4 inches) across. Aim to keep the centre of the circle slightly thicker than the edges.
- Fill and Pleat: Place a heaped tablespoon of the cooled filling in the middle of the dough circle. Carefully draw the edges up and over the filling, pleating as you go to create a tight seal at the top. Firmly pinch the final pleat to close the bun securely. Set the assembled bun, pleated side up, on a small piece of baking parchment. Repeat this process with the rest of the dough and filling.
Step 4: The Second Proof
Arrange the assembled buns on a tray, leaving a little space between each one. Cover them loosely with a clean tea towel and let them rest for a further 20-30 minutes. You will see them puff up slightly. This second proof is vital for a light and airy result.
Step 5: How to Cook Pan-Fried Bao to Golden Perfection
This is the final stage, which gives our buns their signature crispy base.
- Heat the Pan: Add a tablespoon of neutral oil to a large, non-stick frying pan that has a well-fitting lid. Warm it over a medium heat.
- Fry the Buns: Carefully position the buns in the pan, pleated side up, taking care not to overcrowd it (you may need to work in batches). Fry for 2-3 minutes, or until the bottoms are crisp and a beautiful golden-brown colour.
- Steam to Finish: Very carefully pour about 120ml (½ cup) of cold water into the hot pan—it will sizzle and steam instantly, so be prepared! Immediately cover the pan with the lid. Turn the heat down to low and let the buns steam for 8-10 minutes, or until the water has fully evaporated and the buns are cooked through and fluffy.
- Serve Immediately: Remove the lid and allow any final traces of moisture to cook away. Garnish with a few extra sliced spring onions or some toasted sesame seeds, and serve straight away with your preferred dipping sauce.
Customising Your Cabbage and Noodle Buns
One of the finest qualities of this recipe is its adaptability. Please feel free to be creative with the filling!
- Add Protein: For a meat-based version, you could mix in 150g of cooked minced pork or chicken with the vegetables.
- Mushroom Magic: Finely chopped shiitake or chestnut mushrooms will introduce a wonderful earthy, umami depth.
- Spice It Up: If you enjoy a bit of warmth, a teaspoon of chilli flakes or a dash of chilli oil into the filling will do the trick.
- Make it a Meal: These buns are fantastic by themselves, but to create a more substantial meal, you could serve them with a comforting soup like this Tasty Hearty And Easy Cabbage Roll Soup Recipe Delicious Easy or a fresh and crisp Asian Salad Recipe.
Frequently Asked Questions (FAQ)
Can I make the dough ahead of time?
Absolutely! You can prepare the dough and allow it to complete its first rise in the refrigerator for up to 24 hours. This slow, cold fermentation can actually deepen the flavour. Simply ensure you let it return to room temperature for about 30 minutes before you begin to shape and fill the buns.
How do I store and reheat leftover buns?
Keep any leftovers in a sealed container in the fridge for up to 3 days. To reheat them, you can either steam them for 5 minutes or pan-fry them again with a touch of water to revive that lovely crispy base.
My buns weren’t fluffy. What did I do wrong?
A lack of fluffiness in these Chinese stuffed buns is typically down to the yeast or the proofing stages. Check that your yeast is fresh and active (look for that tell-tale foam!). Furthermore, don’t be tempted to rush the two proofing times; they are essential for developing the dough’s light, airy structure.
What’s the best dipping sauce for these buns?
A classic dipping sauce makes for a perfect partner. We suggest a mixture of 3 tablespoons of light soy sauce, 1 tablespoon of rice vinegar, 1 teaspoon of sesame oil, and a few finely sliced spring onions or a pinch of chilli flakes. It provides the ideal balance of salty, tangy, and aromatic notes.
Conclusion: Your New Favourite Snack Awaits
We have guided you through each stage, from kneading the perfect soft dough to frying that signature golden, crispy base. Creating Pan-Fried Cabbage and Noodle Buns from scratch is a deeply rewarding experience that produces a truly delicious outcome. They are the epitome of comfort food, wonderful for sharing with family and friends or savouring all by yourself.
So, what are you waiting for? Assemble your ingredients, roll up your sleeves, and prepare to delight everyone with these amazing buns. We would be thrilled to see your creations! Please share your pictures and tag us on social media, or leave a comment below to tell us how you got on.