The Perfect Oreo Milkshake Recipe: Creamy, Dreamy & Ready in 5 Minutes! 🍪🥤
Are you in the mood for a treat that’s wonderfully indulgent, refreshingly cool, and incredibly straightforward to prepare? A drink that evokes fond memories and is guaranteed to bring a smile to your face? If you’re nodding along, you have certainly come to the right place. We are about to share our definitive guide to the classic cookies and cream delight with our ultimate Oreo Milkshake Recipe 🍪🥤. Ditch the expensive coffee shop versions; in just five short minutes, using only a few basic ingredients, you can whip up a shake that is richer, creamier, and more packed with Oreo flavour than you could ever imagine.
Here at Recipestang, our philosophy is that the finest treats are often the most straightforward. This recipe is a perfect example of that belief. It’s a flawless marriage of rich vanilla ice cream, crunchy chocolate biscuits, and smooth milk, blended together into a sippable work of art. Whether you need a speedy dessert, a comforting pick-me-up after a busy day, or a fun kitchen project with the children, this milkshake fits the bill perfectly. Right then, let’s get blending!
Why You’ll Absolutely Adore This Recipe
Before we dive into the method, let’s explore why this is destined to become your new favourite dessert. This is no ordinary milkshake; it’s the best Oreo milkshake you’ll ever create at home, and here are the reasons why:
- Ready in a Flash: Honestly, you are just five minutes away from pure indulgence. All you have to do is measure the ingredients, blend them together, and pour. It’s the ideal solution for tackling those unexpected sweet cravings.
- Just a Handful of Ingredients: You only require three main components! It truly couldn’t be simpler than this. There are no complicated procedures or difficult-to-source items involved.
- Endlessly Adaptable: This recipe serves as an excellent foundation. We’ll offer lots of inspiration for you to tailor it to your personal taste, from introducing new flavours to making a dairy-free version.
- A Favourite for All Ages: From toddlers to grandparents, who can say no to the timeless taste of an Oreo? It’s the ideal treat for family film nights, celebrations, or just a simple afternoon delight in the sun.
The Ideal Ingredients for Your Oreo Milkshake
The true charm of this recipe is its simplicity. Using high-quality ingredients is crucial for achieving that flawless, velvety texture and deep flavour. Here is what you will need:
- Oreo Biscuits: The undeniable hero of our milkshake! We suggest using the classic Oreo biscuits for that authentic flavour. For more on their product range, you can head over to the official Oreo UK website. We use around 6-8 biscuits for a perfectly balanced taste, but you should absolutely add more if you are a dedicated Oreo enthusiast.
- Vanilla Ice Cream: A premium, creamy vanilla ice cream provides the foundation for our shake. It offers the perfect neutral backdrop that allows the Oreo flavour to take centre stage. We recommend a full-fat ice cream for the creamiest and thickest consistency.
- Whole Milk: This is what helps everything blend smoothly and creates that perfect milkshake consistency. You can alter the quantity of milk to make your shake thicker or runnier to suit your preference.
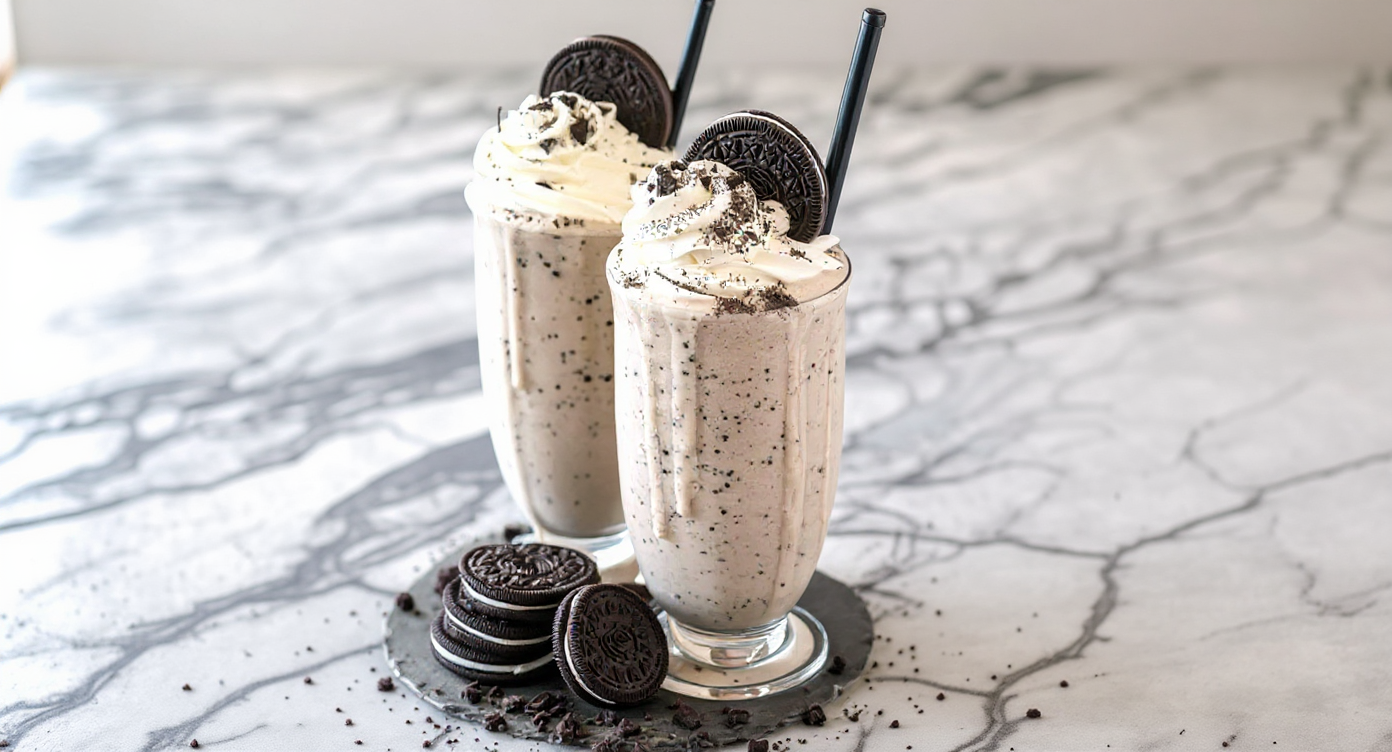
- Optional Toppings: To take your milkshake from delightful to truly spectacular, consider adding whipped cream, a sprinkle of extra crushed Oreos, and a generous drizzle of chocolate sauce.
Ingredient Quantities (Serves 2)
- Oreo Biscuits: 8-10
- Vanilla Ice Cream: 4 large scoops (about 400g)
- Whole Milk: 120ml (½ cup)
- Chocolate Sauce (for garnish): 1-2 tablespoons
- Whipped Cream (for garnish): As much as you like!
How to Make the Perfect Oreo Milkshake: Step-by-Step
Ready to bring this creamy creation to life? Making this homemade Oreo milkshake is as easy as one, two, three. Just follow our simple instructions for a perfect outcome every time.
- Get Everything Ready: Let your ice cream sit out for a few minutes to soften slightly. This will make scooping and blending much easier. Count out your Oreo biscuits, and perhaps set one or two aside to crumble over the top later.
- Add to the Blender: Put the scoops of vanilla ice cream, 8 of the Oreo biscuits, and the milk into your blender jug. For a chunkier milkshake with larger biscuit pieces, you can snap the Oreos in half before adding them.
- Blend Until Smooth: Fasten the lid securely and blend on a medium-to-high setting for around 30-45 seconds. You want to achieve a thick, smooth consistency with little flecks of Oreo visible. Try not to over-blend, as this can make the milkshake watery by melting the ice cream.
- Decorate the Glasses: To achieve that classic café style, drizzle chocolate sauce along the inside of two tall glasses. Give them a little swirl to create a fun, decorative pattern.
- Pour and Garnish: Carefully pour the milkshake mixture evenly into your decorated glasses. Finish with a generous swirl of whipped cream, a scattering of crushed Oreos, and another little drizzle of chocolate sauce. Add a straw and serve straight away!
Pro Tips for an Unforgettable Milkshake
Looking to take your milkshake skills to the next level? We have put together some expert advice to help ensure your shake is absolutely perfect, time after time.
Chill Your Glasses
For a wonderfully chilled drink, place your serving glasses in the freezer for 10-15 minutes before you begin. A frosted glass helps to keep the milkshake colder for longer, slowing down the melting process.
The Right Consistency
Getting the ratio of milk to ice cream just right is key to achieving that ideal texture.
- For a thicker shake: Reduce the amount of milk, or add another scoop of ice cream.
- For a thinner shake: Add more milk a little at a time until it reaches your preferred consistency.
Begin with the quantities in our recipe and adjust as you go. It’s always simpler to make a shake thinner than it is to make it thicker!
Don’t Over-Blend!
The friction and heat from the blender’s motor can cause the ice cream to melt if you blend for too long. A quick blitz is all you need—just enough to combine everything and break down the biscuits. We find that leaving tiny pieces of Oreo adds a lovely, crunchy texture.
Creative Variations on the Classic Oreo Milkshake Recipe
Although the original recipe is a triumph in itself, it also serves as a brilliant canvas for your creativity. Here are some of our favourite variations for you to explore:
- Mint Oreo Milkshake: Introduce a few drops of peppermint extract or switch to a mint chocolate chip ice cream for a cool, refreshing twist.
- Peanut Butter Oreo Milkshake: Blend in a large tablespoon of smooth peanut butter for a rich, nutty, and even more decadent flavour profile.
- Coffee Oreo Milkshake: For a caffeine-infused boost, add a shot of cooled espresso or a teaspoon of instant coffee granules to the mix.
- Vegan & Dairy-Free Oreo Milkshake: This is a simple switch! Just opt for your preferred dairy-free vanilla ice cream (oat, almond, or soy-based are all great) and use a plant-based milk. The good news is that many varieties of Oreo are considered “accidentally vegan”!
If you have a fondness for biscuit-based desserts, you may also enjoy taking a look at our superb Almond Joy Cookie Recipe for another scrumptious treat.
Frequently Asked Questions (FAQ)
Here, we’ve compiled answers to some of the most frequently asked questions about creating the perfect Oreo cookies and cream milkshake.
Can I make an Oreo milkshake without a blender?
Absolutely, though it does take a little more work. Allow the ice cream to soften at room temperature for 10-15 minutes, until it becomes easy to stir. Put the Oreos into a resealable bag and crush them with a rolling pin. In a large bowl, whisk the softened ice cream and milk together energetically, then fold in the crushed Oreo pieces.
How do I make the milkshake thicker?
To achieve a thicker milkshake, the secret is to use less liquid. Begin with only a small amount of milk (about 60ml) and add more only if you feel it’s necessary. Using ice cream that is still quite firm and pre-chilled glasses also contributes to a lovely thick consistency.
Can I use different flavours of Oreos?
Of course! The variety of Oreo flavours is huge, offering many tasty possibilities. Golden Oreos, Mint Oreos, or Peanut Butter Oreos would all create wonderful milkshakes. Don’t hesitate to experiment with whichever ones you like best.
Can I prepare this milkshake in advance?
For the best possible taste and texture, we strongly advise serving the milkshake right after it’s been blended. If you attempt to store it in the freezer, it will become solid and you will lose that signature creamy texture. As it only takes five minutes to prepare, making it fresh is definitely the superior option.
Conclusion: Your New Favourite Treat Awaits!
And there you have it—our straightforward, reliable, and utterly scrumptious Oreo Milkshake Recipe. It is a timeless classic that delivers happiness in every single sip. With just three core ingredients and five minutes of your day, you can craft a café-standard treat from the cosiness of your own home. It’s the ideal way to make use of that tub of ice cream in the freezer and the last few biscuits in the packet.
We hope you feel inspired to experiment, perhaps by trying one of our variations, and to truly make this recipe your own. And if you’re on the hunt for another light and divine dessert to try, why not have a look at our celebrated Cloud Cake Recipe?
Over to you! Give this recipe a try and tell us how it went. Did you stick with the classic version, or did you invent a brand-new flavour combination? Feel free to leave a comment below or share your masterpieces with us on social media. Happy blending!


