Irresistible Mini Chocolate Peanut Butter Pies – Delicious & Easy!
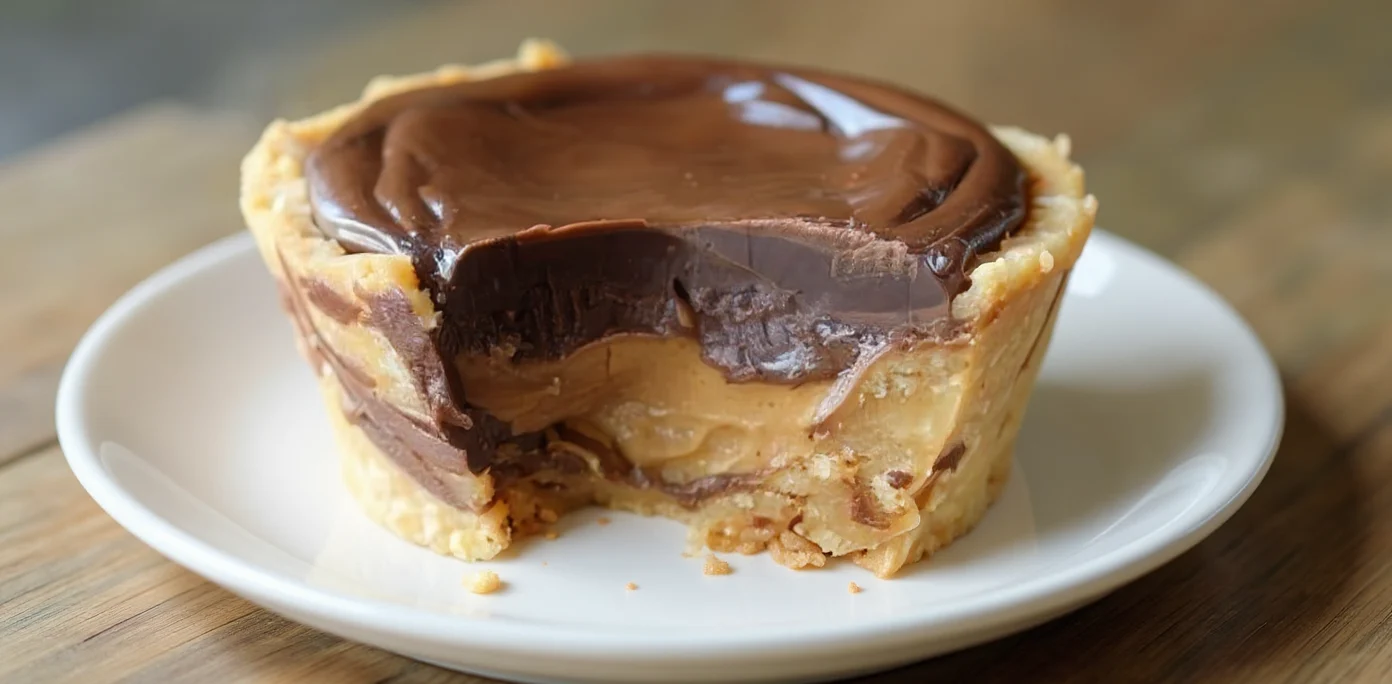
If you have been dreaming of a dessert that flawlessly marries rich, dark chocolate with creamy, smooth peanut butter, your search has ended. We have crafted what we believe is the ultimate recipe for irresistible mini chocolate peanut butter pies that are as effortless to prepare as they are wonderful to eat. These individual desserts are a guaranteed showstopper for any event, from a simple midweek treat to the star of a party dessert spread.
Come along with us as we walk you through each simple step, sharing our very best advice to ensure your mini pies turn out to be nothing less than spectacular. Prepare to discover your new favourite dessert!
Why You’ll Adore These Mini Chocolate Peanut Butter Pies
Before we even reach for the mixing bowls, let’s explore why this recipe is destined to become a staple in your collection. These little bites of joy are more than just a sweet treat; they are a versatile and universally loved answer to any dessert craving.
- Perfect Portions: The individual size means everyone gets their very own pie. This does away with messy slicing and serving, making them ideal for parties, gatherings, and easy portion control.
- No-Bake Brilliance: The filling and topping come together without any oven time, making this a superb recipe for warmer months or whenever you’d rather not heat up the kitchen. It is the pinnacle of no-bake chocolate peanut butter pies.
- Effortlessly Elegant: Don’t be fooled by their chic appearance. These individual chocolate peanut butter tarts are remarkably easy to assemble, yet they look as though they have come from a fancy bakery.
- Make-Ahead Magic: You can prepare these pies a day or two ahead of time, which is a fantastic help when planning an event. They taste even more delicious once the flavours have had time to mingle in the refrigerator.
- The Ultimate Flavour Combo: Let’s be frank, the timeless partnership of chocolate and peanut butter is a match made in culinary heaven. This recipe celebrates that perfect duo in the most delicious way possible.
The Essential Ingredients for Your Pies
Every fantastic dessert begins with quality components. For this recipe, we have organised the ingredients into three straightforward parts: the crisp crust, the velvety filling, and the rich ganache. Opting for high-quality ingredients will make a real difference to the final taste.
For the Chocolate Biscuit Base
- Chocolate Biscuits: 250g (like Oreos or Bourbon creams, filling included)
- Unsalted Butter: 85g, melted
For the Velvety Peanut Butter Filling
- Full-Fat Cream Cheese: 225g, softened to room temperature
- Smooth Peanut Butter: 250g (use a commercial brand like Sun-Pat, not an all-natural one that separates)
- Icing Sugar: 150g, sifted
- Vanilla Extract: 1 tsp
- Double Cream: 240ml, cold
For the Silky Chocolate Ganache
- Dark Chocolate: 120g (at least 50% cocoa solids), finely chopped
- Double Cream: 120ml
Step-by-Step Guide to Making Irresistible Mini Chocolate Peanut Butter Pies
Now, let’s get to the best bit! Follow our clear instructions below to create these perfect little pies. We suggest using a standard 12-hole muffin tin, lined with paper or silicone cases for easy removal.
Step 1: Create the Chocolate Biscuit Base
The foundation of our pie is a wonderfully crisp, chocolate base. Begin by putting the chocolate biscuits into a food processor and processing them into fine crumbs. If you don’t own a food processor, you can place them in a sealed bag and crush them with a rolling pin. Tip the crumbs into a bowl and pour over the melted butter.
Mix with a fork until the crumbs are thoroughly moistened and have the consistency of damp sand. Share the mixture equally between the 12 muffin cases, pressing it down firmly to form the base. A small glass or the back of a spoon is great for creating a compact, even layer. Pop the tin in the refrigerator to chill for at least 30 minutes while you get on with the filling.
Step 2: Prepare the Creamy Peanut Butter Filling
This is where the real magic happens. In a large bowl, use an electric whisk to beat the softened cream cheese with the smooth peanut butter until they are fully combined and wonderfully fluffy. It’s vital that your cream cheese is at room temperature to ensure a silky-smooth texture without lumps. Sift in the icing sugar, add the vanilla extract, and beat again on a low speed to combine, then increase the speed to medium until smooth. In a separate bowl, whip the cold double cream until it forms stiff peaks, taking care not to overwhip. Gently fold the whipped cream into the peanut butter mixture in two or three stages. Use a spatula to maintain a light, airy consistency. Spoon or pipe this glorious filling over your chilled bases and smooth the tops.
Step 3: Make the Luxurious Chocolate Ganache
A velvety ganache provides the perfect finishing touch for these pies. Place your finely chopped dark chocolate into a heatproof bowl. In a small saucepan, gently warm the double cream over a medium-low heat until you see small bubbles forming at the edges—it’s important not to let it boil. Pour the hot cream directly over the chocolate and leave it to stand, undisturbed, for five minutes. This allows the chocolate to melt gently. After five minutes, slowly stir the mixture with a whisk or spatula, beginning in the centre and moving outwards, until you have a glossy, smooth, and fully incorporated ganache. The chocolate you choose really makes a difference here; for a comprehensive guide on chocolate varieties, take a look at this glossary of chocolate types from BBC Good Food.
Step 4: Assemble and Chill Your Mini Pies
Take your muffin tin out of the fridge. Carefully spoon about a tablespoon of the slightly cooled ganache onto each pie, using the back of the spoon to gently spread it out to the edges. Now for the most challenging part: waiting! Return the tin to the fridge to chill for a minimum of 4 hours, or ideally overnight. This step allows the pies to set firmly, creating distinct layers and achieving the perfect texture. Once fully set, they are ready to serve and enjoy.
Pro Tips for Pie Perfection
We have made this recipe more times than we can count, and we’ve learned a few helpful tricks along the way. Follow our tips to ensure your mini pies turn out flawlessly every time.
- Room Temperature is Key: To achieve the smoothest, creamiest filling, it is essential that your cream cheese is properly softened. We recommend taking it out of the fridge at least an hour before you plan to start.
- Choose Your Peanut Butter Wisely: We find that a standard, smooth commercial peanut butter yields the best results. Natural varieties can sometimes separate, which might lead to a greasy or grainy filling.
- Don’t Overmix: When you fold the whipped cream into the peanut butter mixture, use a gentle touch! You want to preserve all the air you’ve incorporated to achieve a light, mousse-like texture.
- Piping for Precision: For exceptionally neat layers, consider using a piping bag to transfer the filling onto the crusts. A large round nozzle is ideal, but even a food-safe plastic bag with the corner snipped off will work wonders.
- Garnish Generously: Just before serving, take your pies to the next level with a final flourish. A sprinkle of flaky sea salt (which beautifully enhances the chocolate), a few chopped roasted peanuts, or even a miniature peanut butter cup on top would be perfect.
Customising Your Individual Chocolate Peanut Butter Tarts
This easy peanut butter pie recipe serves as a wonderful base for your own creative touches. Don’t hesitate to experiment with different flavours and textures to make these pies uniquely yours.
Crust Variations
If chocolate biscuits aren’t your favourite, that’s perfectly fine! A base made from digestive biscuits, Biscoff biscuits, or even a classic shortbread would be just as tasty. Simply maintain the same ratio of crumbs to melted butter.
Filling Twists
For a lovely surprise, you could spread a thin layer of salted caramel or raspberry jam over the biscuit base before adding the peanut butter filling. If you enjoy experimenting with dessert textures and flavours, we think you’ll also love our Almond Joy Cookie Recipe.
Topping Ideas
If you’d prefer a lighter topping, you can omit the ganache entirely and instead opt for a simple swirl of sweetened whipped cream, finished with a dusting of cocoa powder or some fine chocolate shavings.
Storage and Make-Ahead Instructions
These mini pies are ideal for preparing in advance. You can store them in an airtight container in the refrigerator, where they will stay fresh and delicious for up to 5 days. We actually find their flavour deepens and improves by the second day!
They also freeze exceptionally well for longer-term storage. To do this, arrange the set pies on a baking tray and freeze until they are solid. Then, transfer them to a freezer-safe container or bag. They’ll keep for up to 2 months. Simply let them thaw in the fridge for a few hours before you wish to serve them. If you’re planning a day of batch baking, our Cloud Cake Recipe is another excellent make-ahead dessert that also freezes beautifully.
Frequently Asked Questions (FAQ)
Can I make a single large pie instead of mini ones?
Of course! This recipe is easily adapted for a 23cm (9-inch) tart tin, preferably one with a removable base. Just press the crumb mixture into the bottom and up the sides of the tin and then continue with the rest of the instructions. You might need to extend the final chilling time to around 6-8 hours to ensure it has set completely.
Is it possible to use crunchy peanut butter?
Yes, you absolutely can! If you enjoy that extra texture, go ahead and swap the smooth peanut butter for a crunchy variety. The filling will be equally delicious, just with little nutty pieces throughout.
How long will these pies keep in the fridge?
When stored properly in a sealed container, these pies will remain fresh in the refrigerator for up to five days. The biscuit base might soften a little over time, but they will still taste wonderful.
Can this recipe be made gluten-free?
The recipe as written contains gluten because of the biscuits. However, it’s very simple to adapt. Just use your favourite brand of gluten-free chocolate sandwich biscuits for the base. The filling and ganache ingredients are naturally gluten-free.
Which type of chocolate is best for the ganache?
We strongly recommend using a good-quality dark chocolate with a cocoa content of 50-70%. This lends a rich, deep flavour that wonderfully counteracts the sweetness of the filling. We’d advise against using chocolate chips, as they often contain stabilisers that can prevent them from melting into a perfectly smooth ganache.
Your New Favourite Go-To Dessert
And there you have it—our simple yet exceptionally elegant recipe for mini chocolate peanut butter pies that we’re sure you’ll find irresistible. With their crisp base, creamy filling, and decadent ganache, they truly tick all the boxes for a perfect dessert. This recipe is straightforward enough for a novice baker but impressive enough for any special celebration.
We are genuinely excited for you to give this recipe a go and to share these wonderful little treats with your nearest and dearest. We would love to hear how you get on, so please leave us a comment and a rating below. Happy baking!

