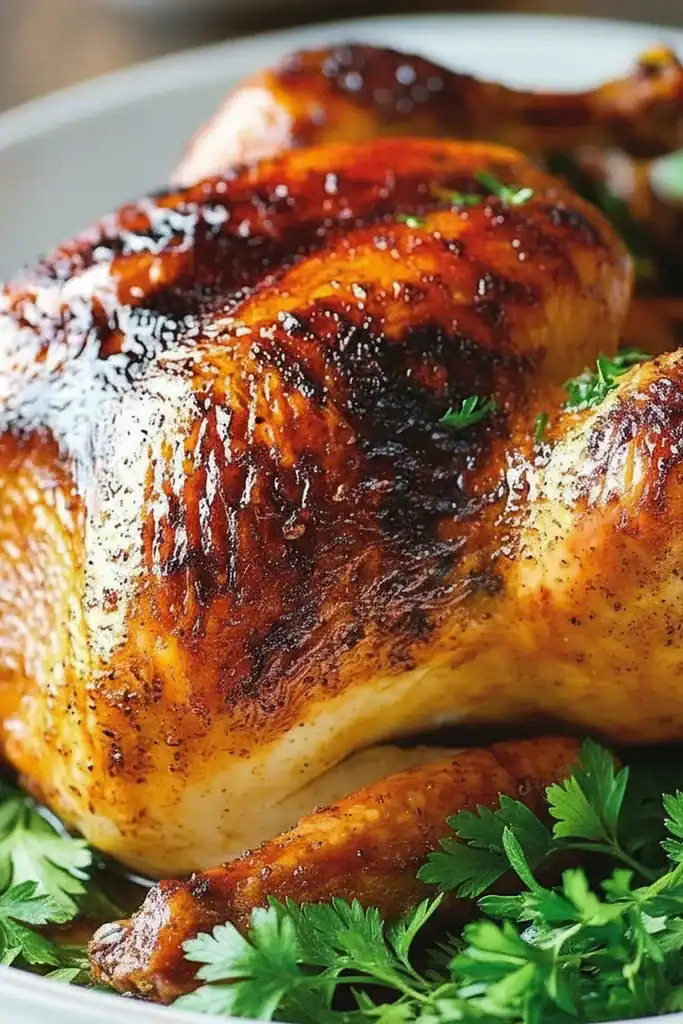
Juicy Rotisserie Chicken Recipe Dinner

There is something truly special about the aroma of a chicken slowly turning on a rotisserie, its skin crackling and deepening to a gorgeous mahogany brown. It’s a scent that promises a delicious meal is on its way, one that fills the house with warmth and anticipation. This rotisserie chicken recipe is the result of many, many trials in my kitchen to replicate that perfect balance of incredibly juicy meat and shatteringly crisp skin you find at the best delis and markets. The secret, as we’ll discover, lies not in a complicated marinade but in a simple, patient technique.
The core inspiration for this method came from a little family-run restaurant I visited in a sun-drenched village in Spain. They served the most magnificent roasted chicken, and when I asked for the secret, the owner just smiled and said, “Salt and time.” That philosophy is at the heart of this recipe. We use a dry brine to draw moisture from the skin, ensuring it becomes unbelievably crisp, while the slow, even heat of the rotisserie keeps the meat tender and succulent. It’s a method that turns a simple chicken into something quite spectacular.
This recipe is ideal when you want a standout centrepiece for a Sunday lunch or a family get-together without spending hours actively cooking. Most of the magic happens while the chicken rests in the fridge and then spins on the rotisserie. The result is a truly memorable chicken recipe that always gets compliments and has become a firm favourite in my home.
Recipe Overview
This rotisserie chicken recipe focuses on a flavourful dry rub and an overnight dry brine to produce succulent meat and exceptionally crispy skin. The blend of smoked paprika, garlic, and thyme creates a savoury crust that seals in all the juices. I’ve found that letting the chicken brine for the full 24 hours makes a noticeable difference to the skin’s texture, so I highly recommend it if you have the time.
- Prep Time: 15 minutes
- Brining Time: 12 to 24 hours
- Cook Time: 1 hour 30 minutes
- Total Time: 1 hour 45 minutes (plus brining)
- Servings: 4-6 people
- Difficulty: Medium
Why You’ll Love This Rotisserie Chicken Recipe
- Phenomenal Flavour and Texture: The overnight dry brine works wonders, resulting in a salty, savoury skin that is genuinely crispy, while the meat underneath remains moist and seasoned all the way through. The smoked paprika adds a lovely, subtle warmth.
- Mostly Hands-Off Cooking: After a quick 15-minute prep, the fridge and the rotisserie do all the hard work. This frees you up to focus on side dishes or simply relax.
- A Flexible Recipe: You can easily adapt the spice rub to your taste. Swap the thyme for rosemary, add a pinch of cayenne for some heat, or use a lemon-and-herb blend for a fresher flavour. It’s a brilliant foundation for your own creations.
- Works Wonderfully for Sunday Roasts: This is my go-to for a classic Sunday dinner. It feels special but is straightforward to execute. It’s also brilliant for meal prepping; the leftovers are fantastic in salads, sandwiches, or even our Garlic Parmesan Chicken Pasta Recipe.
- Family Tested and Approved: Everyone in my family looks forward to rotisserie chicken night. The children love the “crispy bits,” and my husband always claims the first drumstick. It’s one of those meals that brings everyone to the table with a smile.
Ingredients You’ll Need
For this recipe, starting with a good quality, free-range chicken makes all the difference to the final flavour. When it comes to the dry rub, I always use a good quality hot smoked paprika, as it provides a deep, smoky flavour that regular paprika just can’t match.
- 1 whole chicken (approx. 1.8-2kg)
- 2 tbsp coarse sea salt (I prefer Maldon for its flaky texture)
- 1 tbsp soft light brown sugar
- 2 tsp smoked paprika (hot or sweet, to your preference)
- 2 tsp garlic powder
- 1 tsp onion powder
- 1 tsp freshly ground black pepper
- 1 tsp dried thyme
- 1 whole lemon
- 4-5 whole garlic cloves, lightly crushed
- A few fresh thyme or rosemary sprigs
- 2 tbsp olive oil
Sara’s Tip: Don’t be tempted to skip the brown sugar. It doesn’t make the chicken sweet; instead, it helps to balance the salt and aids in achieving that beautiful, deep golden-brown caramelisation on the skin.
How to Make Rotisserie Chicken Recipe
The process is all about preparation. Getting the chicken properly prepped and brined is the key to success. Once it’s on the spit, you can largely leave it to cook, checking on it occasionally.
- Prepare the Chicken: First, remove the chicken from its packaging. Take out any giblets from the cavity and set them aside for making stock later if you wish. Pat the entire chicken, inside and out, thoroughly dry with paper towels. This step is absolutely crucial for crispy skin, so don’t rush it.
- Make the Dry Rub: In a small bowl, combine the coarse sea salt, brown sugar, smoked paprika, garlic powder, onion powder, black pepper, and dried thyme. Mix well until everything is evenly distributed.
- Apply the Rub: Place the chicken on a large tray or baking sheet. Sprinkle the dry rub all over the outside of the chicken, making sure to cover it completely. Gently lift the skin over the breast and thighs and push some of the rub directly onto the meat underneath. This helps flavour the chicken more deeply.
- The Dry Brine: Place the seasoned chicken, uncovered, on a rack set over a tray and refrigerate for at least 12 hours, or ideally up to 24 hours. This allows the salt to penetrate the meat and, importantly, dries out the skin.
- Prepare for the Rotisserie: When you’re ready to cook, remove the chicken from the fridge. Prick the lemon all over with a fork, then place it inside the chicken’s cavity along with the crushed garlic cloves and fresh thyme sprigs.
- Truss the Chicken: Truss the chicken tightly with butcher’s twine to secure the legs and wings. This ensures the chicken is compact and will rotate evenly without any parts flopping around and burning. If you’re unsure how to do this, there are great visual guides available from places like Serious Eats. Securely thread the chicken onto the rotisserie spit, ensuring it’s centred and the forks are firmly in place.
- Set Up for Cooking: Prepare your barbecue or oven for rotisserie cooking with indirect heat, aiming for a consistent temperature of around 175-180°C (160°C fan). Place a drip tray with a little water in it underneath the chicken to catch the drippings and prevent flare-ups. Brush the chicken all over with olive oil.
- Cook the Chicken: Start the rotisserie motor and let the chicken cook for approximately 1 hour and 30 minutes, or until the juices run clear when a thigh is pierced. I find that a meat thermometer is the most reliable way to check for doneness. The internal temperature should reach 74°C at the thickest part of the thigh, as recommended by the Food Standards Agency (FSA).
- Rest Before Carving: Carefully remove the hot spit from the cooker. Let the chicken rest on a cutting board, still on the spit if it’s easier, for at least 15-20 minutes before carving. This allows the juices to redistribute throughout the meat, keeping it moist. It’s tempting to carve straight away, but this rest is non-negotiable for a juicy chicken.
Tips From My Kitchen
- Temperature Control is Key: Maintaining a steady, moderate heat is vital. If the temperature is too high, the skin will burn before the meat is cooked through. If it’s too low, you won’t achieve that perfectly crisp skin. Use a reliable thermometer for your grill or oven.
- The Secret Step: The overnight, uncovered dry brine in the fridge is the single most important step for that incredible skin. I learned that this process, known as osmosis, not only seasons the meat but also creates a very dry surface on the skin, which is exactly what you need for it to get super crisp during cooking.
- Make-Ahead Magic: You can apply the dry rub and leave the chicken to brine in the fridge up to 24 hours in advance. This makes it a great recipe for entertaining, as the main prep is done the day before.
- Storing Leftovers: Leftover rotisserie chicken is a wonderful thing! Once completely cool, store the meat in an airtight container in the fridge for up to 3-4 days. It’s ideal for sandwiches, salads, or quick weeknight meals like our Sticky Chicken Rice Bowls.
Equipment You’ll Need
- A rotisserie attachment for your barbecue or oven
- Butcher’s twine
- An instant-read digital meat thermometer
- A large tray or baking sheet
- Small mixing bowl
- Paper towels
What to Serve With Rotisserie Chicken Recipe
This chicken is versatile enough to be served with a wide range of side dishes. Here are a few of my favourite pairings:
- Classic Roast Potatoes and Greens: You can’t go wrong with crispy, fluffy roast potatoes and some simple steamed green beans or tenderstem broccoli. The chicken drippings can be used to make a fantastic gravy.
- Creamy Coleslaw and Corn on the Cob: For a more relaxed, barbecue-style meal, serve the chicken with a tangy homemade coleslaw and buttery grilled corn.
- A Crisp White Wine: A chilled glass of Sauvignon Blanc or an unoaked Chardonnay cuts through the richness of the chicken beautifully. For red wine lovers, a light-bodied Pinot Noir is an excellent choice.
Frequently Asked Questions
Rotisserie Chicken Recipe
Ingredients
Method
- Prepare the Chicken: First, remove the chicken from its packaging. Take out any giblets from the cavity and set them aside for making stock later if you wish. Pat the entire chicken, inside and out, thoroughly dry with paper towels. This step is absolutely crucial for crispy skin, so don't rush it.
- Make the Dry Rub: In a small bowl, combine the coarse sea salt, brown sugar, smoked paprika, garlic powder, onion powder, black pepper, and dried thyme. Mix well until everything is evenly distributed.
- Apply the Rub: Place the chicken on a large tray or baking sheet. Sprinkle the dry rub all over the outside of the chicken, making sure to cover it completely. Gently lift the skin over the breast and thighs and push some of the rub directly onto the meat underneath. This helps flavour the chicken more deeply.
- The Dry Brine: Place the seasoned chicken, uncovered, on a rack set over a tray and refrigerate for at least 12 hours, or ideally up to 24 hours. This allows the salt to penetrate the meat and, importantly, dries out the skin.
- Prepare for the Rotisserie: When you're ready to cook, remove the chicken from the fridge. Prick the lemon all over with a fork, then place it inside the chicken's cavity along with the crushed garlic cloves and fresh thyme sprigs.
- Truss the Chicken: Truss the chicken tightly with butcher's twine to secure the legs and wings. This ensures the chicken is compact and will rotate evenly without any parts flopping around and burning. If you're unsure how to do this, there are great visual guides available from places like Serious Eats. Securely thread the chicken onto the rotisserie spit, ensuring it's centred and the forks are firmly in place.
- Set Up for Cooking: Prepare your barbecue or oven for rotisserie cooking with indirect heat, aiming for a consistent temperature of around 175-180°C (160°C fan). Place a drip tray with a little water in it underneath the chicken to catch the drippings and prevent flare-ups. Brush the chicken all over with olive oil.
- Cook the Chicken: Start the rotisserie motor and let the chicken cook for approximately 1 hour and 30 minutes, or until the juices run clear when a thigh is pierced. I find that a meat thermometer is the most reliable way to check for doneness. The internal temperature should reach 74°C at the thickest part of the thigh, as recommended by the Food Standards Agency (FSA).
- Rest Before Carving: Carefully remove the hot spit from the cooker. Let the chicken rest on a cutting board, still on the spit if it's easier, for at least 15-20 minutes before carving. This allows the juices to redistribute throughout the meat, keeping it moist. It's tempting to carve straight away, but this rest is non-negotiable for a juicy chicken.
Notes
I hope you give this rotisserie chicken recipe a try. There’s a real sense of satisfaction in watching it turn, knowing you’re about to enjoy a meal that is both simple in its ingredients and magnificent in its results. If you make it, I’d love to hear how it turned out for you. Please leave a comment below and let me know! Happy cooking,
Sara