Homemade Muddy Buddies Puppy Chow
There’s a certain magic to snacks that bring back a flood of happy memories. For me, Homemade Muddy Buddies are at the top of that list. This isn’t just a simple mix of cereal and chocolate; it’s a delightful concoction of textures and flavours that we find utterly irresistible. Imagine crisp, grid-like cereal squares, each one lovingly coated in a rich, melted blend of dark chocolate and creamy peanut butter, then tossed in a snowy cloud of icing sugar. The result is a sweet, salty, crunchy snack that somehow disappears from the bowl at an alarming rate. Friends always ask me for this recipe after trying it at parties, and I’m always so happy to share it.
What makes this particular recipe for Homemade Muddy Buddies so special is the balance. We’re not aiming for cloying sweetness here. By using good-quality dark chocolate and just the right amount of peanut butter, we achieve a depth of flavour that satisfies adults just as much as it delights children. It’s the kind of treat that works beautifully for a family film night on the sofa, a fun addition to a party spread, or even packaged up in little bags as a thoughtful homemade gift for friends and neighbours during the holidays. It’s a straightforward recipe that delivers big on flavour and fun.
Recipe Overview
This recipe guides you through creating the classic chocolate and peanut butter snack known as Muddy Buddies (or Puppy Chow in the US). You can expect a wonderfully crunchy texture from the cereal, a rich and slightly salty coating from the melted chocolate and peanut butter, and a sweet, powdery finish from the icing sugar. I’ve tested this with various types of chocolate, and a good dark chocolate with around 50-60% cocoa solids provides the best flavour counterpoint to the sweetness.
- Prep Time: 10 minutes
- Cook Time: 2 minutes
- Total Time: 12 minutes (plus 15 minutes cooling)
- Servings: 10-12 people
- Difficulty: Easy
Why You’ll Love This Homemade Muddy Buddies Recipe
- Genuine Flavour: The combination of smooth, salty peanut butter and rich dark chocolate creates a coating that’s deeply satisfying without being overly sweet. The vanilla extract adds a lovely aromatic warmth that ties it all together.
- Ready in Under 20 Minutes: From gathering your ingredients to having them spread out to cool, this entire snack comes together in about 15-20 minutes. It’s a fantastic recipe when you need a tasty treat without a long wait.
- Flexible Recipe: You can easily adapt this to your taste. Try using white chocolate for a “Snowy Buddies” version, adding a teaspoon of cinnamon to the icing sugar for warmth, or tossing in a handful of mini pretzels for an extra salty crunch.
- Great for Sharing: This recipe makes a large batch, making it ideal for taking to gatherings, filling party bowls, or portioning out for lunchbox snacks throughout the week.
- Family Tested: My kids absolutely adore making this with me. The final shaking step is their favourite part, and the end result is a snack that the whole family gathers around to enjoy.
Ingredients You’ll Need
For the best results, I recommend using a processed smooth peanut butter like Sun-Pat or Skippy. Natural peanut butters can separate when melted and result in an oily coating. The foundation of this snack is a grid-shaped cereal, which has plenty of nooks and crannies for the delicious coating to cling to. In the UK, Shreddies work well, though the original American recipe uses Chex cereal.
- 250g grid-shaped rice or corn cereal (such as Chex or Shreddies)
- 200g good-quality dark chocolate chips (50-60% cocoa)
- 120g smooth peanut butter
- 60g unsalted butter, cubed
- 1 tsp vanilla extract
- 1/4 tsp fine sea salt
- 200g icing sugar
Sara’s Tip: Don’t skip the pinch of salt! It might seem minor, but it really enhances the chocolate and peanut butter flavours and stops the final snack from tasting flat or overly sweet.
How to Make Homemade Muddy Buddies
The process for making this snack is very straightforward. The key is to work gently when mixing so you don’t crush the cereal, and to allow the chocolate mixture to cool slightly before adding the icing sugar for that perfect powdery coating.
- Prepare Your Cereal: Measure the cereal into a very large mixing bowl. Make sure the bowl is big enough to allow for easy stirring later on without spilling.
- Melt the Coating: In a separate, medium-sized microwave-safe bowl, combine the dark chocolate chips, peanut butter, and cubed unsalted butter.
- Microwave with Care: Heat the mixture in the microwave on high for 30 seconds. Remove and stir well. Repeat in 20-second intervals, stirring thoroughly each time, until the mixture is completely smooth and melted. This gentle heating prevents the chocolate from seizing. Alternatively, you can melt the ingredients in a heatproof bowl set over a saucepan of simmering water.
- Add Flavour: Once the mixture is perfectly smooth, stir in the vanilla extract and the fine sea salt until fully combined.
- Coat the Cereal: Pour the warm chocolate and peanut butter mixture over the cereal in the large bowl. Using a soft spatula, gently fold and stir until every piece of cereal is evenly coated. Be careful not to crush the cereal squares.
- The Crucial Cool Down: Let the coated cereal sit for 2-3 minutes. This allows the chocolate to cool just enough so it doesn’t melt the icing sugar on contact. I used to struggle with this dish until I discovered this technique; my old batches were always a bit clumpy because I rushed this step.
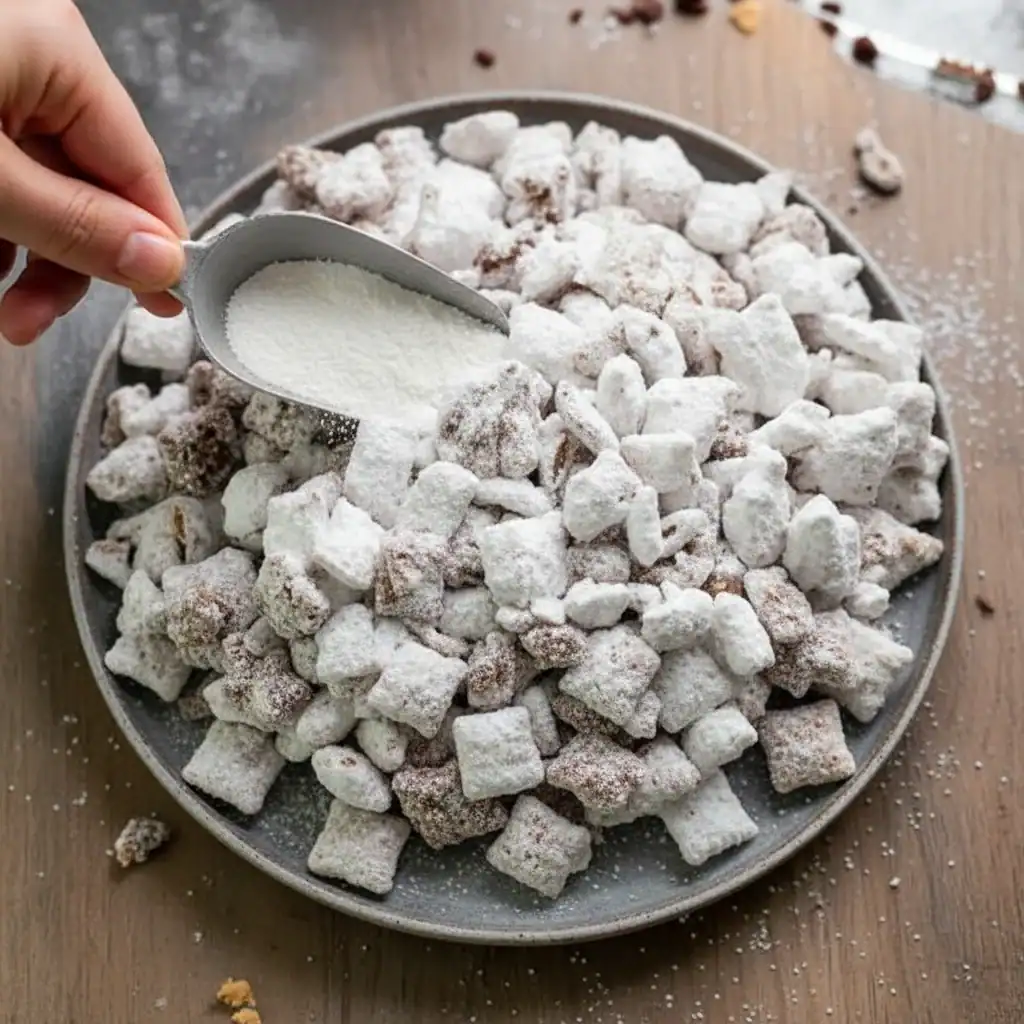
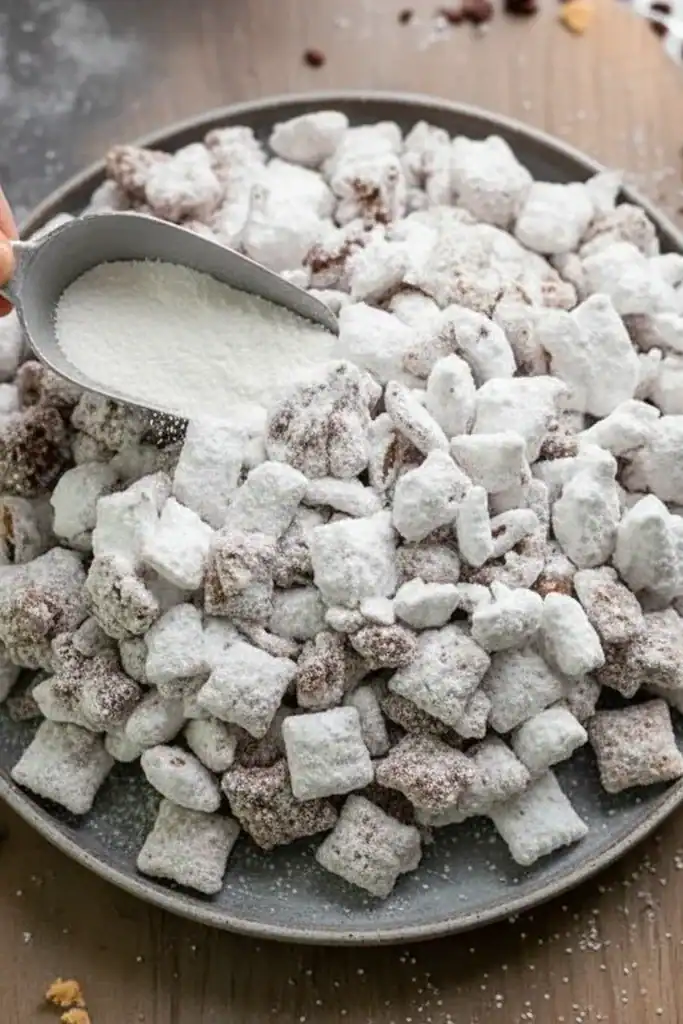
- Shake with Icing Sugar: Add the icing sugar to a very large, sturdy food-safe bag or a container with a tight-fitting lid. Carefully transfer the coated cereal into the bag. Seal it securely, leaving some air inside.
- Get Shaking: Shake the bag vigorously for 30-60 seconds, turning it over and around until every single piece of cereal is generously coated in a white layer of icing sugar.
- Set and Enjoy: Pour the Muddy Buddies onto a large baking tray lined with parchment paper. Spread them into a single layer and let them cool completely for about 15-20 minutes, which will allow the chocolate to set and the coating to become firm and dry. Once set, transfer to an airtight container.
Tips From My Kitchen
- Temperature Control: When melting your chocolate, patience is key. Overheating will cause it to become grainy and “seize.” The science behind this is fascinating, but the simple takeaway is to use short bursts of heat and stir well in between.
- The Secret Step: Don’t underestimate the 2-3 minute cooling period after coating the cereal. I learned that adding the hot, chocolate-coated cereal directly to the icing sugar results in a paste-like coating rather than a light, powdery one. This small pause makes all the difference.
- Make-Ahead: This snack is brilliant for making ahead. You can prepare it up to a week in advance, making it great for party prep or homemade gifts. Just ensure it’s stored correctly.
- Storage: Keep your Homemade Muddy Buddies in a completely airtight container at room temperature. They will stay fresh and crunchy for up to 7 days. I do not recommend refrigerating them, as condensation can make them soft.
Equipment You’ll Need
- A very large mixing bowl
- A medium microwave-safe bowl
- A silicone spatula or wooden spoon
- A large, sealable food bag (a 5-litre one is ideal) or a large container with a lid
- A large baking tray
- Parchment paper
Common Mistakes to Avoid
- Over-mixing the Cereal: Cereal squares are delicate. When you’re coating them with the chocolate mixture, use a gentle folding motion with a spatula. Vigorous stirring will break the cereal into small crumbs.
- Using Hot Chocolate Mixture: As mentioned, if the chocolate and peanut butter coating is too hot when it meets the icing sugar, the sugar will dissolve into it, creating a sticky, wet glaze instead of a dry, powdery coat. Let it cool for a few minutes first.
- Skipping the Spreading Step: Don’t leave the finished Muddy Buddies in a clump in the bag or a bowl to cool. Spreading them on a baking tray in a single layer ensures they cool evenly and don’t form one giant, sticky cluster.
Delicious Variations to Try
Once you’ve mastered the classic recipe, it’s so much fun to experiment. Here are a few variations we love in our house:
- Mint Chocolate Version: Use mint-flavoured dark chocolate chips and a few drops of peppermint extract instead of vanilla. This is especially festive around Christmas time.
- Vegan/Dairy-Free Option: This recipe is easily made vegan. Simply use dairy-free butter (a block-style one works best) and ensure your dark chocolate is dairy-free.
- Add Some Crunch: For more texture, toss in about 100g of mini pretzels, salted peanuts, or even chocolate-coated sweets like M&Ms into the mix right before the final shake.
What to Serve With Homemade Muddy Buddies
Honestly, this snack is a star all on its own, usually disappearing straight from the bowl! However, if you’re building a snack table for a party, here are a few ideas:
- A Fresh Fruit Platter: The sweetness and acidity of fresh berries, melon slices, and grapes provide a wonderful contrast to the rich chocolatey snack.
- Salty Crisps: A bowl of simple, salted crisps or popcorn offers a savoury counterpoint that makes the Muddy Buddies taste even more decadent.
- A Glass of Cold Milk: A classic pairing that never fails. The cold milk is so refreshing alongside the sweet, crunchy cereal.
Frequently Asked Questions
Homemade Muddy Buddies
Ingredients
Method
- Prepare Your Cereal: Measure the cereal into a very large mixing bowl. Make sure the bowl is big enough to allow for easy stirring later on without spilling.
- Melt the Coating: In a separate, medium-sized microwave-safe bowl, combine the dark chocolate chips, peanut butter, and cubed unsalted butter.
- Microwave with Care: Heat the mixture in the microwave on high for 30 seconds. Remove and stir well. Repeat in 20-second intervals, stirring thoroughly each time, until the mixture is completely smooth and melted. This gentle heating prevents the chocolate from seizing. Alternatively, you can melt the ingredients in a heatproof bowl set over a saucepan of simmering water.
- Add Flavour: Once the mixture is perfectly smooth, stir in the vanilla extract and the fine sea salt until fully combined.
- Coat the Cereal: Pour the warm chocolate and peanut butter mixture over the cereal in the large bowl. Using a soft spatula, gently fold and stir until every piece of cereal is evenly coated. Be careful not to crush the cereal squares.
- The Crucial Cool Down: Let the coated cereal sit for 2-3 minutes. This allows the chocolate to cool just enough so it doesn't melt the icing sugar on contact. I used to struggle with this dish until I discovered this technique; my old batches were always a bit clumpy because I rushed this step.
- Shake with Icing Sugar: Add the icing sugar to a very large, sturdy food-safe bag or a container with a tight-fitting lid. Carefully transfer the coated cereal into the bag. Seal it securely, leaving some air inside.
- Get Shaking: Shake the bag vigorously for 30-60 seconds, turning it over and around until every single piece of cereal is generously coated in a white layer of icing sugar.
- Set and Enjoy: Pour the Muddy Buddies onto a large baking tray lined with parchment paper. Spread them into a single layer and let them cool completely for about 15-20 minutes, which will allow the chocolate to set and the coating to become firm and dry. Once set, transfer to an airtight container.
Notes
I really hope you give this Homemade Muddy Buddies recipe a try. It’s a joy to make and even more of a joy to eat and share. After you’ve had a delicious savoury meal, perhaps something like my Lemon Garlic Chicken, this is the perfect sweet treat to settle down with for the evening. Let me know how you get on in the comments below – I’d love to hear about any fun variations you create!
– Sara


