How to Make Perfect Homemade Gumdrops: Your Ultimate Guide
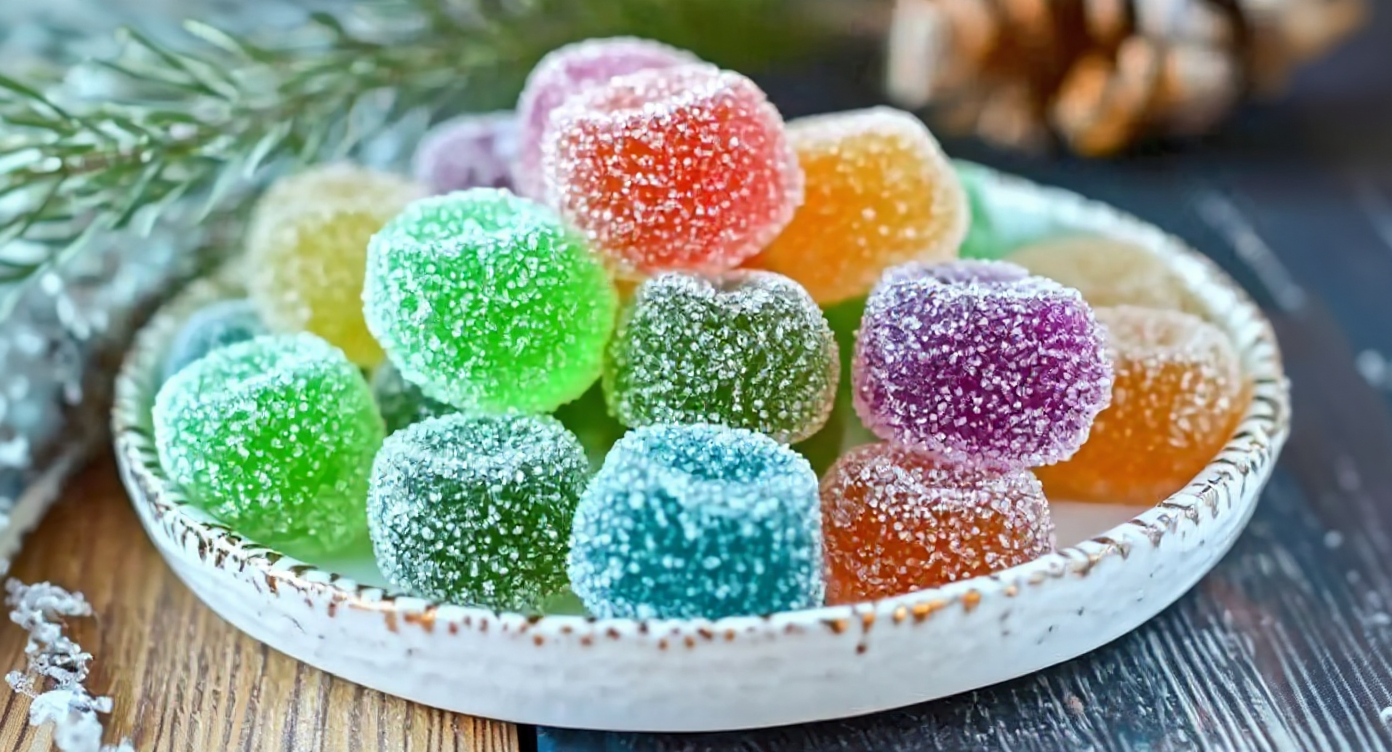
Can you recall the wonder of gazing into a sweet shop jar, brimming with a kaleidoscope of shimmering, sugar-coated jewels? Have you ever thought about recreating that little bit of magic within your own home? Well, we’re here to tell you that you absolutely can! Crafting your own Homemade Gumdrops is not just achievable, it’s a genuinely delightful experience. It’s a charming process that turns a handful of simple ingredients into vibrant, chewy sweets that taste far superior to any shop-bought alternative. We are here to accompany you on every step of this journey, ensuring your foray into confectionery is a sweet success.
Why You Should Make Your Own Gumdrops
Dipping your toes into the world of sweet-making might seem a little intimidating, but the rewards of this recipe are too tempting to resist. When we create our own gumdrops, we are in complete control of the final product. We get to select the flavours, fine-tune the colours, and know exactly what goes into them. This means no unpronounceable preservatives or artificial additives! It is also a wonderfully enjoyable activity to do with the family, creating lasting memories alongside delicious confections. Just imagine presenting a lovely jar of your own handcrafted gumdrops as a gift – it’s a personal and heartfelt gesture that anyone would adore.
Essential Equipment for Your Gumdrop Adventure
Before we get to the recipe itself, let’s make sure we have our equipment ready. Being properly prepared makes the entire process seamless and much more fun. You most likely have these items in your kitchen already:
- A heavy-bottomed saucepan: This is vital for distributing heat evenly across the base, which prevents the sugar syrup from burning.
- A whisk: Necessary for ensuring the gelatine and sugar dissolve smoothly, leaving you with a perfectly clear, lump-free mixture.
- Silicone moulds or a baking tray: Silicone moulds in charming shapes are ideal for creating professional-looking sweets. As an alternative, a small, lightly greased baking tray (about 20x20cm or 8×8 inches) works perfectly for making classic, square-cut gumdrops.
- A candy thermometer: Although not absolutely mandatory for this recipe, a candy thermometer provides precision that guarantees the ideal texture. We really do recommend using one if possible.
- Measuring cups and spoons: When it comes to making sweets, accuracy is paramount!
Gathering Your Ingredients for Homemade Gumdrops
The true charm of this DIY gumdrop recipe is its wonderful simplicity. We only need a few common kitchen ingredients to craft these tasty little treasures. Here is the list of what you will require:
- Cold Water: This is used to ‘bloom’ the gelatine and also forms the base of the sugar syrup. We will need 240ml (1 cup) in total, divided.
- Unflavoured Gelatine: This is the key ingredient that provides gumdrops with their distinctive chewy texture. We need 3 packets (which is about 21g or 3 tablespoons).
- Granulated Sugar: This is the main sweetening agent. You will need 400g (2 cups) for the gumdrop base, plus some extra for the final coating.
- Liquid Glucose or Light Corn Syrup: This is our secret weapon for preventing crystallisation, ensuring your gumdrops have a smooth, chewy texture rather than a grainy one. We suggest using 160ml (2/3 cup).
- Food Colouring: Gel or liquid food colouring will make your gumdrops visually stunning. You can use as much or as little as you wish to get the perfect hue.
- Flavouring Extracts: This is where your creativity can shine! Extracts like lemon, orange, raspberry, or lime all work beautifully. You will need around 1-2 teaspoons, depending on their potency.
The Ultimate DIY Gumdrop Recipe: A Step-by-Step Guide
Are you ready to start? We have organised the method into simple, clear steps. Just follow along with us, and you’ll have a delightful batch of perfect gumdrops before you know it.
- Prepare Your Moulds: Start by lightly greasing your silicone moulds or a 20x20cm (8×8 inch) baking tray with a neutral-tasting oil or a little cooking spray. This simple step ensures your gumdrops can be removed easily later on.
- Bloom the Gelatine: Into a small bowl, pour 120ml (1/2 cup) of the cold water. Sprinkle the three packets of gelatine powder evenly across the water’s surface. Allow it to stand for 5-10 minutes without touching it. During this time, the gelatine will soak up the water and ‘bloom’, transforming into a thick, jelly-like consistency. This is a crucial step for achieving a smooth final product.
- Create the Sugar Syrup: As the gelatine blooms, we’ll make the syrup. Combine the 400g of granulated sugar, 160ml of liquid glucose, and the other 120ml (1/2 cup) of water in your heavy-bottomed saucepan. Set this over a medium heat.
- Heat Gently: Stir the syrup mixture constantly just until you can see that all the sugar has dissolved. Once it’s fully dissolved, you can stop stirring. If you’re using a candy thermometer, clip it onto the side of the saucepan. Allow the mixture to come to a gentle boil and cook until it registers 115°C (240°F), which is known as the ‘soft-ball’ stage in confectionery. Without a thermometer, just let it boil gently for around 8-10 minutes.
- Combine and Dissolve: Take the saucepan off the heat with care. Now, add the bloomed gelatine to the hot syrup. Whisk gently but thoroughly until the gelatine has completely melted into the syrup, leaving you with a clear, smooth liquid.
- Add Flavour and Colour: Now, let the mixture cool for just a few minutes. Adding your flavourings while it’s piping hot can weaken their taste. Once it has cooled slightly, stir in your chosen flavouring extract along with a few drops of food colouring. If you’re planning to make different flavours from one batch, now is the time to divide the mixture into separate bowls before colouring and flavouring each one.
- Pour and Set: Gently pour the liquid gumdrop mixture into your prepared moulds or baking tray. Leave it to set at room temperature, uncovered, for a minimum of 6-8 hours, though we find leaving it overnight is best. It’s important not to place it in the fridge, as the condensation can make the finished sweets overly sticky.
- The Sugar Coating: Once the mixture is completely firm, we can add the finishing touch. If you have used a baking tray, take an oiled knife or a pizza wheel to slice the slab into bite-sized squares. Put about 100g (1/2 cup) of granulated sugar into a bowl. In small batches, gently toss the gumdrops in the sugar until each one is thoroughly coated.
- The Final Cure: Arrange the sugar-coated gumdrops on a wire rack and let them air-dry for another day or two. This step is absolutely essential, as it allows a slight crust to form, which prevents the gumdrops from becoming sticky or ‘weeping’.
Pro Tips for Perfect Gumdrops Every Time
Over our many batches, we’ve discovered a few helpful hints that ensure gumdrop perfection. Keep these pointers in mind to achieve the very best results:
- Invest in a Candy Thermometer: To get the most reliable and consistent texture, a candy thermometer truly is invaluable. It removes any guesswork in reaching the ‘soft-ball’ stage, which is what determines the final chewiness of your sweets.
- Be Patient with Setting and Curing: We know it’s hard to resist diving into your gumdrops straight away, but patience really is a virtue here. Allowing them to set properly overnight and then cure after their sugar coating is the secret to achieving a professional texture and finish.
- Use Gel Food Colouring: While standard liquid colouring is fine, gel-based food colourings offer a more concentrated pigment. This allows you to create intensely vibrant colours without adding excess liquid, which could potentially interfere with the setting process.
- Proper Storage is Everything: Keep your finished gumdrops in an airtight container at room temperature. We recommend placing layers of baking parchment between them to stop them from sticking together. This will maintain their freshness for up to two weeks.
Customising Your Homemade Gumdrops
Now that you have perfected the fundamental recipe, it is time to unleash your creativity! This is your chance to really make this recipe your own.
Creating Sour Gumdrops
For a deliciously tangy variation, you can easily transform your sweets into sour gumdrops. All you need to do is mix 1-2 teaspoons of citric acid (which you can find in the baking section of larger supermarkets or online) into your coating sugar. Toss the set gumdrops in this sour sugar for a zesty flavour that gives a delightful, lip-puckering kick!
Using Fruit Puree for Natural Flavour
For a more natural twist, you can make gorgeous fruit-flavoured jelly sweets. Simply replace half of the water content in the sugar syrup with a smooth, seedless fruit puree, such as raspberry or strawberry. This will impart an authentic fruit taste and a lovely natural hue. Be aware that you might need to give them a little longer to set. If you are a fan of fruity treats, you should also take a look at our Blueberry Heaven Cookies The Definitive Recipe For Soft Chewy Perfection.
Holiday and Themed Gumdrops
You can adapt your gumdrops for any occasion by using different colours and flavours. Consider red (cherry) and green (lime) for a festive Christmas feel, or orange (orange) and purple (blackcurrant) for a spooky Halloween treat. You could even use themed silicone moulds to elevate them further. They would be a fantastic addition to a party spread, especially next to a plate of our Almond Joy Cookie Recipe.
Frequently Asked Questions (FAQ)
We’ve put together answers to some of the most common queries we receive from people making gumdrops for the first time.
Can I make gumdrops without corn syrup?
Yes, absolutely. Liquid glucose is the perfect substitute as it behaves in the same way. If you’re in a bind, golden syrup could also be used, but do note that it will lend a subtle caramel-like flavour and a slightly darker shade to your finished sweets.
Why are my gumdrops sticky after sugaring?
This issue typically arises when the gumdrops haven’t been allowed to dry or ‘cure’ sufficiently before and after being coated in sugar. That final air-drying period on the wire rack is vital for helping a thin skin to form, which holds onto the sugar and stops moisture from escaping.
How long do homemade gumdrops last?
When stored properly in an airtight container at room temperature, your delightful homemade gumdrops should remain fresh and wonderfully chewy for around two weeks.
Can I use pectin instead of gelatin?
You can, but it is not a like-for-like replacement. Pectin yields a different texture, one that is more like a fruit jelly or ‘pâte de fruits’ than a chewy gumdrop. The cooking method also differs. For a fascinating look at the science, we suggest this superb article explaining the differences between gelatin and pectin from King Arthur Baking.
Your Sweet Success Awaits!
So, there we have it – a complete guide with everything you need to create wonderfully delicious and chewy homemade gumdrops. We have taken you through the equipment, ingredients, and our detailed step-by-step method, and shared our best tips for guaranteed success. The pleasure of sharing something you have lovingly made from scratch is truly special, and these colourful little sweets are certain to bring a smile to everyone’s face.
We really hope you experiment with different flavours and colours to make this recipe uniquely yours. We would be absolutely thrilled to see your creations! Please feel free to share your photos and let us know about your favourite flavour combinations in the comments section below.


