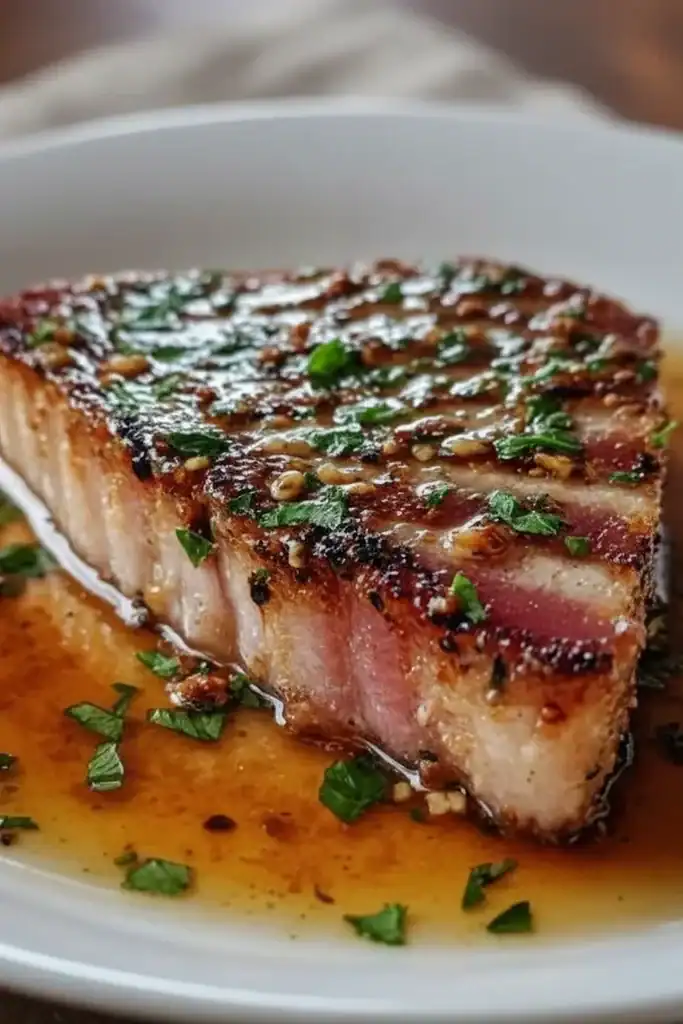
Grilled Steak with Garlic Butter
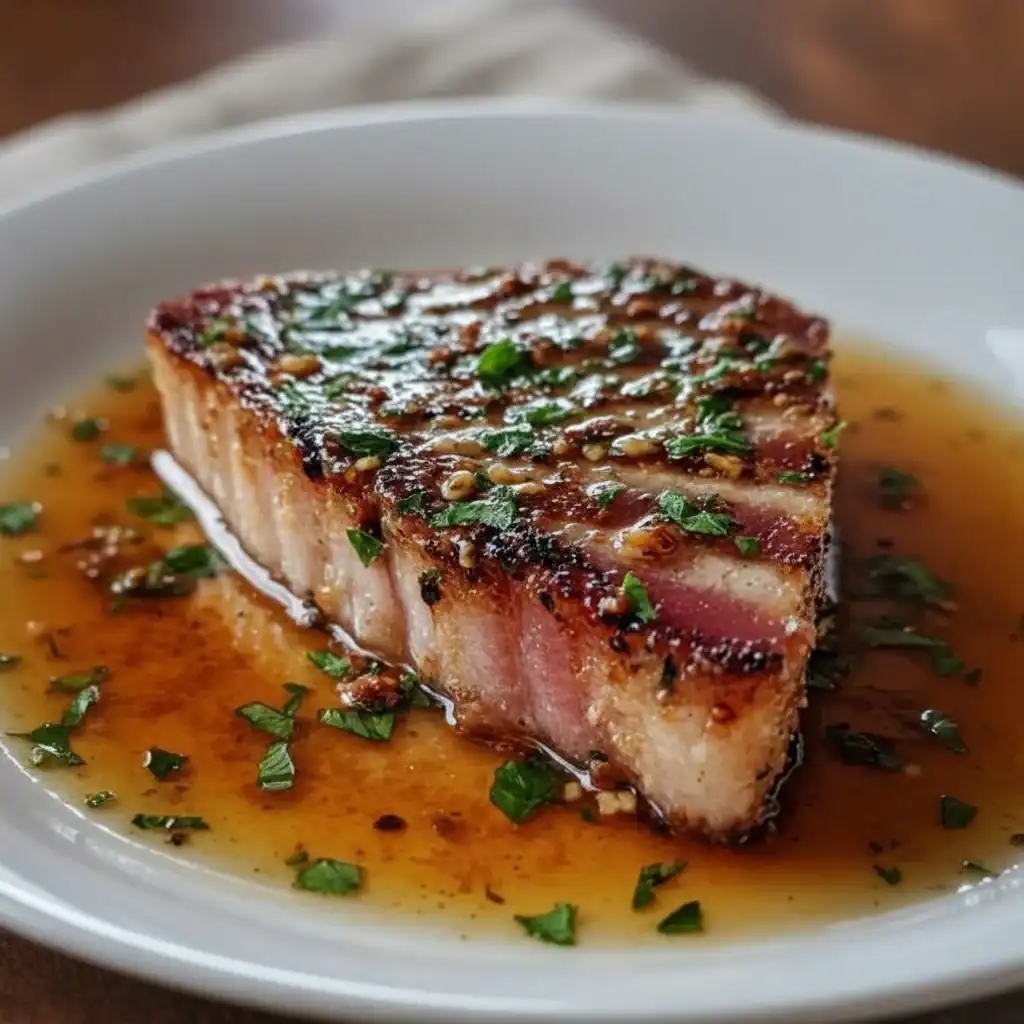
There is something fundamentally satisfying about a perfectly grilled steak. That deep, savoury crust giving way to a tender, juicy interior is one of cooking’s greatest rewards. When you then add a generous disc of melting garlic butter that cascades over the hot meat, creating its own instant, fragrant sauce, you have a meal that feels both rustic and incredibly luxurious. This is my go-to recipe when I need something that feels special without spending hours in the kitchen. It’s a dish built on quality ingredients and a few key techniques that, once mastered, will give you steakhouse-level results at home.
The magic here lies in the contrast. The robust, beefy flavour of the steak is brightened by the sharp, aromatic punch of fresh garlic, the richness of the butter, and the fresh, clean notes of parsley and chives. It’s a combination that just works, every single time. This meal is ideal when you want to mark a special occasion—a birthday, an anniversary, or even just a particularly lovely Friday evening. It turns a simple dinner into a memorable event, and everyone I’ve ever made it for absolutely loves it.
Recipe Overview
This recipe guides you through creating a beautifully seared steak with a rich, flavourful garlic and herb compound butter. We focus on getting a fantastic crust on the meat while keeping the inside perfectly pink and juicy. The butter is prepared first, allowing the flavours to meld while you prepare the steak. From my experience, the most important step is letting the steak rest after cooking; it makes all the difference to the final texture and juiciness.
- Prep Time: 15 minutes
- Cook Time: 10 minutes
- Total Time: 35 minutes (including rest time)
- Servings: 2 people
- Difficulty: Easy
Why You’ll Love This Grilled Steak With Garlic Butter
- Incredible Flavour: The deep, mineral tang of a quality grilled steak is perfectly complemented by the creamy, aromatic garlic butter. The butter melts into the meat’s crust, creating a sauce that’s simply divine.
- Ready in Under 35 Minutes: It’s a genuinely fast meal for something that feels so indulgent, making it a brilliant choice for a weeknight treat or an impromptu special dinner.
- A Flexible Centrepiece: This method works beautifully with various cuts of steak. While I adore a marbled ribeye, it’s just as good with a leaner sirloin or a premium fillet. You can also change the herbs in the butter to suit your taste.
- Great for Date Night: This dish is sophisticated, satisfying, and comes together without much fuss, which works wonderfully for a romantic meal at home where you want to impress without being stressed.
- Always Gets Compliments: I’ve been making this for over 7 years, and it never disappoints. My husband, who is a true steak aficionado, says it’s better than most restaurant versions he’s tried.
Ingredients You’ll Need
For a recipe this straightforward, the quality of your ingredients is paramount. Choose the best steak you can afford; a good butcher will be able to advise you on cuts with good marbling. I always use unsalted butter for the compound butter, as it gives me complete control over the seasoning.
- 2 x 225g sirloin or ribeye steaks, approximately 2.5cm (1 inch) thick
- 1 tbsp rapeseed oil
- 1 tsp coarse sea salt (Maldon sea salt flakes are my favourite)
- 1 tsp freshly cracked black pepper
- For the Garlic Butter:
- 100g unsalted butter, softened to room temperature
- 3 large cloves of garlic, minced very finely
- 2 tbsp fresh flat-leaf parsley, finely chopped
- 1 tbsp fresh chives, finely snipped
- 1 tsp fresh lemon juice
- A generous pinch of sea salt and black pepper
Sara’s Tip: Don’t be tempted to use pre-minced garlic from a jar. The flavour of freshly minced garlic is so much brighter and more potent, and it truly makes a difference in the finished butter.
How to Make Grilled Steak With Garlic Butter
The process is all about preparation and timing. Get your butter made and chilled first, and ensure your steak is at room temperature before it hits the heat. This ensures an even cook and a perfect result.
- Prepare the Garlic Butter: In a small bowl, combine the softened unsalted butter, finely minced garlic, chopped parsley, snipped chives, fresh lemon juice, salt, and pepper. Mix with a fork until everything is thoroughly incorporated.
- Chill the Butter: Scrape the butter mixture onto a piece of cling film or baking parchment. Form it into a log shape, about 3-4cm in diameter. Twist the ends to secure it tightly and place it in the refrigerator to firm up for at least 15 minutes. This makes it easy to slice later.
- Prepare the Steaks: Remove your steaks from the fridge 30-45 minutes before you plan to cook. Pat them completely dry with paper towels – this is crucial for getting a good sear. Rub the rapeseed oil all over the steaks, then season them very generously on all sides with the coarse sea salt and cracked black pepper.
- Heat Your Grill: Place a cast-iron griddle pan or a heavy-based frying pan over a high heat. Let it get incredibly hot; you should see a light shimmer of smoke before adding the steaks. A hot pan is non-negotiable for a great crust.
- Grill the Steaks: Carefully place the seasoned steaks onto the hot pan. You should hear a loud sizzle. For a medium-rare finish (which I recommend), grill for 2-4 minutes per side, depending on thickness. What works best for me is using a digital meat thermometer; I pull the steaks off the heat when they reach an internal temperature of 52°C. You can find excellent guides on steak doneness, like this one from Serious Eats, if you prefer a different level of cooking.
- Add the Butter: During the final minute of cooking, slice a thick disc (about 1cm) of the chilled garlic butter and place it on top of each steak. Let it begin to melt and baste the meat.
- Rest the Meat: This is the most important step! Immediately transfer the steaks to a warm plate or a cutting board. Tent them loosely with a piece of foil and let them rest for at least 5-10 minutes. This allows the juices to redistribute throughout the meat, ensuring every bite is tender and flavourful.
- Serve and Garnish: Slice the steak against the grain into thick strips. Top with another slice of the garlic butter and a sprinkle of fresh parsley as a simple garnish. Serve immediately.
Tips From My Kitchen
- Achieve the Perfect Sear: A screaming hot and dry pan is the secret. Don’t add the steak until your pan is properly preheated. This high heat creates the Maillard reaction, which is responsible for the steak’s delicious, savoury crust.
- The Dry-Pat Secret: I learned that any moisture on the surface of the steak will turn to steam in the hot pan, which prevents a proper crust from forming. Taking 30 seconds to pat the steak thoroughly dry with paper towels is a small step that yields a huge reward.
- Make-Ahead Magic: The garlic butter is the perfect make-ahead component. It can be prepared up to a week in advance and stored in the fridge. You can even freeze it for up to 3 months. I often make a double batch to have on hand for other dishes, like my Lemon Garlic Chicken.
- Storing Leftovers: If you have any leftover steak, allow it to cool completely before storing it in an airtight container in the fridge for up to 3 days. It’s fantastic sliced cold for salads or steak sandwiches the next day.
Common Mistakes to Avoid
- Cooking Straight From the Fridge: A cold steak will cook unevenly, often resulting in a grey, overcooked band on the outside before the centre is done. Letting it sit at room temperature for at least 30 minutes is essential.
- Fiddling With the Steak: Once you place the steak in the hot pan, leave it alone! Don’t be tempted to press it down or move it around. Let it sit undisturbed for the full cooking time on one side to develop that beautiful, dark crust before flipping it just once.
- Skipping the Rest Time: If you slice into a steak immediately after cooking, all of its delicious juices will pour out onto the cutting board, leaving you with dry meat. Resting is a non-negotiable step for a juicy, tender result.
Delicious Variations to Try
While this recipe is fantastic as is, it’s also a great base for experimentation. Here are a few ideas I’ve tried and loved:
- Earthy and Aromatic: Add 1 teaspoon of finely chopped fresh rosemary or thyme to the garlic butter. The woody notes of these herbs pair beautifully with the rich beef.
- A Touch of Heat: For those who like a little spice, mix ¼ teaspoon of red chilli flakes into the butter. It adds a subtle warmth that cuts through the richness without being overwhelming. If you enjoy this, you’ll probably also like my Black Pepper Chicken recipe.
- Decadent Blue Cheese: Crumble a tablespoon of a good quality Stilton or Roquefort cheese over the steak along with the garlic butter during the last minute of cooking. The cheese will melt slightly, creating an intensely savoury and tangy topping.
What to Serve With Grilled Steak With Garlic Butter
This steak deserves a fantastic partner on the plate. Here are a few of my favourite accompaniments:
- Proper Chunky Chips: A pile of crispy, golden, fluffy-centred chips is the classic and, in my opinion, the best pairing. They are perfect for mopping up any of the melted garlic butter and steak juices.
- A Simple Rocket Salad: The peppery bite of rocket leaves, dressed simply with lemon juice and olive oil, provides a fresh and vibrant contrast that cuts through the richness of the meat and butter.
- Creamed Spinach: For a true steakhouse experience at home, serve this with a side of rich, creamy spinach. The combination is pure indulgence.
- Wine Pairing: A bold red wine is the ideal companion. A Malbec from Argentina or a classic Cabernet Sauvignon from California has the structure and fruit to stand up to the powerful flavours of the grilled steak.
Frequently Asked Questions
Grilled Steak With Garlic Butter
Ingredients
Method
- Prepare the Garlic Butter: In a small bowl, combine the softened unsalted butter, finely minced garlic, chopped parsley, snipped chives, fresh lemon juice, salt, and pepper. Mix with a fork until everything is thoroughly incorporated.
- Chill the Butter: Scrape the butter mixture onto a piece of cling film or baking parchment. Form it into a log shape, about 3-4cm in diameter. Twist the ends to secure it tightly and place it in the refrigerator to firm up for at least 15 minutes. This makes it easy to slice later.
- Prepare the Steaks: Remove your steaks from the fridge 30-45 minutes before you plan to cook. Pat them completely dry with paper towels – this is crucial for getting a good sear. Rub the rapeseed oil all over the steaks, then season them very generously on all sides with the coarse sea salt and cracked black pepper.
- Heat Your Grill: Place a cast-iron griddle pan or a heavy-based frying pan over a high heat. Let it get incredibly hot; you should see a light shimmer of smoke before adding the steaks. A hot pan is non-negotiable for a great crust.
- Grill the Steaks: Carefully place the seasoned steaks onto the hot pan. You should hear a loud sizzle. For a medium-rare finish (which I recommend), grill for 2-4 minutes per side, depending on thickness. What works best for me is using a digital meat thermometer; I pull the steaks off the heat when they reach an internal temperature of 52°C. You can find excellent guides on steak doneness, like this one from Serious Eats, if you prefer a different level of cooking.
- Add the Butter: During the final minute of cooking, slice a thick disc (about 1cm) of the chilled garlic butter and place it on top of each steak. Let it begin to melt and baste the meat.
- Rest the Meat: This is the most important step! Immediately transfer the steaks to a warm plate or a cutting board. Tent them loosely with a piece of foil and let them rest for at least 5-10 minutes. This allows the juices to redistribute throughout the meat, ensuring every bite is tender and flavourful.
- Serve and Garnish: Slice the steak against the grain into thick strips. Top with another slice of the garlic butter and a sprinkle of fresh parsley as a simple garnish. Serve immediately.
Notes
There you have it—a truly fantastic Grilled Steak with Garlic Butter that delivers on flavour, texture, and pure satisfaction. It’s a recipe that proves you don’t need a long list of ingredients or complicated steps to create something truly special. I really hope you give this a try for your next special meal. If you do, please let me know how it turned out in the comments below!
Happy Cooking,
Sara Gomez