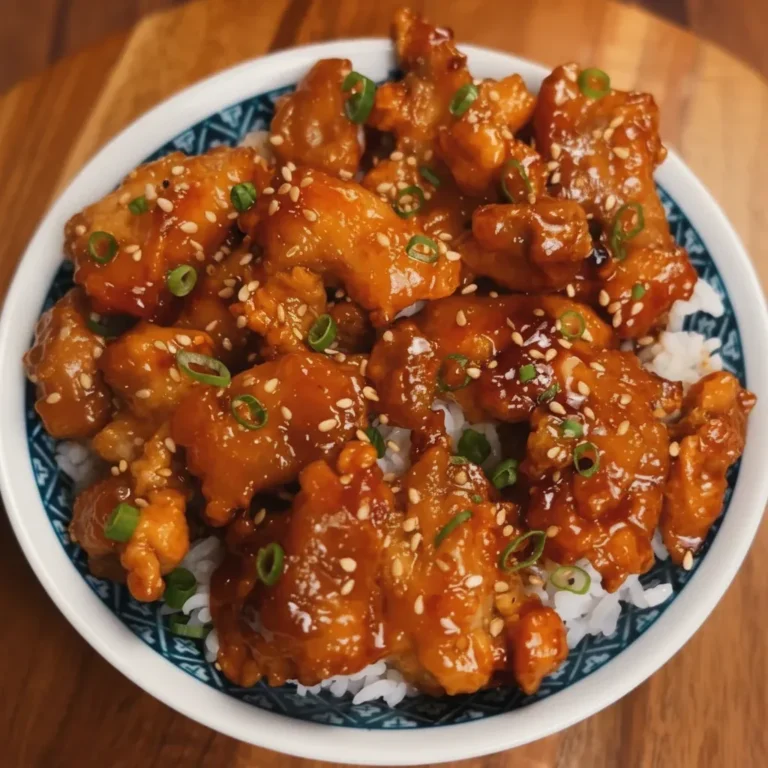
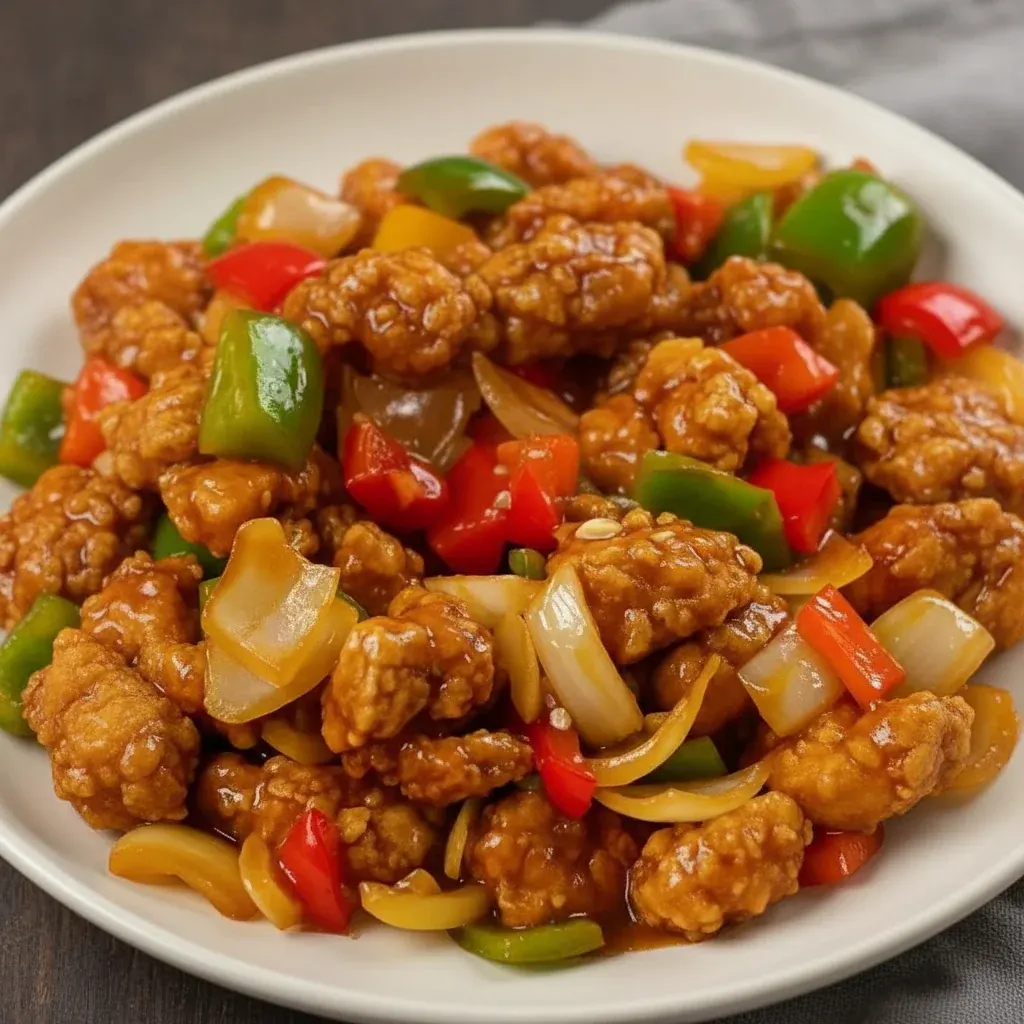
Easy Sweet & Sour Chicken Recipe

We’ve all been there: a powerful craving for sweet and sour chicken strikes, but the local takeaway options often feel like a letdown. You’re hoping for that delightful mix of tang and sweetness, with perfectly crisp chicken and fresh, vibrant vegetables, yet what arrives can be a little lacklustre. What if we told you that creating a version that’s fresher, more flavourful, and tailored to your tastes is entirely possible at home? We’re thrilled to share our tried-and-tested, completely foolproof Easy Sweet & Sour Chicken Recipe.
This beloved dish is a highlight of Chinese-inspired cooking enjoyed across the globe, and its popularity is well-deserved. It’s a true celebration of flavour and texture. We’ve dedicated ourselves to refining this recipe, making sure it’s not just exceptionally tasty but also genuinely straightforward to prepare. Say goodbye to overly sweet, gloopy sauces and soggy batter. We’re talking about beautifully crisp chicken pieces cloaked in a glossy, zesty sauce you’ll be eager to make time and again. This is your ultimate guide to crafting incredible homemade sweet and sour chicken that will have everyone convinced you’ve discovered the best new restaurant in town.
Why You’ll Love This Recipe
- Faster and More Affordable Than Ordering In: You can have this wonderful meal on the dinner table in less than 30 minutes, which is often quicker than waiting for a delivery. Plus, it relies on common pantry staples, making it a very economical choice.
- A Perfect Harmony of Flavours: Our sauce achieves that ideal balance of sweet, sharp, and savoury notes without being overwhelming. The inclusion of fresh pineapple, crisp peppers, and onion introduces layers of texture and taste that truly elevate the dish.
- Achieve That Unbeatable Crispy Texture: We’re sharing our simple secret for getting a light, crispy coating on the chicken that miraculously stays crunchy, even after being enveloped in that glorious sauce. No more disappointment with soggy chicken!
- Wonderfully Versatile: Don’t have a red pepper? A yellow or orange one will work just as well. Fancy a bit of a kick? A pinch of chilli flakes does the job perfectly. This recipe serves as a brilliant foundation that you can easily adapt to suit your family’s preferences.
- A Guaranteed Hit with Everyone: This is one of those special meals that delights all ages, from the pickiest of eaters to the most discerning of palates. It’s a vibrant, appealing dish that brings the fun of a Chinese takeout at home right to your dining table.
Ingredients
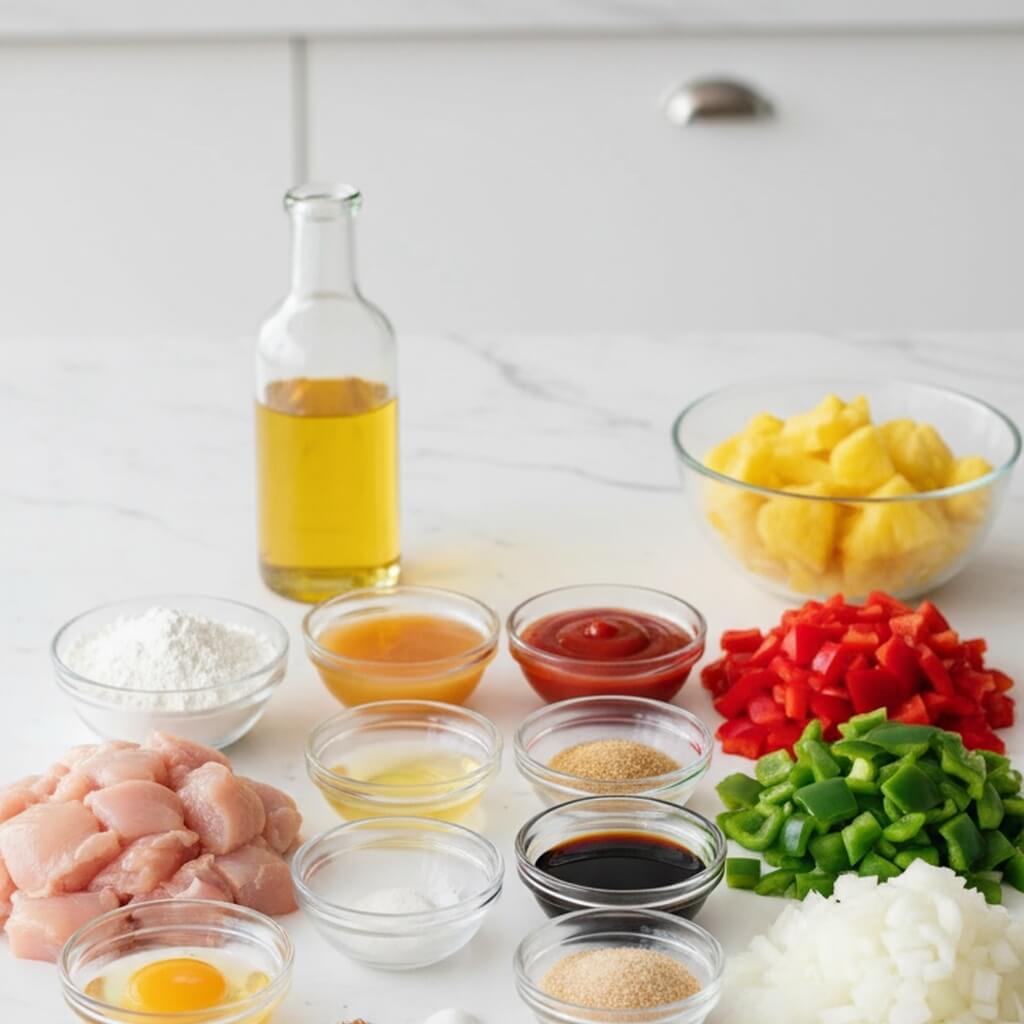
To make this recipe as straightforward as possible, we have organised the ingredients into three distinct groups: the chicken, the sauce, and the stir-fry components. Preparing all your elements before you begin cooking (a technique known as ‘mise en place’) is the secret to a relaxed and successful stir-frying experience.
- For the Crispy Chicken:
- 500g skinless, boneless chicken breasts, cut into 1-inch cubes
- 60g cornflour
- 1 large egg, beaten
- 1/2 tsp salt
- 1/4 tsp white pepper
- 3-4 tbsp vegetable or rapeseed oil, for frying
- For the Sweet & Sour Sauce:
- 120ml pineapple juice (from the can of pineapple chunks)
- 80ml rice vinegar
- 60g ketchup
- 50g light brown sugar
- 1 tbsp soy sauce
- 1 tbsp cornflour, mixed with 2 tbsp cold water (a cornflour slurry)
- For the Stir-Fry:
- 1 red bell pepper, deseeded and chopped into 1-inch pieces
- 1 green bell pepper, deseeded and chopped into 1-inch pieces
- 1 medium onion, chopped into 1-inch pieces
- 225g can of pineapple chunks in juice, drained (reserve the juice for the sauce)
How to Make the Best Easy Sweet & Sour Chicken
Are you ready to cook up something spectacular? We’ve structured this recipe as a clear, step-by-step guide. Just follow along, and you’ll be serving a magnificent meal before you know it. Think of this as more than just a recipe—it’s a technique you can apply to other stir-fries too!
Step 1: Prepare the Crispy Chicken
The secret to that incredibly crisp chicken texture is a simple two-step coating process. This method forms a light, protective barrier that fries up beautifully and maintains its crunch when combined with the sauce.
- Begin by patting the chicken cubes thoroughly dry with a paper towel. This is an essential step, as it helps the coating to adhere properly and ensures the chicken becomes wonderfully crisp.
- In a medium-sized bowl, whisk the beaten egg together with the salt and white pepper. Add the chicken pieces and stir until every piece is evenly coated in the egg mixture.
- Spread the 60g of cornflour on a separate shallow plate or in a large food-safe bag. In small batches, move the egg-coated chicken to the cornflour, tossing gently to ensure each piece is completely covered. Tap off any excess cornflour.
- Arrange the coated chicken pieces on a plate and set aside while you get the sauce ready.
Step 2: Whisk Up the Perfect Sweet & Sour Sauce
Our sauce is the heart and soul of this dish. It’s a simple blend of kitchen staples, but getting the proportions right is what creates that authentic, takeaway-style flavour. We achieve a delicious pineapple chicken sauce by cleverly using the juice straight from the can!
- In a small bowl or measuring jug, combine all the sauce ingredients: the reserved pineapple juice, rice vinegar, ketchup, light brown sugar, and soy sauce.
- Whisk the mixture thoroughly until the sugar has fully dissolved and everything is well combined.
- Next, prepare the cornflour slurry. In a small, separate bowl, mix 1 tablespoon of cornflour with 2 tablespoons of cold water until you have a smooth paste. Keep this close by, as we’ll use it to thicken the sauce right at the end.
Step 3: Cook the Chicken and Vegetables
It’s now time to bring all the components together. For this quick chicken stir-fry, we find a large wok or a deep-sided frying pan works best. The high sides are great for preventing oil splashes and make tossing the ingredients together much easier.
- Heat the vegetable oil in your wok or pan over a medium-high heat. When the oil begins to shimmer, carefully place the coated chicken pieces in a single layer. To avoid overcrowding the pan, it’s best to cook the chicken in two batches if needed.
- Fry the chicken for about 3–4 minutes on each side, or until it’s a beautiful golden-brown colour, crisp, and cooked all the way through. Use a slotted spoon to transfer the cooked chicken to a wire rack or a plate lined with kitchen paper to drain off any excess oil.
- Carefully wipe the pan clean, leaving just about one teaspoon of oil. Place the pan back on the heat and add your chopped onion and bell peppers.
- Stir-fry the vegetables for 3–4 minutes. You want them to soften just slightly while retaining a pleasant crunch—tender-crisp is the goal here, not mushy!
Step 4: Combine and Serve
This is the final, rewarding stage where all your hard work comes together in one glorious, saucy pan of deliciousness.
- Pour your prepared sweet and sour sauce mixture into the pan with the stir-fried vegetables. Bring the sauce to a gentle simmer, stirring continuously.
- Once it’s simmering, slowly pour in the cornflour slurry while whisking. You’ll notice the sauce thicken almost instantly. Allow it to bubble for about 30 seconds until it becomes glossy and has a perfect coating consistency. For a more detailed look at this technique, Serious Eats offers a great guide on how to use cornflour slurries.
- Now, add the drained pineapple chunks and the crispy cooked chicken back into the pan. Gently fold everything together until the chicken and vegetables are evenly coated in the wonderful sauce.
- For the best possible texture, serve immediately. We think it’s absolutely perfect spooned over a bowl of fluffy white rice or alongside some noodles. To make it a truly complete meal, a side of our Garlic Chicken Fried Rice makes an amazing accompaniment.
Tips for Success
To make certain your sweet and sour chicken turns out perfectly every single time, here are a few of our top tips to bear in mind:
- Don’t Skip the Coating Steps: The egg and cornflour combination is what creates that signature crispy finish. It’s a simplified take on the velveting method often used in Chinese cookery.
- Control the Heat: Ensure your oil is sufficiently hot before you add the chicken. You should hear an immediate sizzle. This sears the outside quickly, preventing the chicken from becoming oily.
- Prep in Advance: This dish cooks very quickly once you start. We highly recommend having all your vegetables chopped, the sauce mixed, and the chicken coated before you turn the hob on.
- Sauce Consistency: If you find your sauce has become a little too thick, simply stir in a tablespoon of water or a splash more pineapple juice to loosen it. If it seems too thin, let it simmer for an extra minute to reduce.
If you’re a fan of recreating takeaway favourites at home, we have a feeling you will also adore our much-loved Black Pepper Chicken recipe. It’s another speedy, flavour-packed dish that’s ideal for a midweek treat.
FAQ
Conclusion
And there you have it—a genuinely easy sweet and sour chicken recipe that excels in flavour, texture, and simplicity. We are certain that after trying this homemade version, you’ll think twice before picking up that takeaway menu. This way, you have complete control over the ingredients, the level of sweetness, and the freshness, creating a meal that is both deeply satisfying and wonderfully impressive.
We truly hope you feel inspired to head to the kitchen and give this recipe a try. It’s the ideal dish for a busy weeknight dinner, a fun weekend cooking session, or a fantastic way to wow your guests. If you do make our recipe, we would love to hear how it went! Please feel free to leave a comment below or tag us in your photos on social media. We always enjoy seeing your culinary creations!
Recipe Card
Ingredients
- For the Crispy Chicken:
- 500g skinless, boneless chicken breasts, cut into 1-inch cubes
- 60g cornflour
- 1 large egg, beaten
- 1/2 tsp salt & 1/4 tsp white pepper
- 3-4 tbsp vegetable oil for frying
- For the Sweet & Sour Sauce:
- 120ml pineapple juice (from can)
- 80ml rice vinegar
- 60g ketchup
- 50g light brown sugar
- 1 tbsp soy sauce
- 1 tbsp cornflour mixed with 2 tbsp cold water
- For the Stir-Fry:
- 1 red bell pepper, chopped
- 1 green bell pepper, chopped
- 1 medium onion, chopped
- 225g can of pineapple chunks, drained
Instructions
- Toss chicken cubes in a mixture of beaten egg, salt, and pepper. Coat each piece thoroughly in cornflour.
- Heat oil in a wok over medium-high heat. Fry chicken in batches until golden brown and crispy (3-4 minutes per side). Remove and set aside.
- In the same pan, stir-fry the chopped onion and bell peppers for 3-4 minutes until tender-crisp.
- Whisk together pineapple juice, rice vinegar, ketchup, sugar, and soy sauce. Pour into the pan and bring to a simmer. Whisk in the cornflour slurry to thicken until glossy.
- Return the crispy chicken and drained pineapple chunks to the pan. Gently fold everything together to coat in the sauce and serve immediately.