Decadent Black Forest Cheesecake: A Step-by-Step Guide
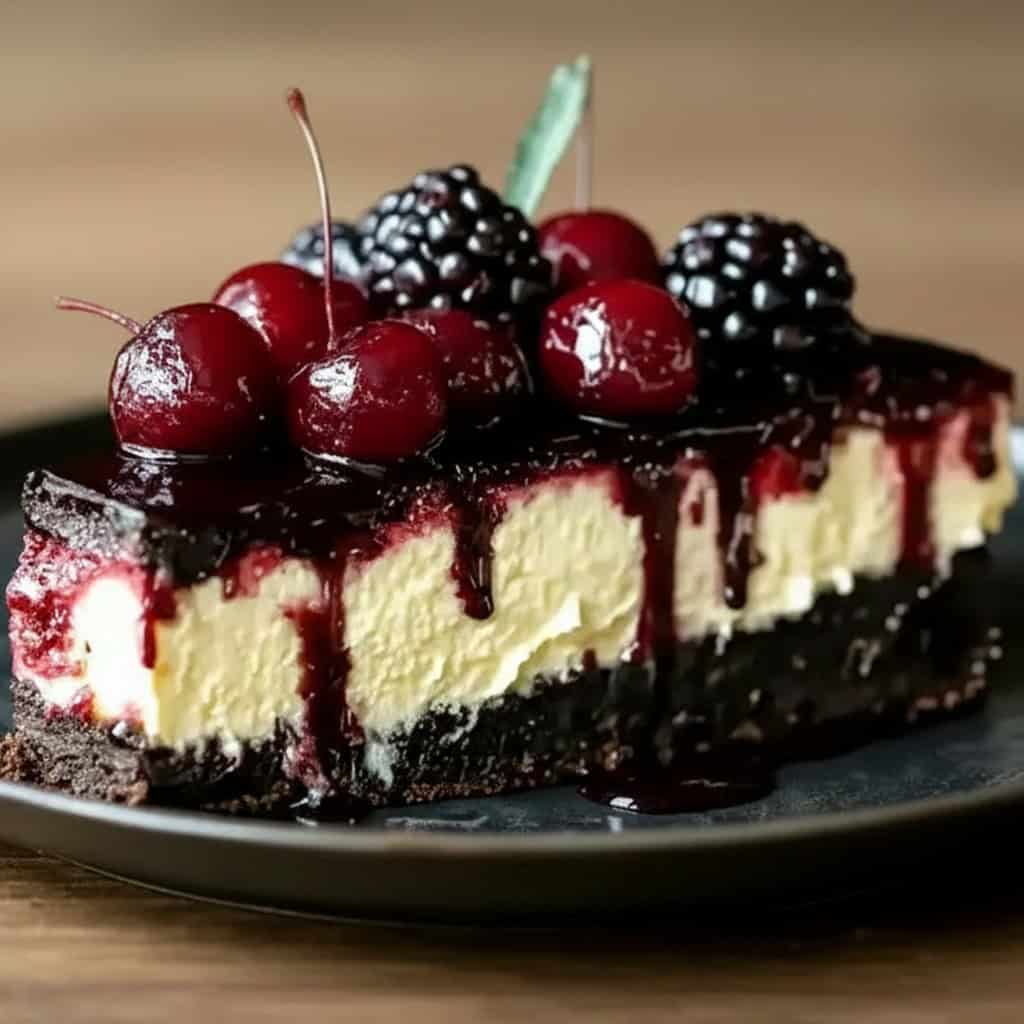
Have you ever imagined a dessert that combines the velvety smoothness of cheesecake with the intense chocolate and cherry flavours of a traditional Black Forest gâteau? Well, that dream is about to become a reality. We’re here to walk you through crafting the ultimate decadent black forest cheesecake, a truly stunning treat that tastes even more amazing than it looks. This recipe features a crisp chocolate biscuit base, a silky chocolate cheesecake filling, and a generous topping of sweet cherries and delicate chocolate curls. It is pure bliss in every mouthful, and we assure you it’s much simpler to prepare than you might imagine.
Whether you have a special occasion on the horizon or simply fancy a luxurious treat, this cheesecake is the perfect choice. We’ve crafted this guide to be straightforward and foolproof, empowering you to create a culinary masterpiece from your very own kitchen. Right then, let’s begin!
What Makes This Black Forest Cheesecake Recipe So Special?
The true charm of a Black Forest gâteau is found in its signature blend of flavours: rich, dark chocolate, tangy-sweet cherries, and light, fluffy cream. We have taken this cherished combination and reimagined it as a cheesecake that is simply divine. In contrast to the classic sponge, our version boasts a dense, creamy consistency that dissolves on the tongue, offering a fresh and delightful way to savour these timeless flavours.
Our recipe centres on a no-bake approach, which makes it a wonderfully accessible and easy black forest cheesecake recipe for home bakers of any experience level. You won’t need to fuss with water baths or worry about precise oven temperatures. The appeal of this dessert is rooted in its simplicity and the calibre of its ingredients, culminating in a rich, fulfilling, and beautifully presented cheesecake that sets flawlessly in the refrigerator.
The Perfect Harmony of Layers
Each component of this cheesecake has been carefully considered to work in perfect harmony with the others:
- The Base: We begin with a buttery, crunchy foundation made from crushed chocolate biscuits, such as Oreos or chocolate digestives. This layer provides a fantastic textural counterpoint to the velvety filling.
- The Filling: This is where the true indulgence lies. We blend full-fat cream cheese, double cream, and premium dark chocolate to fashion a cheesecake filling that is exquisitely rich and smooth. It retains the characteristic tang of a cheesecake, beautifully infused with a deep chocolate essence.
- The Topping: A glorious cherry topping, created from either a simple homemade compote or a high-quality jar of cherries in syrup, provides a sharpness that cuts through the richness of the chocolate. To finish, we add decorative swirls of freshly whipped cream and a generous dusting of chocolate shavings for that classic Black Forest appearance.
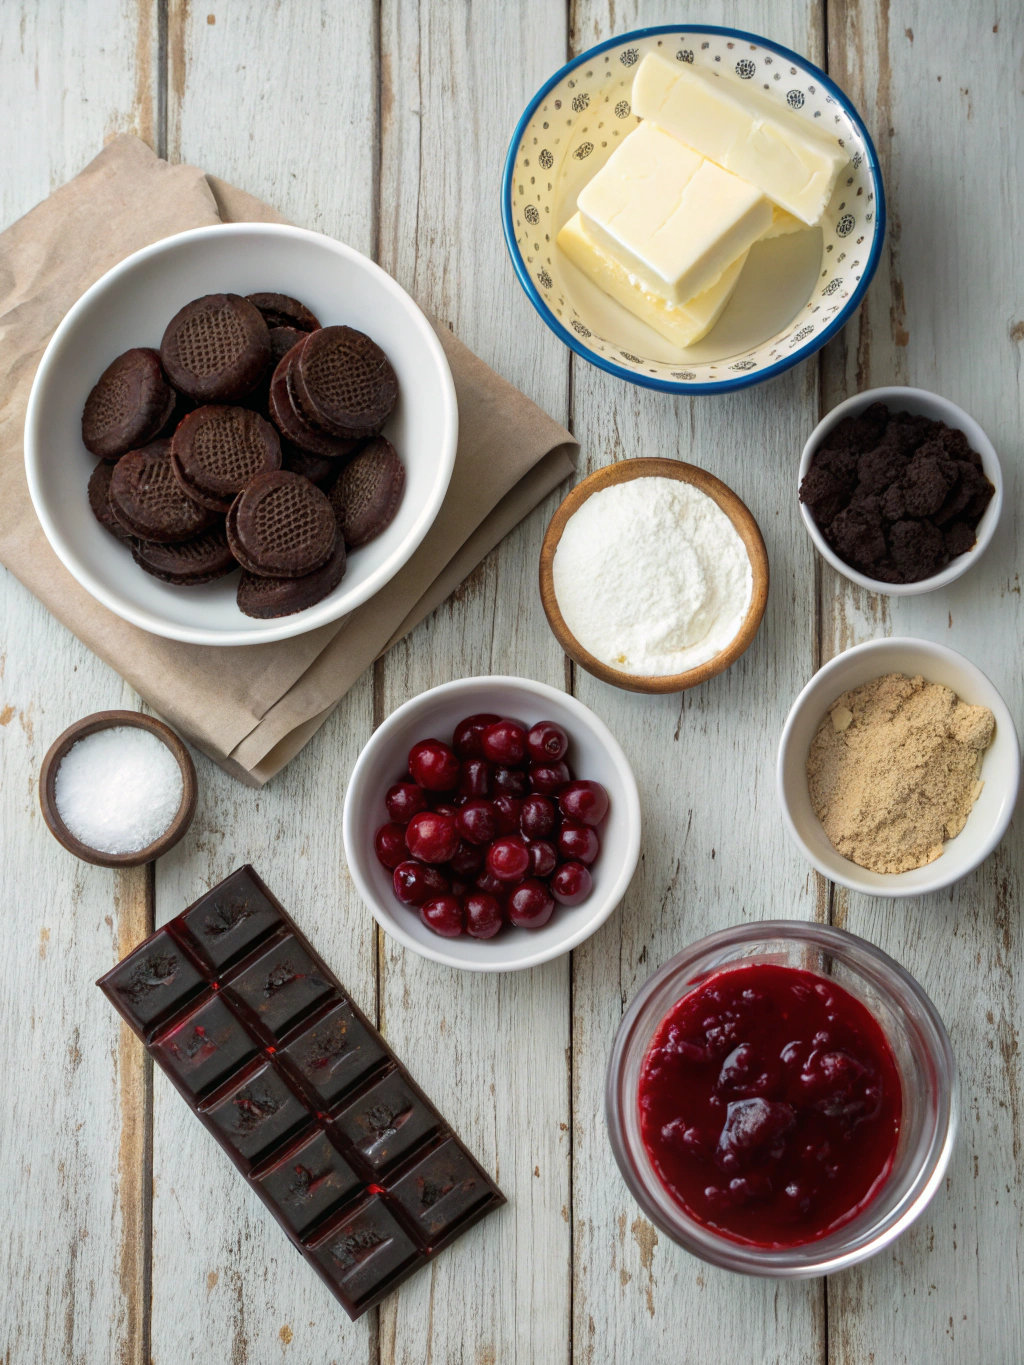
Essential Ingredients for Your Decadent Black Forest Cheesecake
For the very best outcome, we always suggest using top-quality ingredients. Full-fat cream cheese and double cream are non-negotiable for achieving a rich, stable filling that sets beautifully. Here is everything you will need to have ready before you start.
For the Chocolate Biscuit Base:
- 300g chocolate biscuits (Oreos or chocolate digestives work perfectly)
- 125g unsalted butter, melted
For the Chocolate Cheesecake Filling:
- 500g full-fat cream cheese, at room temperature
- 100g icing sugar, sifted
- 1 tsp vanilla extract
- 200g dark chocolate (at least 70% cocoa solids), melted and cooled slightly
- 300ml double cream, cold
For the Topping and Decoration:
- 400g can of pitted black cherries in syrup or a pre-made cherry pie filling
- 150ml double cream
- 1 tbsp icing sugar
- 50g dark chocolate, for shavings
Your Step-by-Step Guide to Perfection
Are you ready to build your showstopper? Follow these instructions with care, and you will soon have a magnificent cheesecake ready for chilling. We’ve organised the entire process into simple, easy-to-follow stages.
Part 1: Preparing the Chocolate Biscuit Base
- First, grease a 20cm (8-inch) springform cake tin and line the bottom with baking parchment.
- Place your chocolate biscuits into a food processor and pulse them into fine crumbs. Alternatively, if you don’t own a food processor, pop them into a sturdy, sealed bag and bash them with a rolling pin.
- Pour the melted butter over the biscuit crumbs and stir until everything is thoroughly combined. The texture should be similar to damp sand.
- Press this crumb mixture firmly and evenly across the base of the prepared tin. We find using the back of a spoon or a flat-bottomed glass helps to create a compact layer. Pop the tin into the fridge to firm up while you make the filling.
Part 2: Creating the Creamy Chocolate Cheesecake Filling
- In a large mixing bowl, use an electric mixer (or a whisk and some elbow grease) to beat the room-temperature cream cheese until it’s completely smooth and free of lumps.
- Sift the icing sugar into the bowl, add the vanilla extract, and beat again until the mixture is smooth and fully incorporated.
- Carefully fold in the slightly cooled, melted dark chocolate until you have a consistently coloured mixture. Try not to overmix at this stage. To understand why high-quality chocolate makes a difference, resources like BBC Good Food offer great insights.
- In a separate, clean bowl, whip the cold double cream until it just reaches the soft peak stage. You’ll know it’s ready when the cream holds its shape as you lift the beaters, but the very tip gently flops over.
- Gently fold the whipped cream into the chocolate and cream cheese mixture, adding it in two or three stages. This technique helps to keep the filling wonderfully light and airy. Continue folding until everything is just combined.
Part 3: Assembling and Chilling Your Masterpiece
- Take the chilled biscuit base out of the fridge. Spoon the chocolate cherry cheesecake filling over the base, using a spatula or the back of a spoon to create a smooth, level surface.
- Transfer the cheesecake to the fridge and leave it to set for a minimum of 6–8 hours, though overnight is ideal. This chilling period is absolutely vital for the cheesecake to become firm, so please resist the temptation to cut it short!
Part 4: Adding the Signature Topping
- Once your cheesecake has fully set, carefully release it from the springform tin. For a clean edge, you can briefly warm the outside of the tin by wrapping it in a cloth soaked in hot water.
- Spoon the cherry filling evenly over the top, making sure to leave a small border around the outer edge.
- In another clean bowl, whip the remaining 150ml of double cream with 1 tbsp of icing sugar until it forms stiff peaks. You can then pipe or spoon swirls of this cream around the cheesecake’s perimeter.
- Lastly, for the chocolate shavings, simply run a vegetable peeler along the side of a bar of dark chocolate. Sprinkle these liberally over the cream and cherries. Your cheesecake is now ready to be served and enjoyed!
Pro Tips for the Best Cheesecake Recipe
Looking to elevate your dessert from great to absolutely exceptional? Here are a handful of our most trusted tips and tricks to guarantee your no-bake black forest cheesecake is perfect, time and time again.
- Room Temperature is Key: For the creamiest filling, ensure your cream cheese has come to room temperature. This is the secret to avoiding lumps and ensuring it mixes smoothly with the other ingredients.
- Don’t Overwhip the Cream: You’re aiming for soft peaks when whipping the double cream for the filling, and stiff peaks for the decoration. If you overwhip it, the cream can become grainy.
- Patience is a Virtue: We know the hardest part of this recipe is the wait! However, allowing the cheesecake its full chilling time is crucial for it to set into that firm, perfectly sliceable texture.
- For a Boozy Kick: To capture a more authentic Black Forest flavour, consider soaking the cherries in one or two tablespoons of Kirsch (a cherry brandy) for about 30 minutes before you add them as a topping.
- Get Clean Slices: For flawless, neat slices, dip a sharp knife into hot water and wipe it clean between each and every cut.
- Experiment with Desserts: After you’ve perfected this cheesecake, why not try your hand at another fruity creation? Our recipe for Blueberry Heaven Cookies The Definitive Recipe For Soft Chewy Perfection is a brilliant next step.
Frequently Asked Questions (FAQ)
Can I use fresh cherries instead of canned?
Of course! When fresh cherries are in season, you can easily make your own compote. Just pit around 400g of fresh cherries and let them simmer in a saucepan with 2–3 tablespoons of sugar and a little splash of water for 10–15 minutes. They’re ready when they’ve softened and the liquid has thickened. Allow it to cool down completely before spreading it over your cheesecake.
Why is my no-bake cheesecake not setting?
The most frequent culprits for a cheesecake that won’t set are insufficient chilling time or the use of low-fat dairy products. Full-fat cream cheese and double cream are essential, as their higher fat content is what helps the cheesecake to firm up. Also, double-check that you only whipped the double cream to soft peaks before folding it into the filling.
Can I make this cheesecake ahead of time?
Yes, this dessert is ideal for making in advance! You can prepare the cheesecake (without its topping) up to two days ahead and store it, covered, in the fridge. We do suggest adding the fresh cream and chocolate shavings just before you plan to serve it, to ensure it looks and tastes its best.
How do I store leftovers?
Any leftover cheesecake should be stored in an airtight container in the fridge, where it will keep well for up to 3 days. It also freezes beautifully! To freeze, we recommend slicing the cheesecake first and placing the individual portions on a baking tray in the freezer to firm up. Once solid, wrap each slice in cling film and then foil. It will last for up to a month. Simply thaw it in the fridge for a few hours before you wish to serve it.
Can this be made gluten-free?
Yes, it’s incredibly simple to make this recipe gluten-free. All you need to do is substitute the chocolate biscuits in the base with your preferred brand of gluten-free chocolate biscuits. The other ingredients are typically gluten-free, but it’s always wise to check the labels on your chocolate and other products just to be certain. If you are a fan of light and airy bakes, our gluten-free adaptable Cloud Cake Recipe could be another wonderful option for you.
A Dessert Worth Celebrating
And there you have it—our complete guide to creating a truly magnificent and decadent black forest cheesecake. This is more than just a dessert; it’s an experience to be shared. It makes the perfect centrepiece for a birthday, a get-together with family, or simply for a quiet evening when you feel you deserve something truly special. The blend of rich chocolate, creamy filling, and sharp cherries is a classic combination for very good reason.
We’re quite certain that once you’ve tried this recipe, it will quickly become a firm favourite in your dessert repertoire. It’s the best cheesecake recipe we know for impressing your guests without any of the stress.
So, now it is over to you! Assemble your ingredients, follow our guide, and get ready to fall in love with your new signature dessert. We would be delighted to see your beautiful cheesecakes, so please do share a picture and tag us on social media! Happy baking!