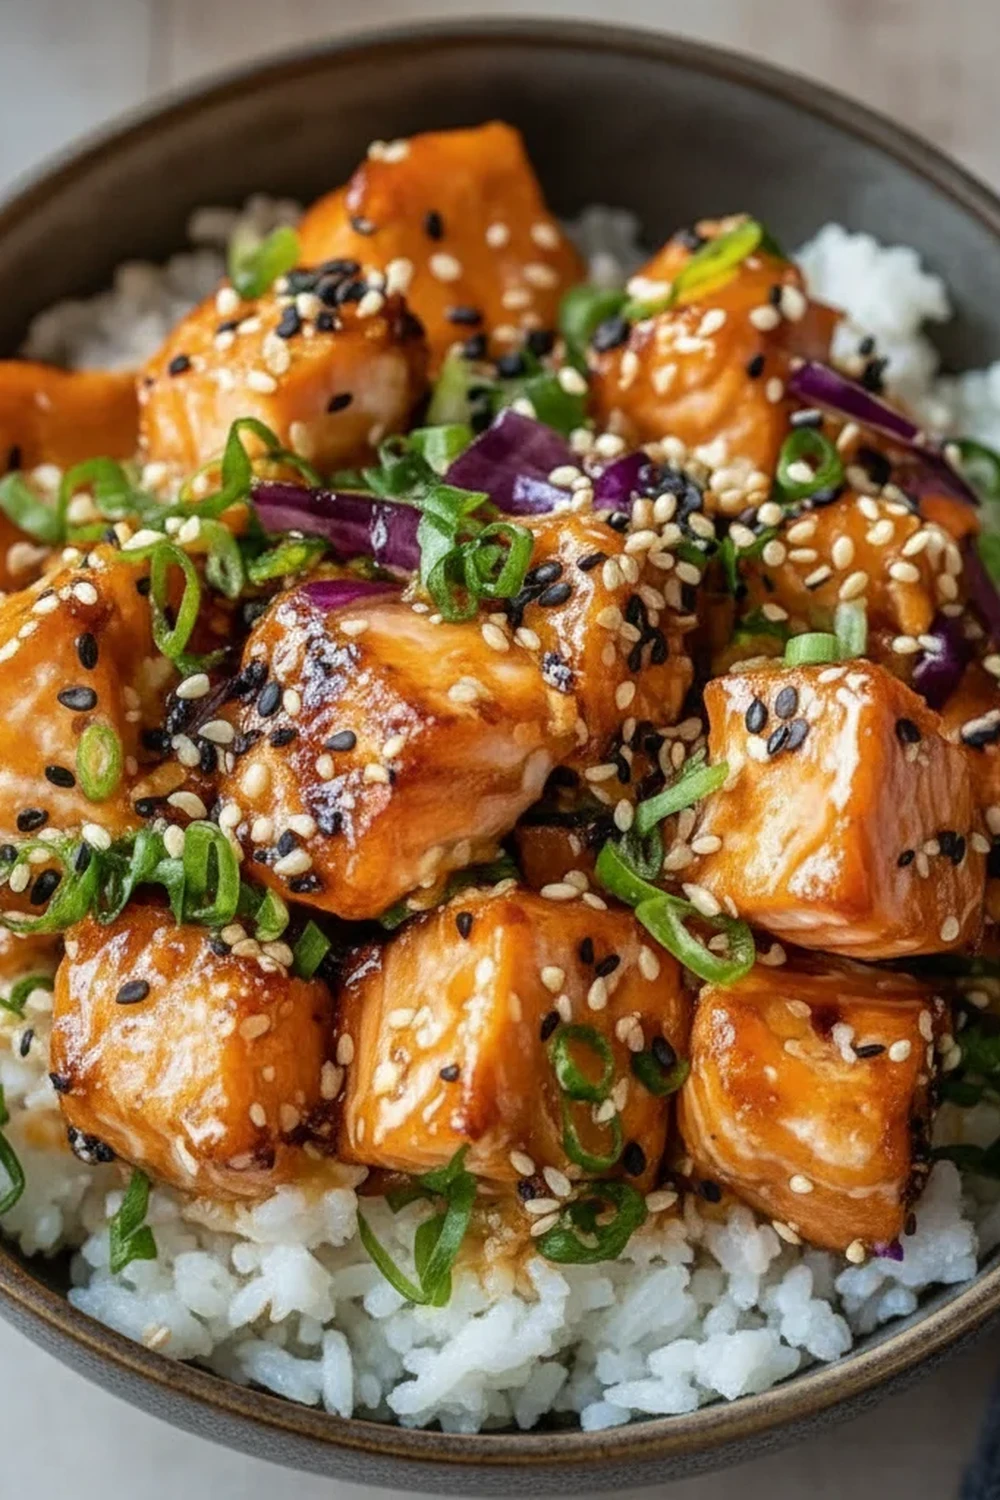
Crispy Salmon Rice Bowl
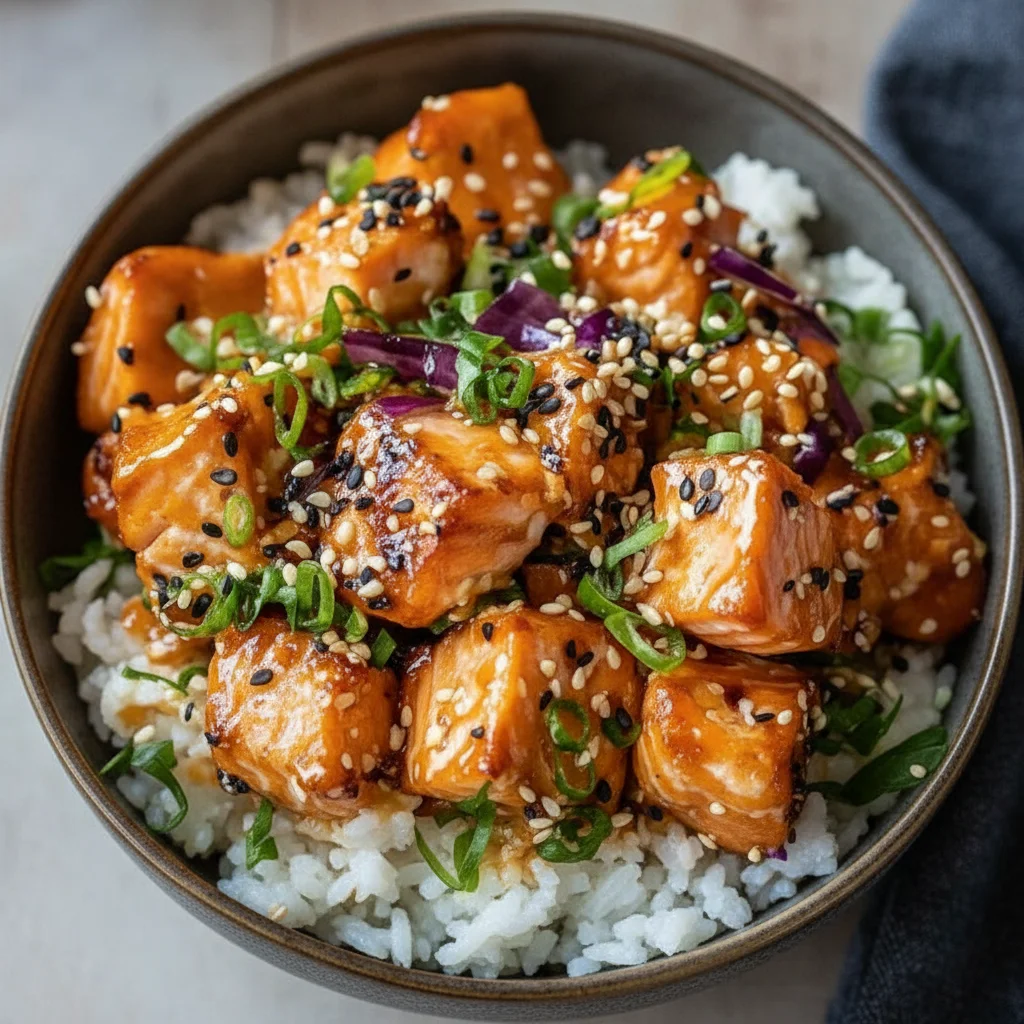
There is something immensely satisfying about a meal that hits every note perfectly. For me, this Crispy Salmon Rice Bowl is that meal. It’s a beautiful balance of textures and flavours: the rich, flaky salmon with its shatteringly crisp skin, a bed of fluffy seasoned rice, crisp, cooling vegetables, and a savoury-sweet sauce that ties everything together. It feels nourishing and a little bit indulgent all at once. It’s the kind of dinner we turn to on a busy Tuesday when we want something wholesome that doesn’t feel like a compromise.
I stumbled upon this combination by accident one evening, trying to use up some leftover vegetables and a lovely piece of salmon, and it’s been a hit in my house ever since. What makes this dish so special is the attention to detail, particularly in getting that salmon skin just right. It’s a technique that, once you master it, you’ll use again and again. It transforms a simple piece of fish into the star of the show. We’ve found it’s a brilliant way to enjoy a healthy seafood dinner without spending hours in the kitchen.
This recipe is ideal for anyone looking for a vibrant, balanced meal that comes together in about 30 minutes. It works beautifully for a nutritious lunch that will keep you going all afternoon or a sophisticated yet straightforward evening meal. If you enjoy wholesome bowls or are looking for more healthy recipes that don’t skimp on flavour, this one is for you.
Recipe Overview
This recipe guides you through creating a restaurant-quality rice bowl at home. Expect a savoury, slightly sweet soy-ginger glaze that caramelises on the salmon, paired with the freshness of cucumber and carrot. The key is achieving that perfectly rendered, crispy salmon skin. After testing this recipe five times, I finally got it just right by focusing on a dry skin and a moderately hot pan.
- Prep Time: 15 minutes
- Cook Time: 15 minutes
- Total Time: 30 minutes
- Servings: 2 people
- Difficulty: Easy
Why You’ll Love This Crispy Salmon Rice Bowl
- Genuine Flavour: The umami-rich soy and ginger sauce reduces to a sticky glaze on the warm salmon, creating a deep, savoury flavour that complements the richness of the fish.
- Ready in 30 Minutes: From start to finish, you can have this complete, satisfying meal on the table in about half an hour, making it great for weeknight dinners.
- Flexible Recipe: This bowl is wonderfully adaptable. You can swap the cucumber for thinly sliced radishes or bell peppers, add creamy avocado, or throw in some edamame beans for extra protein.
- Great for a Healthy Dinner: It’s a fantastic option when you want a meal that’s packed with Omega-3s, protein, and fresh vegetables. It leaves you feeling full and energised.
- Family Tested: This recipe always gets compliments in my house. Even my husband, who is selective about fish dishes, asks for this one regularly.
Ingredients You’ll Need
For the best results, start with high-quality ingredients. I always opt for skin-on salmon fillets, as the skin is essential for that signature crispiness. When it comes to soy sauce, I find a good quality Japanese brand like Kikkoman provides a balanced, less harsh saltiness that works beautifully in the sauce.
- 2 salmon fillets, skin-on (about 150g each)
- 1 tbsp vegetable or rapeseed oil
- A pinch of salt and freshly ground black pepper
- 150g sushi rice
- 200ml water (for the rice)
- 2 tbsp rice vinegar
- 1 tsp caster sugar
- For the Sauce:
- 3 tbsp low-sodium soy sauce
- 1 tbsp mirin (or substitute with 1 tsp sugar)
- 1 tbsp rice vinegar
- 1 tsp sesame oil
- 1 tsp freshly grated ginger
- 1 clove garlic, minced
- For the Bowl:
- 1/2 a large cucumber, thinly sliced or cut into ribbons
- 1 large carrot, julienned or grated
- 2 spring onions, finely sliced
- 1 tbsp toasted sesame seeds
- Optional: edamame beans, sliced avocado, nori strips
Sara’s Tip: Ask your fishmonger for centre-cut salmon fillets. They tend to be more uniform in thickness, which helps them cook more evenly and ensures the entire piece of skin gets gloriously crisp.
How to Make This Crispy Salmon Rice Bowl
The process is straightforward. We’ll start by getting the rice on, then prepare the vegetables and sauce while it cooks. The final, and most important, step is searing the salmon to perfection.
- Cook the Rice: Rinse the sushi rice under cold water until the water runs clear. Add the rinsed rice and 200ml of cold water to a small saucepan. Bring to a boil, then reduce the heat to the lowest setting, cover with a tight-fitting lid, and simmer for 10-12 minutes, or until all the water is absorbed. Do not lift the lid during this time. Once cooked, remove from the heat and let it stand, still covered, for 10 minutes.
- Season the Rice: While the rice is standing, mix the 2 tbsp of rice vinegar and 1 tsp of sugar in a small bowl until the sugar dissolves. Fluff the cooked rice with a fork and gently fold in the vinegar mixture. Set aside.
- Prepare the Toppings and Sauce: While the rice cooks, prepare your vegetables: slice the cucumber, julienne the carrot, and chop the spring onions. In a separate small bowl, whisk together all the sauce ingredients: soy sauce, mirin, rice vinegar, sesame oil, grated ginger, and minced garlic.
- Prep the Salmon: This is the most crucial step for crispy skin. Use a paper towel to pat the salmon fillets completely dry on all sides, especially the skin. This removes excess moisture, which is the enemy of crispiness. Season the flesh side with a little salt and pepper.
- Sear the Salmon: Heat the oil in a large non-stick frying pan over a medium-high heat. Once the oil is shimmering, carefully place the salmon fillets skin-side down in the pan. I find that pressing down gently on each fillet with a spatula for the first 30 seconds ensures the entire surface of the skin makes contact with the pan, helping it to crisp up evenly.
- Cook Through: Cook for 4-6 minutes on the skin side, depending on the thickness of your fillets. You’ll see the colour change as it cooks up the side of the fish. Resist the urge to move it around. The skin should be deeply golden and release easily from the pan.
- Flip and Glaze: Flip the salmon and cook on the other side for another 1-2 minutes. Reduce the heat to low, then pour the prepared sauce over the fillets. Let it bubble and thicken for about 30 seconds, spooning it over the salmon. Be careful not to let the garlic burn.
- Rest the Fish: Remove the salmon from the pan and let it rest for a couple of minutes before serving. This allows the juices to settle, ensuring the fish is moist and tender.
- Assemble Your Bowls: Divide the seasoned rice between two bowls. Top with the crispy salmon fillet, then arrange the cucumber, carrot, and any other toppings like edamame or avocado around it. Drizzle with any remaining sauce from the pan, sprinkle with spring onions and toasted sesame seeds, and serve immediately.
Tips From My Kitchen
- Temperature Control: A pan that is medium-hot is the goal. If the pan is too hot, the skin will burn before the fat has a chance to render out and become crisp. If it’s not hot enough, the skin will steam and stick. Look for the oil to shimmer gently.
- The Secret Step: I learned that patting the salmon skin completely dry is the absolute game-changer. Any moisture will create steam, which prevents that perfect, glass-like crispness. For an in-depth explanation of the science, check out this excellent guide to cooking salmon perfectly.
- Make-Ahead: The sauce can be made up to 3 days in advance and stored in an airtight container in the fridge. The vegetables can also be prepped a day ahead to make assembly even faster.
- Storage: Leftovers are best stored with the components separated in airtight containers in the fridge for up to 2 days. The salmon is delicious cold, or you can reheat it gently in a pan to try and revive some of the crispiness.
Equipment You’ll Need
- Large non-stick frying pan or skillet
- Sharp knife and cutting board
- Small saucepan with a lid
- Mixing bowls
- Spatula
Common Mistakes to Avoid
- Overcrowding the pan: Always give the salmon fillets plenty of space in the pan. If they are too close together, they will steam instead of sear, and you won’t get that lovely crispy skin. Cook in batches if necessary.
- Wrong temperature: Don’t start with a cold pan. Allow the pan and oil to heat up properly over a medium-high heat before adding the fish. This ensures an immediate sear that locks in flavour and prevents sticking.
- Skipping the rest time: It might be tempting to serve the salmon straight from the pan, but letting it rest for a minute or two is vital. It allows the juices to redistribute throughout the fillet, resulting in a much more tender and moist piece of fish.
Delicious Variations to Try
One of the best things about a bowl recipe is how easily you can adapt it. Feel free to play around with these ideas or whatever you have in your fridge!
- Spicy Version: Add a teaspoon of sriracha, gochujang paste, or a pinch of chilli flakes to the sauce for a welcome kick of heat.
- Vegetarian/Vegan Option: This bowl works wonderfully with firm tofu. Press the tofu to remove excess water, cut it into slabs, and pan-fry until golden and crisp on both sides before glazing with the sauce.
- Different Protein: If salmon isn’t your thing, try this with pan-seared prawns or thinly sliced chicken thighs. For a similar dish, check out my Sticky Chicken Rice Bowls recipe.
What to Serve With This Crispy Salmon Rice Bowl
This is a complete meal in one bowl, but if you’d like to add a few extras, here are some suggestions that work well:
- Pickled Ginger: A small mound of pickled ginger on the side provides a sharp, palate-cleansing contrast to the rich salmon.
- Miso Soup: A small, steaming bowl of miso soup makes a wonderful starter and complements the Japanese-inspired flavours of the main dish.
- Drink Pairing: A crisp, dry white wine like a Sauvignon Blanc or Pinot Grigio cuts through the richness of the salmon beautifully. A light Japanese lager also works very well.
Frequently Asked Questions
Crispy Salmon Rice Bowl
Ingredients
Method
- Cook the Rice: Rinse the sushi rice under cold water until the water runs clear. Add the rinsed rice and 200ml of cold water to a small saucepan. Bring to a boil, then reduce the heat to the lowest setting, cover with a tight-fitting lid, and simmer for 10-12 minutes, or until all the water is absorbed. Do not lift the lid during this time. Once cooked, remove from the heat and let it stand, still covered, for 10 minutes.
- Season the Rice: While the rice is standing, mix the 2 tbsp of rice vinegar and 1 tsp of sugar in a small bowl until the sugar dissolves. Fluff the cooked rice with a fork and gently fold in the vinegar mixture. Set aside.
- Prepare the Toppings and Sauce: While the rice cooks, prepare your vegetables: slice the cucumber, julienne the carrot, and chop the spring onions. In a separate small bowl, whisk together all the sauce ingredients: soy sauce, mirin, rice vinegar, sesame oil, grated ginger, and minced garlic.
- Prep the Salmon: This is the most crucial step for crispy skin. Use a paper towel to pat the salmon fillets completely dry on all sides, especially the skin. This removes excess moisture, which is the enemy of crispiness. Season the flesh side with a little salt and pepper.
- Sear the Salmon: Heat the oil in a large non-stick frying pan over a medium-high heat. Once the oil is shimmering, carefully place the salmon fillets skin-side down in the pan. I find that pressing down gently on each fillet with a spatula for the first 30 seconds ensures the entire surface of the skin makes contact with the pan, helping it to crisp up evenly.
- Cook Through: Cook for 4-6 minutes on the skin side, depending on the thickness of your fillets. You’ll see the colour change as it cooks up the side of the fish. Resist the urge to move it around. The skin should be deeply golden and release easily from the pan.
- Flip and Glaze: Flip the salmon and cook on the other side for another 1-2 minutes. Reduce the heat to low, then pour the prepared sauce over the fillets. Let it bubble and thicken for about 30 seconds, spooning it over the salmon. Be careful not to let the garlic burn.
- Rest the Fish: Remove the salmon from the pan and let it rest for a couple of minutes before serving. This allows the juices to settle, ensuring the fish is moist and tender.
- Assemble Your Bowls: Divide the seasoned rice between two bowls. Top with the crispy salmon fillet, then arrange the cucumber, carrot, and any other toppings like edamame or avocado around it. Drizzle with any remaining sauce from the pan, sprinkle with spring onions and toasted sesame seeds, and serve immediately.
Notes
I really hope you enjoy making this Crispy Salmon Rice Bowl. It’s a true favourite of mine, and it brings a little bit of brightness to any dinner table. Let me know how it turns out for you in the comments below – I love hearing about your kitchen adventures! Happy cooking,
Sara


