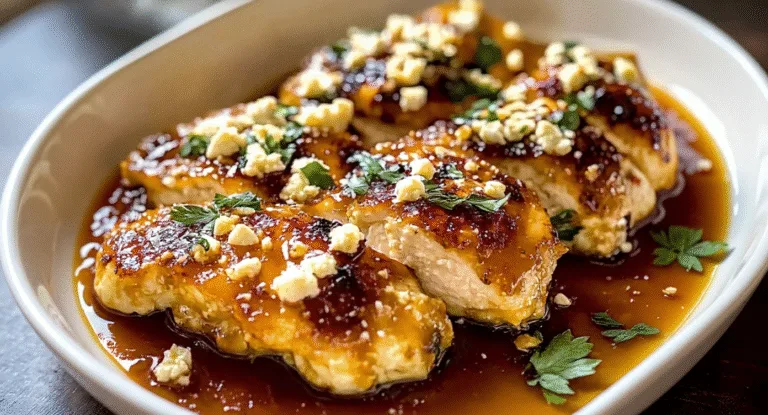
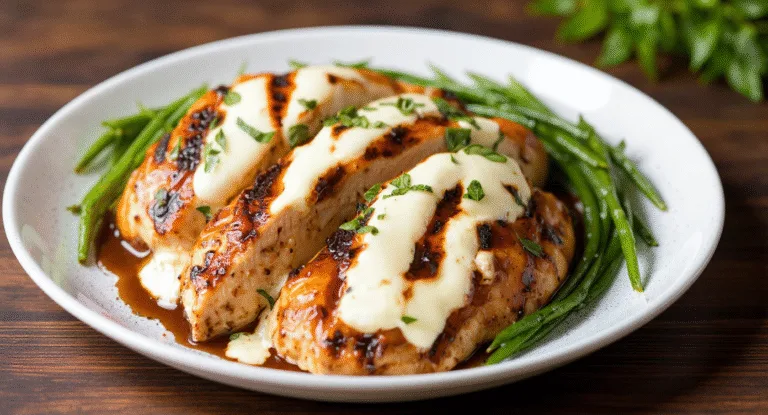
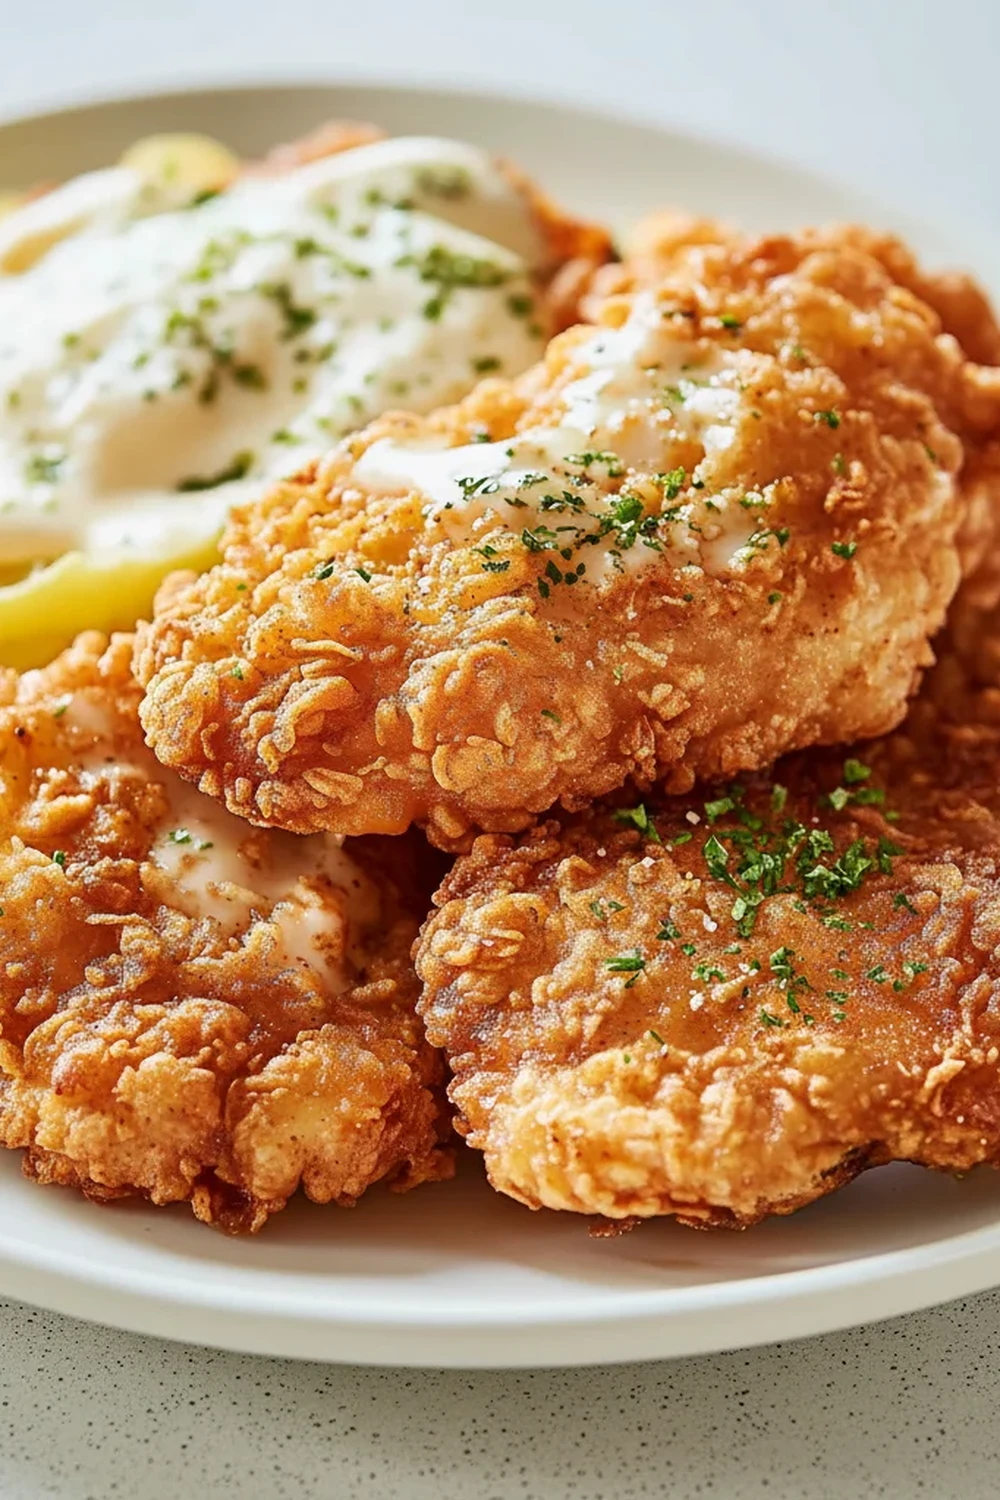
Crispy Chicken Fried Chicken Recipe at Home
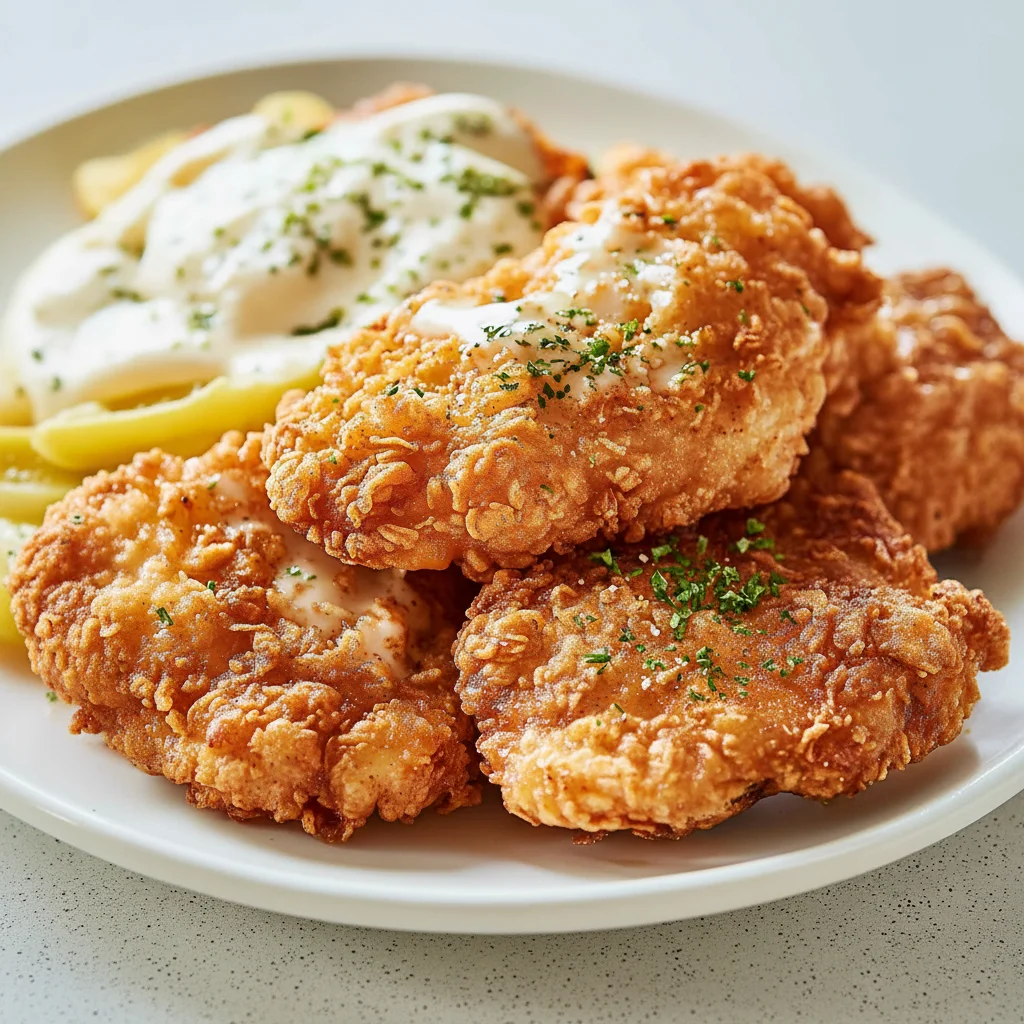
There’s something truly special about the sound of a perfectly fried chicken breast sizzling in the pan. It’s a sound that promises a shatteringly crisp, golden-brown crust giving way to incredibly tender, juicy meat. That’s exactly what this Chicken Fried Chicken recipe delivers, every single time. It’s not just a meal; it’s a feeling of pure satisfaction. Paired with a rich, peppery, creamy gravy made right in the same pan, this dish is the epitome of hearty, home-cooked food. I’ve been making this for over 6 years, and it never disappoints.
Unlike some fried chicken recipes that can feel a bit daunting, this method is straightforward and focuses on building layers of flavour at every stage. We start with chicken breasts that are gently pounded for even cooking, then they take a dip in seasoned buttermilk before being dredged in a flavour-packed flour mixture. The secret is in the double dredge, which creates that craggy, ultra-crispy coating we’re all after. The final touch, a luscious pan gravy, captures all the delicious browned bits from frying, ensuring not an ounce of flavour goes to waste.
This is the kind of dinner that works beautifully for a relaxed weekend meal or a special weeknight treat when you want something substantial and deeply savoury. It’s a recipe that always gets compliments, with family and friends asking for the secret to the perfect crust. If you’re looking for a reliable, tested, and truly delicious Chicken Fried Chicken recipe, you’ve found it.
Recipe Overview
This recipe guides you through creating exceptionally crispy, flavourful chicken fried chicken with a classic, creamy pan gravy. Expect a wonderfully seasoned, crunchy coating that stays put, encasing a succulent chicken breast. I’ve found that letting the chicken rest for a few minutes after dredging is key; it helps the coating adhere much better during frying.
- Prep Time: 20 minutes
- Cook Time: 20 minutes
- Total Time: 40 minutes
- Servings: 4 people
- Difficulty: Medium
Why You’ll Love This Chicken Fried Chicken Recipe
- Genuine Flavour: The coating isn’t just crunchy; it’s deeply savoury with paprika, garlic powder, and a good amount of black pepper. The buttermilk tenderises the chicken, adding a subtle tang that balances the richness.
- Ready in About 40 Minutes: From prepping the chicken to whipping up the gravy, this entire meal comes together in well under an hour, making it achievable even on a busy evening.
- Flexible Recipe: You can easily adjust the spice level by adding more cayenne pepper to the flour mixture. No buttermilk? A mixture of milk and lemon juice works as a great substitute (see the FAQs for details).
- Great for a Hearty Dinner: This meal is ideal when you want something truly satisfying. It’s my go-to for a Sunday dinner when I want to gather everyone around the table for a memorable meal.
- Family Tested: My kids absolutely adore the crispy coating, and my husband always asks for extra gravy. It’s one of those recipes that everyone in my house genuinely gets excited about.
Ingredients You’ll Need
For this recipe, we’re using simple, readily available ingredients. The key is using full-fat buttermilk; its thickness helps it cling to the chicken, which in turn helps the flour coating stick. I often use Trewithen Dairy buttermilk when I can find it.
- For the Chicken:
- 4 skinless, boneless chicken breasts (about 170g each)
- 240ml full-fat buttermilk
- 1 large egg
- 1 tsp hot sauce (optional, for a little kick)
- For the Dredge:
- 250g plain flour
- 2 tsp salt
- 2 tsp freshly ground black pepper
- 2 tsp paprika (not smoked)
- 1 tsp garlic powder
- 1 tsp onion powder
- ½ tsp cayenne pepper (or to taste)
- For Frying and the Gravy:
- 500ml vegetable or sunflower oil, for frying
- 60g plain flour
- 700ml whole milk
- Salt and freshly ground black pepper, to taste
Sara’s Tip: Don’t be shy with the black pepper in both the dredge and the gravy. That peppery note is characteristic of a great Chicken Fried Chicken and really complements the creamy sauce.
How to Make Chicken Fried Chicken Recipe
The process involves three main stages: preparing the chicken, dredging and frying it, and finally, making that irresistible pan gravy. Let’s walk through it together.
- Prepare the Chicken: Place the chicken breasts between two sheets of cling film or baking parchment. Using a rolling pin or meat mallet, gently pound them to an even thickness of about 1.5cm (just over ½ inch). This ensures they cook evenly. Season both sides lightly with salt and pepper.
- Set Up Your Dredging Station: You’ll need two shallow dishes. In the first, whisk together the buttermilk, egg, and optional hot sauce. In the second, combine the 250g of plain flour with the salt, pepper, paprika, garlic powder, onion powder, and cayenne pepper. Mix thoroughly with a fork.
- Dredge the Chicken: Working with one chicken breast at a time, dip it into the buttermilk mixture, ensuring it’s fully coated. Let any excess drip off. Transfer it to the flour mixture and toss to coat completely. Then, for an extra-crispy coating, dip it *back* into the buttermilk mixture, and then a final time into the flour. Press the flour on gently to help it adhere. Place the coated chicken on a wire rack and repeat with the remaining breasts. Let them rest for 10-15 minutes. This step is crucial for helping the coating set.
- Heat the Oil: Pour the vegetable oil into a large, heavy-bottomed frying pan or cast-iron skillet to a depth of about 1-1.5cm. Heat over a medium-high heat until it reaches 175°C (350°F). If you don’t have a thermometer, a pinch of flour should sizzle vigorously when dropped in.
- Fry the Chicken: Carefully place two chicken breasts in the hot oil, ensuring you don’t overcrowd the pan. Fry for 4-6 minutes per side, until deep golden brown, crispy, and cooked through. The internal temperature should reach 74°C (165°F). I find that using tongs is the best way to flip them without disturbing the crust. Transfer the cooked chicken to a clean wire rack to drain. Keep warm in a low oven while you fry the remaining chicken.
- Start the Gravy: Carefully pour off all but about 4 tablespoons (60ml) of the hot oil from the pan, leaving the crispy browned bits (the fond) behind. Return the pan to a medium heat.
- Make the Roux: Whisk the 60g of flour into the reserved hot oil. Cook, whisking constantly, for about 1-2 minutes until it forms a smooth, light brown paste. This cooks out the raw flour taste.
- Finish the Gravy: Gradually pour in the whole milk while whisking continuously to prevent lumps. Bring the gravy to a simmer, and continue to cook for 3-5 minutes, stirring, until it has thickened to a lovely pouring consistency. Season generously with salt and lots of black pepper. Taste and adjust seasoning as needed. Serve the gravy hot over the chicken fried chicken.
Tips From My Kitchen
- Temperature Control: The oil temperature is vital. Too low, and the chicken will be greasy; too high, and the crust will burn before the inside is cooked. Use a cooking thermometer if you can. If not, monitor carefully and adjust the heat to maintain a steady, energetic sizzle.
- The Secret Step: The double dredge (wet-dry-wet-dry) is the technique that creates those wonderful craggy bits and an ultra-crisp coating. I learned that letting the chicken rest on a wire rack after dredging allows the coating to hydrate and adhere, making it less likely to fall off in the pan. This tip comes from lots of reading on sites like Serious Eats, who really dive into the science of frying.
- Make-Ahead: You can prepare the seasoned flour mixture days in advance and store it in an airtight container. You can also pound the chicken breasts ahead of time and keep them covered in the fridge for up to 24 hours before you’re ready to cook.
- Storage: Leftover chicken fried chicken can be stored in an airtight container in the refrigerator for up to 3 days. The gravy should be stored separately. To reheat, place the chicken on a rack on a baking sheet in an oven preheated to 190°C (170°C fan) for 10-15 minutes until hot and crisp.
Equipment You’ll Need
- Large, heavy-bottomed frying pan or cast-iron skillet
- Meat mallet or rolling pin
- Two shallow dishes for dredging
- Wire rack
- Tongs
- Whisk
Common Mistakes to Avoid
- Overcrowding the pan: Frying too many pieces at once lowers the oil temperature dramatically, leading to a soggy, greasy crust instead of a crispy one. Always fry in batches, leaving plenty of space around each piece.
- Wrong oil temperature: As mentioned, 175°C is the sweet spot. If the oil starts smoking, it’s too hot. If the sizzle is weak and lazy, it’s too cool. Pay attention and adjust your hob’s temperature as you go.
- Skipping the rest time: The 10-15 minute rest after dredging is not just a suggestion. It gives the flour time to absorb moisture from the buttermilk, creating a ‘glue’ that helps the coating stick firmly to the chicken during frying.
Delicious Variations to Try
Once you’ve mastered the classic recipe, it’s fun to experiment. Here are a few variations we enjoy at home:
- Spicy Version: Double the cayenne pepper in the flour mixture and add a full tablespoon of hot sauce to the buttermilk. You can also add a pinch of smoked paprika for a different kind of heat.
- Vegetarian Option: This method works surprisingly well with thick slices of firm tofu or seitan cutlets. Press the tofu well to remove excess water before starting. For a vegetable option, try it with large, thick portobello mushroom caps.
- Different Protein: This recipe is fantastic with thin pork loin steaks to make Chicken Fried Pork. Just follow the exact same steps. Another great option is our Juicy Chicken Recipe, which can be adapted for a simpler pan-fried meal.
What to Serve With Chicken Fried Chicken
This dish calls for sides that can stand up to its richness and soak up all that wonderful gravy.
- Creamy Mashed Potatoes: The classic pairing for a reason. Their smooth texture is the perfect contrast to the crispy chicken.
- Steamed Green Beans: A simple side of steamed or blanched green beans, maybe tossed with a little butter, adds a welcome touch of freshness and colour. If you want a one-pan meal, check out our Chicken Breast And Green Beans for inspiration.
- Drink Pairing: A crisp, cold lager or a light pilsner cuts through the richness beautifully. For wine, a dry Chenin Blanc or a simple Pinot Grigio works well.
Frequently Asked Questions
Chicken Fried Chicken Recipe
Ingredients
Method
- Prepare the Chicken: Place the chicken breasts between two sheets of cling film or baking parchment. Using a rolling pin or meat mallet, gently pound them to an even thickness of about 1.5cm (just over ½ inch). This ensures they cook evenly. Season both sides lightly with salt and pepper.
- Set Up Your Dredging Station: You'll need two shallow dishes. In the first, whisk together the buttermilk, egg, and optional hot sauce. In the second, combine the 250g of plain flour with the salt, pepper, paprika, garlic powder, onion powder, and cayenne pepper. Mix thoroughly with a fork.
- Dredge the Chicken: Working with one chicken breast at a time, dip it into the buttermilk mixture, ensuring it's fully coated. Let any excess drip off. Transfer it to the flour mixture and toss to coat completely. Then, for an extra-crispy coating, dip it *back* into the buttermilk mixture, and then a final time into the flour. Press the flour on gently to help it adhere. Place the coated chicken on a wire rack and repeat with the remaining breasts. Let them rest for 10-15 minutes. This step is crucial for helping the coating set.
- Heat the Oil: Pour the vegetable oil into a large, heavy-bottomed frying pan or cast-iron skillet to a depth of about 1-1.5cm. Heat over a medium-high heat until it reaches 175°C (350°F). If you don't have a thermometer, a pinch of flour should sizzle vigorously when dropped in.
- Fry the Chicken: Carefully place two chicken breasts in the hot oil, ensuring you don't overcrowd the pan. Fry for 4-6 minutes per side, until deep golden brown, crispy, and cooked through. The internal temperature should reach 74°C (165°F). I find that using tongs is the best way to flip them without disturbing the crust. Transfer the cooked chicken to a clean wire rack to drain. Keep warm in a low oven while you fry the remaining chicken.
- Start the Gravy: Carefully pour off all but about 4 tablespoons (60ml) of the hot oil from the pan, leaving the crispy browned bits (the fond) behind. Return the pan to a medium heat.
- Make the Roux: Whisk the 60g of flour into the reserved hot oil. Cook, whisking constantly, for about 1-2 minutes until it forms a smooth, light brown paste. This cooks out the raw flour taste.
- Finish the Gravy: Gradually pour in the whole milk while whisking continuously to prevent lumps. Bring the gravy to a simmer, and continue to cook for 3-5 minutes, stirring, until it has thickened to a lovely pouring consistency. Season generously with salt and lots of black pepper. Taste and adjust seasoning as needed. Serve the gravy hot over the chicken fried chicken.
Notes
I truly hope you give this Chicken Fried Chicken recipe a go. It’s a labour of love that pays off in every single crispy, savoury bite. It’s the kind of meal that brings warmth and happiness to the dinner table. Let me know how it turns out for you in the comments below – I love hearing about your kitchen adventures! Happy cooking, Sara.