Cool Whip Cookies Chocolate Crinkle
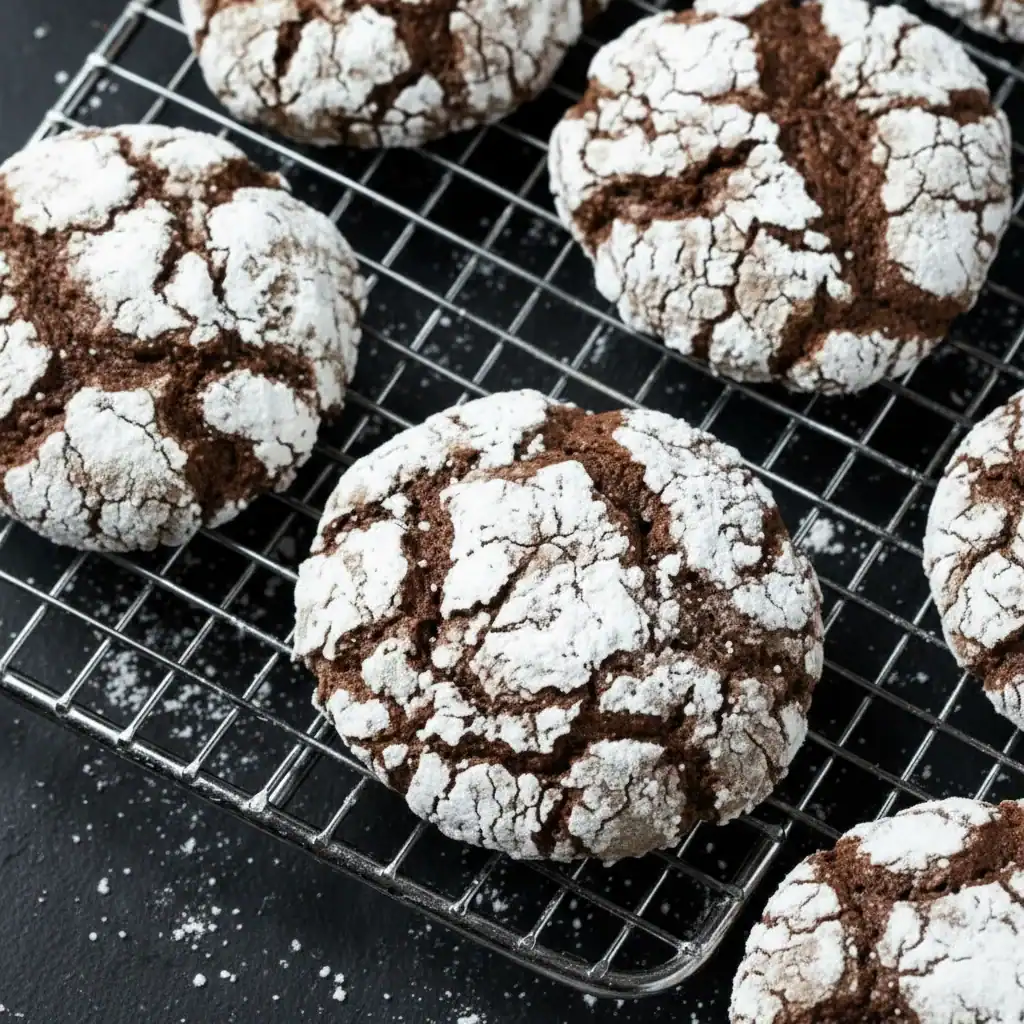
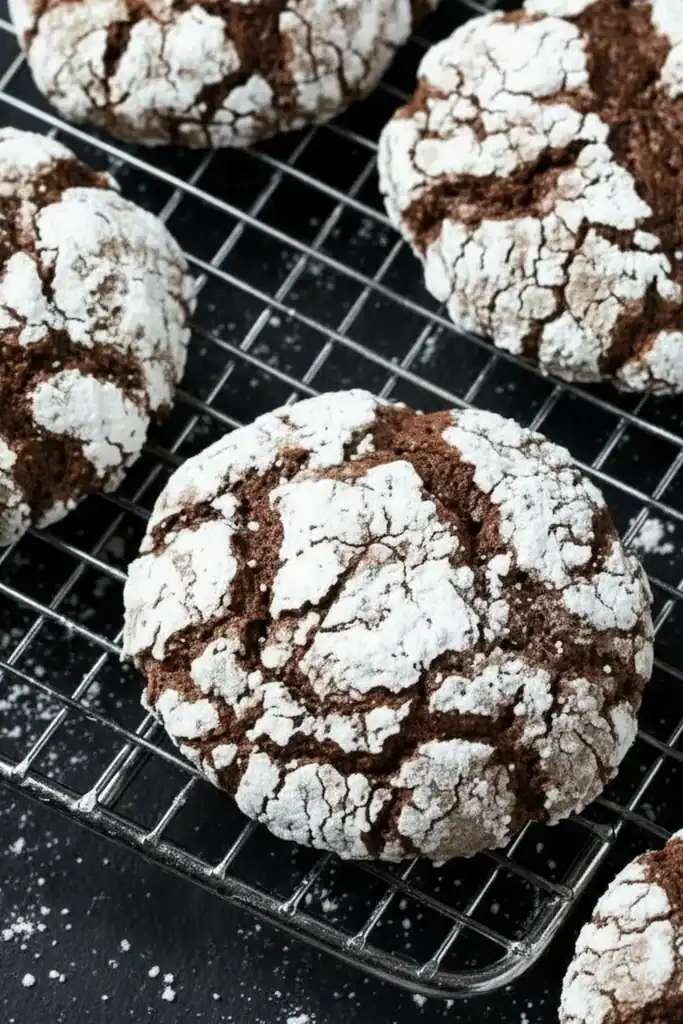
There are some baking recipes that feel like a delightful secret, a clever trick you’ve discovered that yields spectacular results with minimal fuss. These Cool Whip Cookies are exactly that. The first time I stumbled upon the idea of using a tub of whipped topping in a cookie dough, I was sceptical. But the result is a cookie unlike any other: incredibly soft, with a fudgy, brownie-like texture and a stunning, snowy white crinkle top that looks like it came from a professional bakery. My kids absolutely devour this every time I make it, and their little faces, dusted with icing sugar, are all the proof I need that this recipe is a keeper.
What makes these chocolate crinkle cookies so special is the Cool Whip itself. It replaces the butter and much of the liquid in a traditional cookie recipe, creating a uniquely moist and airy crumb that stays soft for days. The dough itself is a bit of a wonder – sticky, light, and almost mousse-like. It can be a little surprising to work with at first, but trust the process. That slightly unusual dough transforms in the oven into these beautiful, deeply chocolatey morsels.
We make these cookies all year round, but they feel particularly festive during the winter months, looking like little snow-dusted treats on a Christmas platter. They are also wonderful for bake sales or for when you need a simple, yet impressive, dessert that comes together in about 30 minutes. Anyone who loves the rich flavour of a good chocolate brownie will fall head over heels for these.
Recipe Overview
These Cool Whip Cookies deliver a deep chocolate flavour wrapped in a wonderfully soft, chewy package. The magic is in the texture – the centre is moist and almost cakey, while the edges have a delicate crispness. The powdered sugar coating creates a striking “crinkle” effect as the cookies bake and spread. After testing this recipe five times, I finally got the chill time and baking temperature just right to guarantee that perfect fudgy middle and a beautiful crackled top every single time.
- Prep Time: 15 minutes (plus 30 minutes chilling)
- Cook Time: 10-12 minutes
- Total Time: 57 minutes
- Servings: 24 cookies
- Difficulty: Easy
Why You’ll Love These Cool Whip Cookies
- Genuine Chocolate Flavour: Using a quality chocolate fudge or devil’s food cake mix gives these cookies an intensely rich, chocolatey taste that isn’t overly sweet. The texture is more like a brownie than a typical cookie.
- Ready in Under an Hour: From mixing the dough to pulling the warm cookies from the oven, the whole process (including chill time) takes less than an hour, making them ideal for a spontaneous baking session.
- A Wonderfully Flexible Recipe: This recipe works beautifully with other cake mix flavours! Try it with a lemon cake mix for a zesty summer treat, or a red velvet mix for a dramatic-looking cookie.
- Great for Sharing: Their unique appearance and texture make them a standout on any dessert table. They work wonderfully for holiday cookie exchanges, family gatherings, or packed into a lunchbox as a special treat.
- Family Tested and Approved: These are one of the most requested bakes in my house. The simple process means the children can get involved with rolling the dough in icing sugar, and everyone seems to love the final result.
Ingredients You’ll Need
The ingredient list for these cookies is wonderfully short. The key is to use a good quality boxed cake mix, as it provides the flour, sugar, and flavour base. I always reach for Betty Crocker’s Devil’s Food Cake Mix for its rich, dark chocolate flavour, but any similar brand will work well.
- 450g box chocolate fudge or devil’s food cake mix
- 225g tub Cool Whip, thawed but still cold
- 1 large free-range egg
- 120g icing sugar, for rolling
Sara’s Tip: Make sure your Cool Whip is fully thawed in the refrigerator, not at room temperature. If it’s too warm, the dough will be overly sticky and harder to handle, even after chilling.
How to Make Cool Whip Cookies
The process for making these cookies is very straightforward. The dough is much stickier than a standard cookie dough, so don’t be alarmed! Chilling is the essential step that makes it manageable.
- Combine the Main Ingredients: In a large bowl, or the bowl of a stand mixer fitted with the paddle attachment, combine the dry cake mix, the thawed Cool Whip, and the egg.
- Mix the Dough: Mix on a low speed until everything is just combined. The dough will be very soft and sticky, almost like a thick brownie batter. Avoid over-mixing; stop as soon as there are no dry streaks of cake mix left.
- Chill the Dough: This is the most important step! Cover the bowl with cling film and place it in the refrigerator to chill for at least 30 minutes. This will firm up the dough, making it possible to roll into balls.
- Preheat and Prepare: Towards the end of the chilling time, preheat your oven to 180°C (160°C fan). Line two large baking trays with parchment paper.
- Coat the Cookies: Place the icing sugar in a shallow bowl. Take about a tablespoon of the chilled dough and roll it into a 1-inch ball. What works best for me is using a small cookie scoop to portion the dough evenly. Drop the ball into the icing sugar and roll it around until it’s generously and completely coated.
- Arrange on Trays: Place the sugar-coated dough balls onto the prepared baking trays, leaving about 2 inches of space between each one to allow for spreading.
- Bake the Cookies: Bake for 10-12 minutes. The cookies will puff up and the tops will crackle, revealing the dark chocolate cookie beneath the white sugar. They should look set around the edges but still be soft in the centre.
- Cool Properly: Let the cookies cool on the baking tray for 5 minutes. They will be very soft when they first come out of the oven, and this allows them to set. Afterwards, carefully transfer them to a wire rack to cool completely.
Tips From My Kitchen
- Temperature Control: Chilling the dough is non-negotiable. If you’re in a hurry, you can pop the bowl in the freezer for 15 minutes, but keep a close eye on it. The colder the dough, the less it will spread and the fudgier the final cookie will be.
- The Secret Step: For a really bright white, crackled finish, I learned that giving the dough balls a second roll in the icing sugar just before placing them on the tray makes a huge difference. The thicker coat prevents the sugar from melting into the cookie too much.
- Make-Ahead Dough: The cookie dough can be made, covered, and stored in the refrigerator for up to 24 hours before you plan to bake. This makes it a great option for getting ahead on party prep.
- Storage: Once completely cool, store the cookies in an airtight container at room temperature. They will stay wonderfully soft for up to 4 days. I find they are even fudgier on day two!
Equipment You’ll Need
You don’t need any fancy gadgets for this recipe, just standard baking equipment.
- Stand mixer or a large bowl with a hand mixer
- Baking trays
- Parchment paper
- Small cookie scoop (optional, but very helpful)
- Wire cooling rack
Common Mistakes to Avoid
- Overcrowding the Pan: These cookies need space to spread. If you place them too close together, they will bake into one another and won’t develop those lovely crisp edges. Stick to about 8-10 cookies per large tray.
- Using Warm Cool Whip: If your whipped topping is at room temperature, the dough will be almost liquid and impossible to work with. It needs to be thawed but still chilled from the fridge for the best consistency.
- Skipping the Chill Time: I know it’s tempting to bake them right away, but you’ll have a sticky mess on your hands. Chilling firms up the dough enough so you can roll it. This step ensures the cookies bake up thick and chewy rather than spreading too thin.
Delicious Variations to Try
One of the best things about this recipe is how easily it can be adapted. Here are a few variations we love:
- Mexican Hot Chocolate: Add 1/2 teaspoon of cinnamon and a small pinch of cayenne pepper to the dry cake mix for a gentle, warming spice that pairs beautifully with the deep chocolate.
- Lemon Crinkle Cookies: Swap the chocolate cake mix for a lemon cake mix. The result is a wonderfully bright, zesty cookie that’s ideal for spring and summer.
- Red Velvet Crinkles: Use a red velvet cake mix for a truly stunning cookie. You can even add 100g of white chocolate chips to the dough for an extra decadent treat. The method is explained well in this guide to baking techniques.
What to Serve With Cool Whip Cookies
These cookies are fantastic on their own, but they also pair wonderfully with other treats. They’re a lovely way to finish a family meal, especially after a savoury main course like my Lemon Garlic Chicken, as their rich sweetness provides a perfect contrast.
- A Cold Glass of Milk: The classic pairing for any chocolate cookie, and it’s a classic for a reason.
- Vanilla Bean Ice Cream: Serve a warm cookie alongside a scoop of good quality vanilla ice cream for a simple yet elegant dessert.
- A Hot Cup of Coffee: The rich chocolate is a great match for the bitter notes in a fresh coffee or espresso. They make for a perfect afternoon pick-me-up.
Frequently Asked Questions
Cool Whip Cookies
Ingredients
Method
- Combine the Main Ingredients: In a large bowl, or the bowl of a stand mixer fitted with the paddle attachment, combine the dry cake mix, the thawed Cool Whip, and the egg.
- Mix the Dough: Mix on a low speed until everything is just combined. The dough will be very soft and sticky, almost like a thick brownie batter. Avoid over-mixing; stop as soon as there are no dry streaks of cake mix left.
- Chill the Dough: This is the most important step! Cover the bowl with cling film and place it in the refrigerator to chill for at least 30 minutes. This will firm up the dough, making it possible to roll into balls.
- Preheat and Prepare: Towards the end of the chilling time, preheat your oven to 180°C (160°C fan). Line two large baking trays with parchment paper.
- Coat the Cookies: Place the icing sugar in a shallow bowl. Take about a tablespoon of the chilled dough and roll it into a 1-inch ball. What works best for me is using a small cookie scoop to portion the dough evenly. Drop the ball into the icing sugar and roll it around until it's generously and completely coated.
- Arrange on Trays: Place the sugar-coated dough balls onto the prepared baking trays, leaving about 2 inches of space between each one to allow for spreading.
- Bake the Cookies: Bake for 10-12 minutes. The cookies will puff up and the tops will crackle, revealing the dark chocolate cookie beneath the white sugar. They should look set around the edges but still be soft in the centre.
- Cool Properly: Let the cookies cool on the baking tray for 5 minutes. They will be very soft when they first come out of the oven, and this allows them to set. Afterwards, carefully transfer them to a wire rack to cool completely.
Notes
I really hope you give these wonderfully different Cool Whip Cookies a try. They always get compliments whenever I make them, and they’ve become a firm favourite in my baking repertoire. They are a testament to how a few simple ingredients can create something truly special. If you bake a batch, please let me know how they turned out in the comments below! I love hearing from you.
Happy Baking,
Sara


