Classic Boston Cream Pie Recipe for Dessert
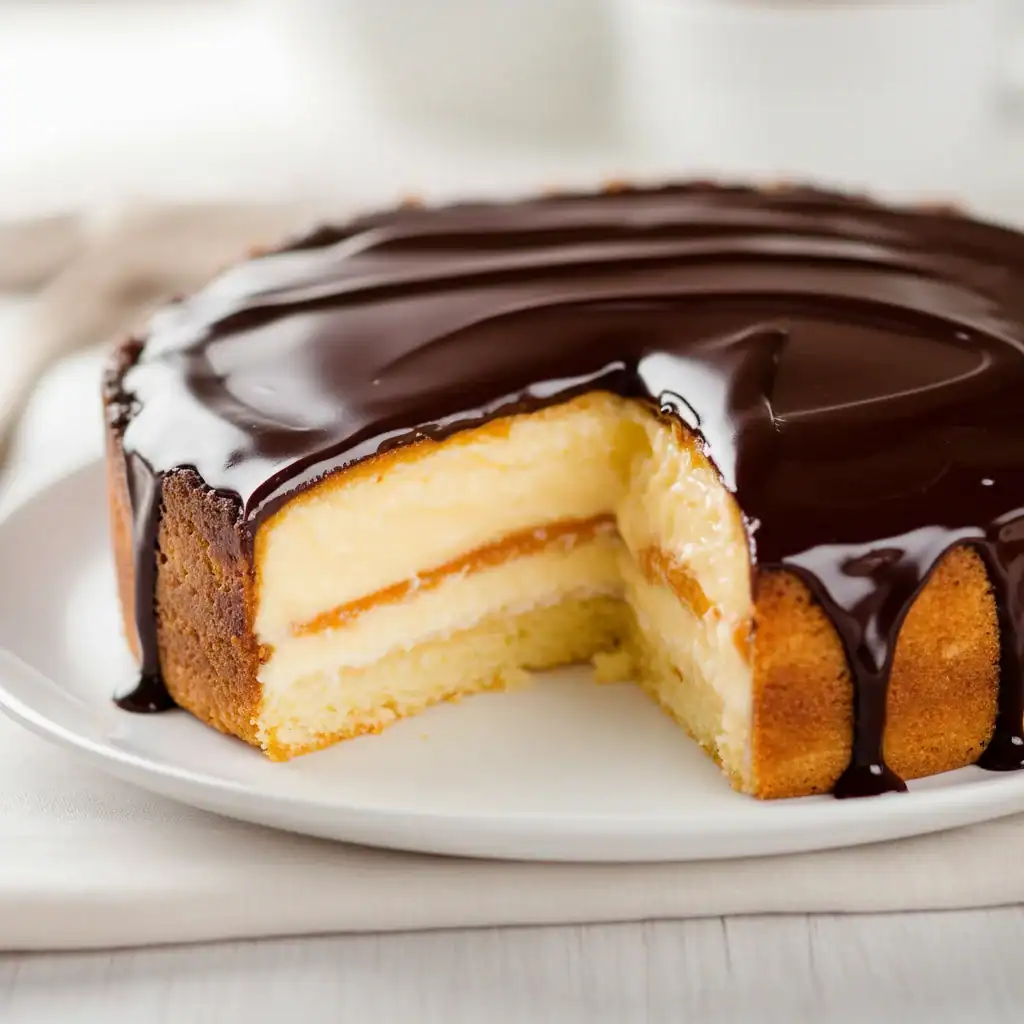
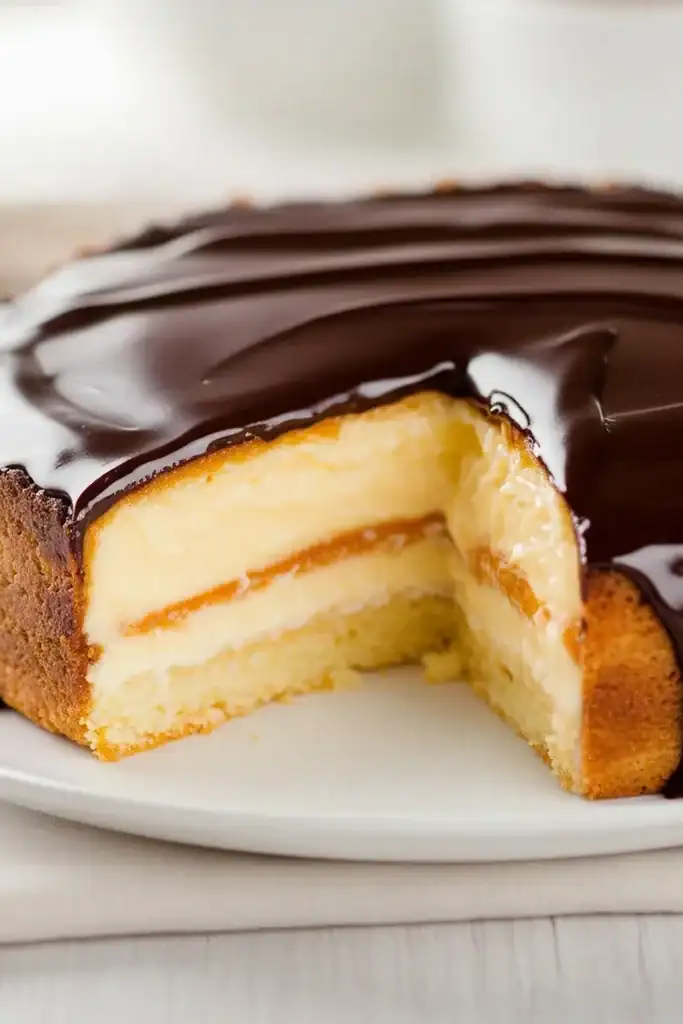
There’s a delightful irony to the Boston Cream Pie – it isn’t a pie at all. It’s a magnificent cake, a triumphant assembly of three distinct, wonderful layers that come together to create something truly special. We’re talking about two layers of light, buttery sponge, a thick, luscious layer of vanilla pastry cream sandwiched between them, and a glossy, rich chocolate ganache poured over the top. It’s a classic for a reason, and this recipe is the one I’ve honed over the years to get it just right. I’ve been making this for over 8 years, and it never disappoints.
What I adore about this Boston Cream Pie recipe is the balance. The sponge is tender and not overly sweet, which allows the creamy vanilla filling and the deep chocolate topping to shine. The contrast between the cool, smooth cream and the soft cake is simply heavenly. It’s the kind of bake that feels impressive and looks stunning sitting on a cake stand, yet it’s built from simple, honest components.
This is a wonderful bake for a weekend afternoon tea, a birthday celebration, or whenever you feel like treating your family to something a bit spectacular. While it requires a few separate steps, each one is straightforward, and the end result is so worth the effort. If you’re looking for a centrepiece dessert that always gets compliments, this is the one for you.
Recipe Overview
This recipe breaks down the classic Boston Cream Pie into three manageable stages: a light vanilla sponge, a silky smooth pastry cream, and a rich chocolate ganache. The flavour profile is a timeless combination of vanilla, chocolate, and buttery cake. I’ve found that the key to success is patience, particularly allowing each component to cool completely before assembly to prevent any melting or sogginess.
- Prep Time: 45 minutes
- Cook Time: 35 minutes
- Total Time: 3 hours (includes cooling and chilling)
- Servings: 8-10 people
- Difficulty: Medium
Why You’ll Love This Boston Cream Pie Recipe
- A Harmony of Textures: You get the airy softness of the sponge, the cool, substantial creaminess of the vanilla filling, and the smooth, rich snap of the chocolate ganache in every single bite.
- Comes Together in Stages: The active kitchen time is broken into easy chunks, meaning you can prepare the components without feeling overwhelmed. You can even make the cream a day ahead.
- Customisable Sweetness: You have full control. Prefer a less sweet dessert? Use a dark chocolate with a higher cocoa percentage for the ganache. Want it richer? Go for milk chocolate.
- Works Beautifully for Special Occasions: This cake has a real sense of occasion. It’s ideal for birthdays, anniversaries, or as the grand finale to a lovely dinner party. It would be a fantastic dessert after our popular Bruschetta Chicken.
- Family Tested: My kids absolutely devour this every time I make it. They always fight over who gets the last piece with the most chocolate ganache on it!
Ingredients You’ll Need
For the best results, I recommend using good quality ingredients, especially the vanilla and chocolate, as their flavours are front and centre. I always use Nielsen-Massey vanilla bean paste for a really intense, authentic vanilla flavour in the pastry cream. All ingredients should be at room temperature unless specified.
- For the Sponge Cake:
- 130g plain flour
- 1 ½ teaspoons baking powder
- ¼ teaspoon salt
- 115g unsalted butter, softened
- 200g caster sugar
- 2 large eggs
- 1 teaspoon vanilla extract
- 120ml whole milk
- For the Pastry Cream:
- 3 large egg yolks
- 100g caster sugar
- 25g cornflour
- ½ teaspoon salt
- 350ml whole milk
- 1 teaspoon vanilla bean paste or extract
- 30g unsalted butter, cold and cubed
- For the Chocolate Ganache:
- 120g dark chocolate (at least 60% cocoa solids), finely chopped
- 120ml double cream
- 1 tablespoon golden syrup or corn syrup (optional, for shine)
Sara’s Tip: Ensure your butter for the sponge is properly softened to room temperature. It should give way easily when pressed with a finger. This is crucial for creaming it with the sugar to create a light, airy cake.
How to Make Boston Cream Pie Recipe
We’ll tackle this in three parts: cake, cream, and ganache. The most important part is the assembly, which requires a bit of patience while things cool down. Just follow the steps, and you’ll have a beautiful cake to show for it.
- Prepare for Baking: Preheat your oven to 180°C (160°C fan). Grease and flour two 20cm (8-inch) round cake tins, and line the bottoms with parchment paper.
- Make the Cake Batter: In a medium bowl, whisk together the plain flour, baking powder, and salt. In a separate large bowl, use a stand mixer or electric hand mixer to beat the softened butter and caster sugar on medium-high speed until light, pale, and fluffy, about 3-4 minutes.
- Combine Wet Ingredients: Beat the eggs into the butter mixture one at a time, scraping down the bowl after each addition. Mix in the vanilla extract. Reduce the mixer speed to low and add the flour mixture in three additions, alternating with the milk in two additions (beginning and ending with the flour). Mix only until just combined – do not overmix.
- Bake the Sponges: Divide the batter evenly between your prepared tins and smooth the tops. Bake for 30-35 minutes, or until a skewer inserted into the centre comes out clean. Let the cakes cool in their tins for 15 minutes before inverting them onto a wire rack to cool completely.
- Start the Pastry Cream: While the cakes bake, make the filling. In a medium, heatproof bowl, whisk the egg yolks and sugar together until pale and thick. Whisk in the cornflour and salt until smooth.
- Heat the Milk: Pour the milk into a medium saucepan and heat over a medium heat until it just begins to simmer at the edges. Don’t let it boil.
- Temper and Thicken: Slowly pour about half of the hot milk into the egg yolk mixture, whisking constantly to temper the eggs. Pour the tempered egg mixture back into the saucepan with the remaining milk. Cook over medium heat, whisking constantly, until the cream thickens and starts to bubble. Let it bubble for 1 minute, still whisking, then remove from the heat. I find that passing it through a fine-mesh sieve at this point guarantees a silky texture.
- Finish the Pastry Cream: Whisk in the cold butter and vanilla until the butter has fully melted and the cream is smooth and glossy. Transfer the pastry cream to a bowl, press a piece of cling film directly onto the surface to prevent a skin from forming, and refrigerate for at least 2 hours, or until completely cold and set.
- Make the Ganache: Place the finely chopped chocolate in a heatproof bowl. Gently heat the double cream (and golden syrup, if using) in a small saucepan until it’s just simmering. Pour the hot cream over the chocolate and let it sit for 5 minutes without stirring. Then, gently whisk from the centre outwards until the ganache is smooth and glossy. Let it cool for 15-20 minutes, or until it’s slightly thickened but still pourable.
- Assemble Your Pie: Place one cooled cake layer on your serving plate or cake stand. Give the chilled pastry cream a good whisk to loosen it up, then spread it evenly over the cake, leaving a small border around the edge. Place the second cake layer on top. Pour the slightly cooled ganache over the top of the cake, using a spatula to gently guide it so it drips appealingly down the sides. Refrigerate for at least 30 minutes for the ganache to set before slicing and serving.
Tips From My Kitchen
- Temperature Control is Everything: Do not rush the cooling. Assembling the cake with a warm sponge or warm pastry cream will result in a soggy, melting disaster. Cool components are non-negotiable for a clean, stable cake.
- The Secret Step: I learned that passing the cooked pastry cream through a sieve before chilling is the best way to ensure it’s perfectly smooth. It catches any small bits of cooked egg that might have formed, giving you a professional-quality filling every time.
- Make-Ahead Magic: You can make both the cake layers and the pastry cream a day in advance. Store the wrapped cake layers at room temperature and the pastry cream in the fridge with cling film on its surface. Assemble on the day you plan to serve it for the best results. For other meal-prep ideas, check out our Healthy Chicken Recipes.
- Storage: This cake must be stored in the refrigerator because of the cream filling. Keep it in an airtight container or under a cake dome for up to 3 days. It tastes best when you let it sit at room temperature for 20 minutes before serving.
Equipment You’ll Need
- Stand mixer or electric hand mixer
- Two 20cm (8-inch) round cake tins
- Parchment paper
- Wire cooling rack
- Medium saucepan
- Whisk and spatula
Delicious Variations to Try
While the classic is hard to beat, it’s also a wonderful base for a few creative twists. Here are some ideas we’ve enjoyed:
- Mocha Cream Pie: Dissolve 2 teaspoons of instant espresso powder in the hot milk before you temper the eggs for the pastry cream. The coffee flavour pairs beautifully with the chocolate.
- A Zesty Twist: Add the finely grated zest of one orange to the cake batter. It adds a lovely, fresh fragrance and cuts through the richness of the cream and chocolate.
- White Chocolate Dream: For a sweeter, creamier finish, simply swap the dark chocolate in the ganache for the same amount of good-quality white chocolate.
What to Serve With Boston Cream Pie Recipe
This cake is a complete dessert all on its own, but a simple drink pairing can elevate the experience. For a wonderful family meal, this dessert would be a great follow-up to our Chicken Breast and Green Beans.
- Freshly Brewed Coffee: A cup of medium-roast black coffee or a flat white is the perfect companion, as its slight bitterness contrasts wonderfully with the cake’s sweetness.
- A Pot of Tea: A classic English Breakfast or Earl Grey tea works beautifully. The floral notes of Earl Grey are particularly nice with the vanilla cream.
- Dessert Wine: For a more grown-up occasion, a small glass of a light dessert wine like a late-harvest Riesling would be a delightful pairing.
Frequently Asked Questions
Boston Cream Pie
Ingredients
Method
- Prepare for Baking: Preheat your oven to 180°C (160°C fan). Grease and flour two 20cm (8-inch) round cake tins, and line the bottoms with parchment paper.
- Make the Cake Batter: In a medium bowl, whisk together the plain flour, baking powder, and salt. In a separate large bowl, use a stand mixer or electric hand mixer to beat the softened butter and caster sugar on medium-high speed until light, pale, and fluffy, about 3-4 minutes.
- Combine Wet Ingredients: Beat the eggs into the butter mixture one at a time, scraping down the bowl after each addition. Mix in the vanilla extract. Reduce the mixer speed to low and add the flour mixture in three additions, alternating with the milk in two additions (beginning and ending with the flour). Mix only until just combined – do not overmix.
- Bake the Sponges: Divide the batter evenly between your prepared tins and smooth the tops. Bake for 30-35 minutes, or until a skewer inserted into the centre comes out clean. Let the cakes cool in their tins for 15 minutes before inverting them onto a wire rack to cool completely.
- Start the Pastry Cream: While the cakes bake, make the filling. In a medium, heatproof bowl, whisk the egg yolks and sugar together until pale and thick. Whisk in the cornflour and salt until smooth.
- Heat the Milk: Pour the milk into a medium saucepan and heat over a medium heat until it just begins to simmer at the edges. Don't let it boil.
- Temper and Thicken: Slowly pour about half of the hot milk into the egg yolk mixture, whisking constantly to temper the eggs. Pour the tempered egg mixture back into the saucepan with the remaining milk. Cook over medium heat, whisking constantly, until the cream thickens and starts to bubble. Let it bubble for 1 minute, still whisking, then remove from the heat. I find that passing it through a fine-mesh sieve at this point guarantees a silky texture.
- Finish the Pastry Cream: Whisk in the cold butter and vanilla until the butter has fully melted and the cream is smooth and glossy. Transfer the pastry cream to a bowl, press a piece of cling film directly onto the surface to prevent a skin from forming, and refrigerate for at least 2 hours, or until completely cold and set.
- Make the Ganache: Place the finely chopped chocolate in a heatproof bowl. Gently heat the double cream (and golden syrup, if using) in a small saucepan until it's just simmering. Pour the hot cream over the chocolate and let it sit for 5 minutes without stirring. Then, gently whisk from the centre outwards until the ganache is smooth and glossy. Let it cool for 15-20 minutes, or until it's slightly thickened but still pourable.
- Assemble Your Pie: Place one cooled cake layer on your serving plate or cake stand. Give the chilled pastry cream a good whisk to loosen it up, then spread it evenly over the cake, leaving a small border around the edge. Place the second cake layer on top. Pour the slightly cooled ganache over the top of the cake, using a spatula to gently guide it so it drips appealingly down the sides. Refrigerate for at least 30 minutes for the ganache to set before slicing and serving.
Notes
There you have it – a truly classic bake that feels both nostalgic and elegant. I hope you love making this Boston Cream Pie Recipe as much as we love eating it in my house. The moment when you slice through the set ganache, soft cake, and cool cream is so satisfying. Please let me know how you get on in the comments below! – Sara x


