Chocolate Earthquake Cake Decadent Dessert
Have you ever craved a dessert that joyfully tears up the rulebook? A cake that is wonderfully messy, utterly delicious, and masterfully combines the deep richness of a chocolate fudge cake with the velvety tang of a cheesecake? If that sounds like heaven, then we’ve got just the recipe for you. Allow us to introduce the **Chocolate Earthquake Cake Decadent Dessert**, a remarkable treat that forges its own cracked, beautiful landscape as it bakes, revealing molten chasms of gooey delight. This isn’t merely a cake; it’s a culinary adventure, and one we are thrilled to guide you through.
This dessert provides the perfect sweet finale to a savoury meal. We feel it’s a magnificent reward after a flavour-packed main course like our Lemon Garlic Chicken or a comforting classic such as our Garlic Parmesan Chicken Pasta Recipe. The sheer opulence of this cake is a celebration in its own right.
What Exactly Is an Earthquake Cake?
The name might sound a little dramatic, but it perfectly describes the unique finish of this amazing dessert. An **Earthquake Cake** earns its name from the tectonic-like shifts that occur within the oven. As the cake bakes, the dense, creamy cheesecake filling gently sinks into the lighter chocolate batter, while the coconut and pecans rise up from the base. This baking process creates a stunningly cracked, fissured top that looks like the aftermath of a delicious geological event. Each slice presents a unique topography of deep chocolate, creamy swirls, and crunchy nuts. It is this beautiful imperfection that gives the cake its undeniable charm and makes it so irresistible.
Why You’ll Love This Recipe
- Wonderfully Simple: We begin with a chocolate cake mix as our foundation, which makes this recipe incredibly approachable and ideal for bakers of any experience level. You get a truly homemade taste with minimal fuss.
- A Medley of Textures: From the moist, rich cake and the smooth, velvety cheesecake filling to the chewy coconut and crunchy pecans, every mouthful is a delightful textural journey.
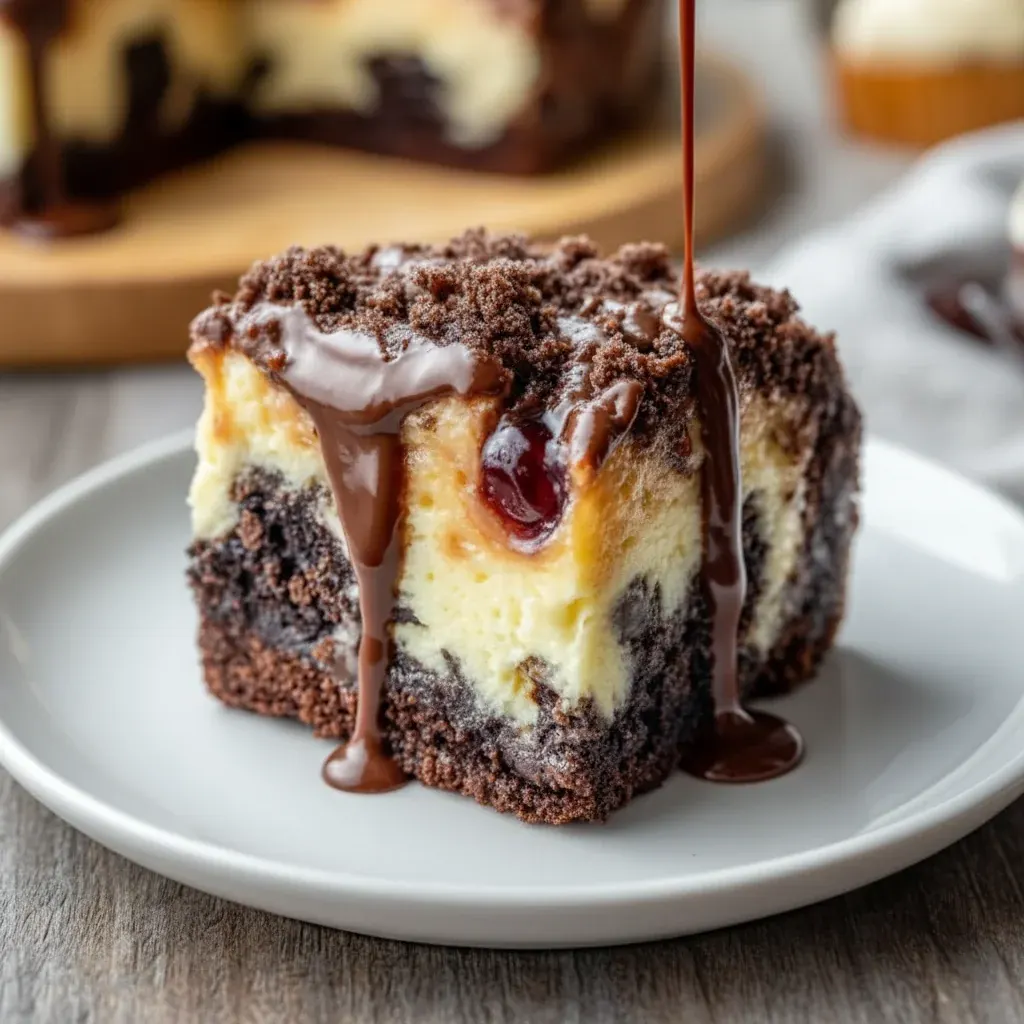
- Gooey, Molten Core: The true magic of this cake lies in its gooey, almost-liquid centre. It is at its best when served slightly warm, creating a self-saucing effect that is the definition of pure indulgence.
- Visually Striking: Forget about perfectly smooth icing! The cracked, cratered surface is a natural piece of art. It’s a definite showstopper that will have all your guests asking for the recipe.
- Easily Adaptable: Not keen on nuts or coconut? Not a problem! We will share a few simple substitutions to tailor this recipe perfectly to your preferences.
Ingredients
- 1 box (around 430g) of chocolate fudge or devil’s food cake mix
- 3 large eggs, at room temperature
- 120ml vegetable oil
- 240ml water
- 150g sweetened shredded coconut
- 120g chopped pecans (or walnuts)
- 225g full-fat cream cheese, softened
- 115g unsalted butter, softened
- 250g icing sugar, sifted
- 1 tsp vanilla extract
- 150g milk or semi-sweet chocolate chips
Crafting Your Chocolate Earthquake Cake: A Step-by-Step Guide
Putting this masterpiece together is a wonderfully rewarding process. We have broken it down into simple, easy-to-follow steps to ensure your cake emerges from the oven perfectly cracked and delicious every single time.
Step 1: Prepare the “Rubble” Layer
First things first, we need to get our baking tin ready. Preheat your oven to 175°C (160°C Fan/Gas Mark 4). Thoroughly grease and flour a 23×33 cm (9×13 inch) baking tin. This is a very sticky cake, so preparing the tin properly is key to preventing it from catching.
Next, scatter the sweetened shredded coconut in an even layer across the bottom of the prepared tin. Follow this with an even distribution of the chopped pecans. This base layer of “rubble” will bubble up through the cake as it bakes, infusing fantastic texture and flavour throughout.
Step 2: Mix the Rich Chocolate Cake Batter
In a large mixing bowl, add the chocolate cake mix, eggs, vegetable oil, and water. Using an electric hand mixer or a stand mixer, beat the ingredients on a low speed until they are just incorporated. Afterwards, increase the speed to medium and mix for a couple of minutes until the batter is smooth and has a little air in it. Take care not to over-mix. Gently pour this luscious **Chocolate Cake** batter over the coconut and pecan layer, spreading it evenly to cover the base.
Step 3: Create the Creamy Cheesecake “Fissures”
Now, let’s create the element that puts the “quake” in our earthquake cake! In a separate bowl, it’s time to whip up the creamy filling. It is vital that your cream cheese and butter are properly softened to room temperature for a smooth, lump-free result. For some brilliant advice on softening cream cheese quickly, you can check out this useful guide from King Arthur Baking.
Combine the softened cream cheese and butter in the bowl. Beat them together with an electric mixer on a medium speed until the mixture is light and airy. Bit by bit, add the sifted icing sugar, mixing on low at first to prevent a sugary cloud, then raising the speed once it’s blended in. Lastly, stir in the vanilla extract. You should have a wonderfully smooth and creamy filling, a crucial part of this **Cheesecake Cake** hybrid.
Spoon large dollops of this cream cheese mixture over the top of the chocolate batter. Don’t aim for neatness! The dollops can be placed randomly. Finally, sprinkle the chocolate chips over the entire surface, covering both the chocolate batter and the cream cheese spots.
Step 4: Bake to Cracked Perfection
Place the tin into the preheated oven and bake for 40-50 minutes. This is when the transformation happens! You’ll witness the surface bubble, crack, and shift into its final form. The cake is ready when the edges look set and a skewer inserted into the cakey sections comes out with moist crumbs. The centre should still have a slight wobble; this is the secret to a perfectly gooey middle. Resist the temptation to overbake, as this will result in a dry cake.
Once it’s baked, take the cake out of the oven and let it cool on a wire rack for at least 30 minutes before you slice into it. This cake is absolutely divine when served warm.
Top Tips for the Ultimate Chocolate Earthquake Cake
We want you to have the best baking experience possible. Here are a few extra pointers we have picked up along the way:
Ingredient Variations
- Nuts: While pecans are the classic choice, walnuts also work wonderfully. If you have a nut allergy or they’re just not your thing, feel free to leave them out completely. You could even swap them for more chocolate chips or some toffee pieces.
- Cake Mix: We adore a rich devil’s food or chocolate fudge mix, but any standard chocolate cake mix will do the job. Don’t be afraid to experiment with dark chocolate or even a German chocolate variety.
- Coconut: If you’re not a fan of coconut, you can simply omit it. The cake will be a little less chewy but will remain exceptionally delicious.
Technique and Serving
- Room Temperature Ingredients: For the silkiest cheesecake filling, it’s essential that your eggs, butter, and cream cheese are all at room temperature. This allows them to combine into a seamless mixture.
- Serving Suggestions: This **Chocolate Earthquake Cake** is a decadent treat on its own, but a warm slice accompanied by a scoop of vanilla bean ice cream is a truly heavenly combination. A drizzle of caramel or chocolate sauce will also elevate it to another level.
- Don’t Swirl: Fight the urge to swirl the cream cheese filling into the chocolate batter. By dropping it in dollops, you allow it to sink naturally, creating those signature pockets of creamy goodness and deep fissures on top.
FAQ
A Beautifully Chaotic Conclusion
And there you have it – a dessert that is a true celebration of glorious imperfection. The Chocolate Earthquake Cake Decadent Dessert is proof that you don’t need flawless sides and neat layers to make a showstopping bake. Its blend of rich, moist chocolate cake, tangy cheesecake swirls, chewy coconut, and crunchy pecans delivers an unforgettable taste and texture experience.
It’s the ideal cake for family get-togethers, potlucks, or simply for those times when you crave a genuinely comforting and indulgent treat. So, why not embrace a little chaos in your kitchen? Gather your ingredients, start baking, and watch the delicious magic unfold. We can promise this is one earthquake you’ll be delighted to be a part of!
Have you tried making this recipe? We’d love to see your beautifully cracked creations! Share them with us in the comments section below.
Recipe Card

Ingredients
- 1 box (around 430g) of chocolate fudge cake mix
- 3 large eggs, at room temperature
- 120ml vegetable oil
- 240ml water
- 150g sweetened shredded coconut
- 120g chopped pecans
- 225g full-fat cream cheese, softened
- 115g unsalted butter, softened
- 250g icing sugar, sifted
- 1 tsp vanilla extract
- 150g milk or semi-sweet chocolate chips
Instructions
- Preheat oven to 175°C (160°C Fan/Gas Mark 4). Grease and flour a 23×33 cm (9×13 inch) baking tin.
- Scatter the shredded coconut and chopped pecans evenly over the bottom of the prepared tin.
- In a large bowl, beat the cake mix, eggs, vegetable oil, and water with a mixer until smooth (about 2 minutes). Pour this batter over the coconut and pecan layer.
- In a separate bowl, beat the softened cream cheese and butter until light and creamy. Gradually beat in the sifted icing sugar, then mix in the vanilla extract.
- Spoon large dollops of the cream cheese mixture randomly over the chocolate batter. Sprinkle the chocolate chips evenly over the top.
- Bake for 40-50 minutes, or until the edges are set but the center has a slight wobble. A skewer inserted into a cakey part should come out with moist crumbs.
- Allow the cake to cool on a wire rack for at least 30 minutes before slicing. Serve warm for a wonderfully gooey center.


