Chocolate Covered Pretzels Snack
There is something utterly magical about the combination of salt and sweet. It’s a pairing that hits all the right notes, creating a deeply satisfying treat that’s moreish in the best possible way. My journey with Chocolate Covered Pretzels began years ago, as I was looking for a simple but impressive sweet to bring to a friend’s gathering. What I discovered was a recipe so adaptable and delightful that it has since become a staple in my kitchen. Friends always ask me for this recipe after trying it, and they’re always surprised at how straightforward it is to achieve such a professional-looking result.
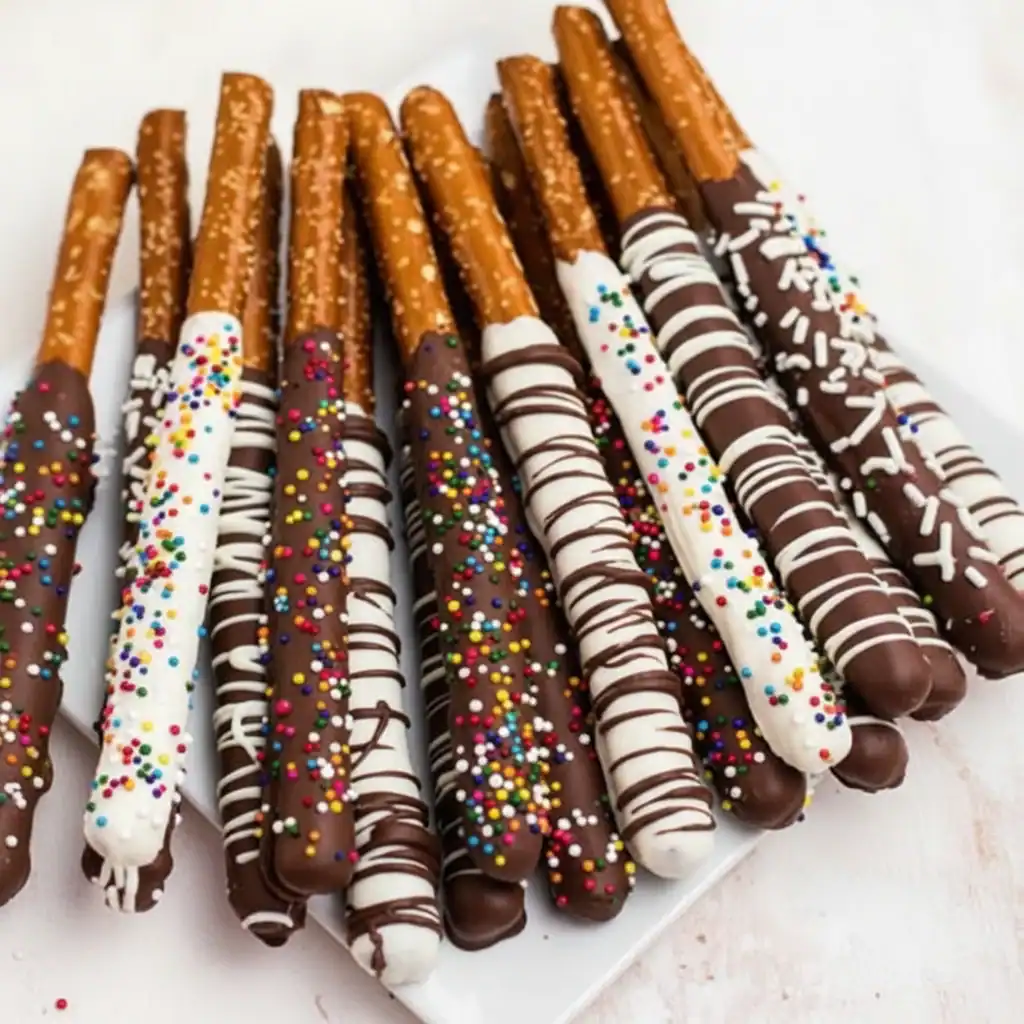
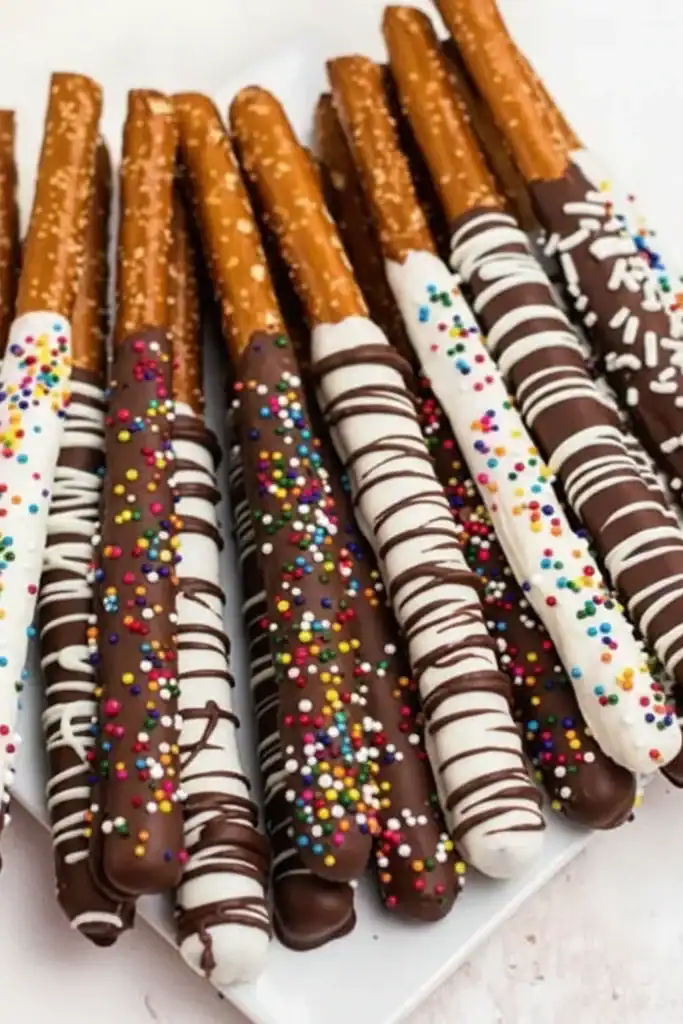
What makes these Chocolate Covered Pretzels so special is the textural contrast. You get the loud, satisfying crunch of the baked pretzel, followed by the immediate snap of the cooled chocolate shell which then melts luxuriously in your mouth. The salty kick from the pretzel cuts through the richness of the chocolate, preventing it from being overwhelmingly sweet. It’s a delicate balance that we’ve perfected over many, many batches.
This is a wonderful activity for a quiet afternoon, and it’s especially fun to make with children, who adore decorating their own creations. They work beautifully for homemade gifts, packed into cellophane bags and tied with a ribbon, or simply piled high on a plate for a film night. After a savoury family meal, maybe something like our popular Bruschetta Chicken, these pretzels are the ideal light and sweet finish.
Recipe Overview
This recipe guides you through creating beautifully crisp, chocolate-coated pretzels with a glossy, professional finish. The key is using good quality chocolate and melting it gently to maintain a smooth, dippable consistency. I’ve found that adding a tiny amount of coconut oil is the secret to getting that perfect sheen. You can expect a delightful snap, a salty crunch, and a rich chocolate flavour in every single bite.
- Prep Time: 15 minutes
- Cook Time: 5 minutes
- Setting Time: 15 minutes
- Total Time: 35 minutes
- Servings: Makes approx. 30 pretzels
- Difficulty: Easy
Why You’ll Love This Chocolate Covered Pretzels Recipe
- Genuine Flavour: The intense flavour comes from the sharp contrast between salty, savoury pretzels and rich, sweet chocolate. We use dark chocolate for depth, but milk or white chocolate work wonderfully for a creamier taste.
- Ready in about 35 Minutes: From start to finish, you can have a full plate of these gorgeous treats ready in just over half an hour, including setting time.
- Flexible Recipe: This is a fantastic base recipe. You can switch up the chocolate, use pretzel rods instead of twists, and go wild with toppings like chopped nuts, desiccated coconut, or colourful sprinkles.
- Great for Gifting and Parties: They are ideal for creating homemade Christmas hampers, adding to party favour bags, or arranging on a dessert platter for any gathering.
- Family Tested: My children absolutely love decorating these—it’s one of their favourite rainy-day activities, and the results are always devoured within minutes!
Ingredients You’ll Need
For the best results, I recommend using a good quality chocolate with a high percentage of cocoa solids, as it melts more smoothly and has a richer flavour. I often use Callebaut callets or a good bar of Green & Black’s. The small amount of coconut oil is optional but highly recommended for a glossy, smooth coating.
- 200g salted pretzel twists or rods
- 200g dark chocolate (at least 70% cocoa solids), chopped
- 200g milk chocolate, chopped
- 100g white chocolate, chopped (for drizzling)
- 1 tsp coconut oil or vegetable shortening (optional, per 200g of chocolate)
- For the Toppings (optional):
- 2 tbsp finely chopped toasted hazelnuts
- 2 tbsp colourful sprinkles
- 1 tbsp desiccated coconut
- 1/2 tsp flaky sea salt (like Maldon)
Sara’s Tip: Don’t use chocolate chips meant for baking cookies. They often contain stabilisers to help them hold their shape, which means they won’t melt into the silky-smooth consistency we need for dipping.
How to Make Chocolate Covered Pretzels
The process is very straightforward. The main thing to remember is to melt the chocolate gently and have all your toppings and equipment ready before you begin. We call it our little pretzel production line!
- Prepare Your Workspace: Line two large baking sheets with baking parchment. This is essential to prevent the pretzels from sticking as they set. Have your chosen toppings ready in small, separate bowls.
- Melt the Dark Chocolate: Place the chopped dark chocolate and ½ teaspoon of coconut oil (if using) in a microwave-safe bowl. Microwave on medium power in 20-second bursts, stirring well after each interval, until the chocolate is almost completely melted. Stir until the residual heat melts the last few lumps and the chocolate is smooth. Alternatively, melt it in a heatproof bowl set over a saucepan of barely simmering water (a bain-marie), ensuring the bottom of the bowl doesn’t touch the water.
- Dip the Pretzels: Hold a pretzel by one edge and dip about two-thirds of it into the melted chocolate. I find it easiest to use a fork to lift it out, allowing the excess chocolate to drip back into the bowl. Give it a gentle tap on the side of the bowl.
- Decorate and Set (Part 1): Carefully place the chocolate-dipped pretzel onto the prepared baking sheet. While the chocolate is still wet, immediately sprinkle with your desired toppings like chopped nuts or sea salt. Repeat with half of your pretzels.
- Melt and Dip with Milk Chocolate: Clean your bowl or use a new one and repeat the melting process with the milk chocolate and the remaining coconut oil. Dip the rest of your pretzels in the milk chocolate, place them on the baking parchment, and add toppings.
- Let Them Set: Leave the pretzels at room temperature for about 10-15 minutes, or until the chocolate is firm to the touch. You can speed this up by placing the baking sheets in the fridge for 5-10 minutes, but room temperature setting prevents the chocolate from ‘sweating’.
- Add the Drizzle (Optional): Once the first layer of chocolate is set, melt the white chocolate using the same method. Using a spoon or a small piping bag, drizzle the melted white chocolate back and forth over the pretzels on the baking sheet for a decorative finish.
- Final Set: Allow the drizzle to set completely at room temperature (another 10 minutes or so) before handling or storing the pretzels.
Tips From My Kitchen
- Temperature Control: The biggest challenge with chocolate is overheating it, which causes it to “seize” and become a thick, grainy mess. Always use low heat, short bursts in the microwave, and stir frequently. Patience is key!
- The Secret Step: I learned that adding just a tiny bit of coconut oil or vegetable shortening makes a world of difference. It helps the chocolate melt more evenly and gives the finished pretzels a beautiful, glossy sheen that looks so professional.
- Make-Ahead: These are brilliant for making in advance. You can prepare them up to a week ahead of time. Just be sure to store them correctly so they stay crisp and the chocolate remains in perfect condition.
- Storage: Store your finished Chocolate Covered Pretzels in an airtight container at cool room temperature. Avoid the fridge, as condensation can form on the chocolate, causing it to look dull or develop a white ‘bloom’. They will keep well for up to 2 weeks.
Equipment You’ll Need
- 2 Large baking sheets
- Baking parchment
- Microwave-safe bowls or a small saucepan and heatproof bowl
- Spatula or metal spoon for stirring
- Forks for dipping and lifting
Common Mistakes to Avoid
- Getting Water in the Chocolate: If even a tiny drop of water or steam gets into your melting chocolate, it will seize up instantly and become unusable. When using a bain-marie, be extremely careful.
- Wrong Temperature: As mentioned, don’t rush the melting process. Too high a heat will ruin the texture of the chocolate. For a truly professional finish, you can learn how to temper chocolate, which gives it an extra-satisfying snap and shine.
- Skipping the Parchment Paper: Don’t be tempted to place the wet pretzels directly onto a plate or tray. They will stick fast! Baking parchment is non-negotiable for an easy release once they are set.
Delicious Variations to Try
Once you have the basic technique down, it’s so much fun to experiment. These are just a few ideas that have been a hit in our house.
- Spicy Chocolate Version: Add a pinch of cayenne pepper or chilli powder to your melted dark chocolate for a surprising, warming kick that pairs beautifully with the sweetness.
- Vegan Option: This is very easy to make vegan! Just ensure you use a dairy-free dark chocolate and check that your brand of pretzels doesn’t contain milk or butter.
- Topping Overload: Go beyond sprinkles! Try crushed freeze-dried raspberries, finely chopped crystallised ginger, crushed Lotus Biscoff biscuits, or even edible glitter for a festive occasion.
What to Serve With Chocolate Covered Pretzels
While they are magnificent on their own, these pretzels can also be part of a larger spread. It’s always fun to create a sweet plate for guests to pick at. After serving a main course like my Sweet Chili Chicken Recipe, a platter of these offers a completely different flavour profile for dessert.
- Dessert Platter: Arrange them on a large wooden board or plate with fresh berries, grapes, cheese, and a selection of biscuits for a beautiful and interactive dessert.
- Ice Cream Topping: Roughly chop a few pretzels and sprinkle them over a bowl of vanilla or salted caramel ice cream for added crunch and flavour.
- Drink Pairing: A cold glass of milk is the classic choice. For adults, they are wonderful with a freshly brewed coffee, a cappuccino, or even a glass of dessert wine.
Frequently Asked Questions
Chocolate Covered Pretzels
Ingredients
Method
- Prepare Your Workspace: Line two large baking sheets with baking parchment. This is essential to prevent the pretzels from sticking as they set. Have your chosen toppings ready in small, separate bowls.
- Melt the Dark Chocolate: Place the chopped dark chocolate and ½ teaspoon of coconut oil (if using) in a microwave-safe bowl. Microwave on medium power in 20-second bursts, stirring well after each interval, until the chocolate is almost completely melted. Stir until the residual heat melts the last few lumps and the chocolate is smooth. Alternatively, melt it in a heatproof bowl set over a saucepan of barely simmering water (a bain-marie), ensuring the bottom of the bowl doesn't touch the water.
- Dip the Pretzels: Hold a pretzel by one edge and dip about two-thirds of it into the melted chocolate. I find it easiest to use a fork to lift it out, allowing the excess chocolate to drip back into the bowl. Give it a gentle tap on the side of the bowl.
- Decorate and Set (Part 1): Carefully place the chocolate-dipped pretzel onto the prepared baking sheet. While the chocolate is still wet, immediately sprinkle with your desired toppings like chopped nuts or sea salt. Repeat with half of your pretzels.
- Melt and Dip with Milk Chocolate: Clean your bowl or use a new one and repeat the melting process with the milk chocolate and the remaining coconut oil. Dip the rest of your pretzels in the milk chocolate, place them on the baking parchment, and add toppings.
- Let Them Set: Leave the pretzels at room temperature for about 10-15 minutes, or until the chocolate is firm to the touch. You can speed this up by placing the baking sheets in the fridge for 5-10 minutes, but room temperature setting prevents the chocolate from ‘sweating’.
- Add the Drizzle (Optional): Once the first layer of chocolate is set, melt the white chocolate using the same method. Using a spoon or a small piping bag, drizzle the melted white chocolate back and forth over the pretzels on the baking sheet for a decorative finish.
- Final Set: Allow the drizzle to set completely at room temperature (another 10 minutes or so) before handling or storing the pretzels.
Notes
I do hope you give these Chocolate Covered Pretzels a try. They are such a joy to make and even more of a joy to share. There’s nothing better than seeing a whole plate of them disappear in minutes, with everyone asking how you made them! Let me know how you get on in the comments below – I’d love to hear about the creative topping combinations you come up with. Happy dipping! – Sara Gomez