Baked Apple Crumble Dessert Recipe
Is there a scent more evocative of warmth and home than sweet, spiced apples bubbling beneath a golden, buttery crumble topping? We believe it’s a fragrance that captures the essence of cosy evenings and cherished family moments. If you’ve been on the hunt for a truly dependable recipe that yields perfect results every time, your search is over. We’re delighted to share our ultimate guide to creating the most delectable, foolproof Baked Apple Crumble Dessert Recipe you’ll ever try. This isn’t just a set of instructions; it’s your key to a comforting, nostalgic treat.
We have meticulously refined each component to achieve the ideal harmony: tangy, tender apples that retain their texture, crowned with a flavourful, crunchy crumble that is neither too dense nor too dry. Move beyond underwhelming shop-bought alternatives; this homemade classic is straightforward, deeply satisfying, and certain to win you accolades. So, let’s get our aprons on and create a dessert that will fill your kitchen with warmth and your spirit with joy.
Why You’ll Love This Recipe
- Incredibly Simple to Make: We’ve crafted this recipe for complete ease of use. With common ingredients and clear instructions, even those new to baking can produce outstanding results. It’s an ideal dessert for a simple weeknight indulgence or a relaxed dinner party.
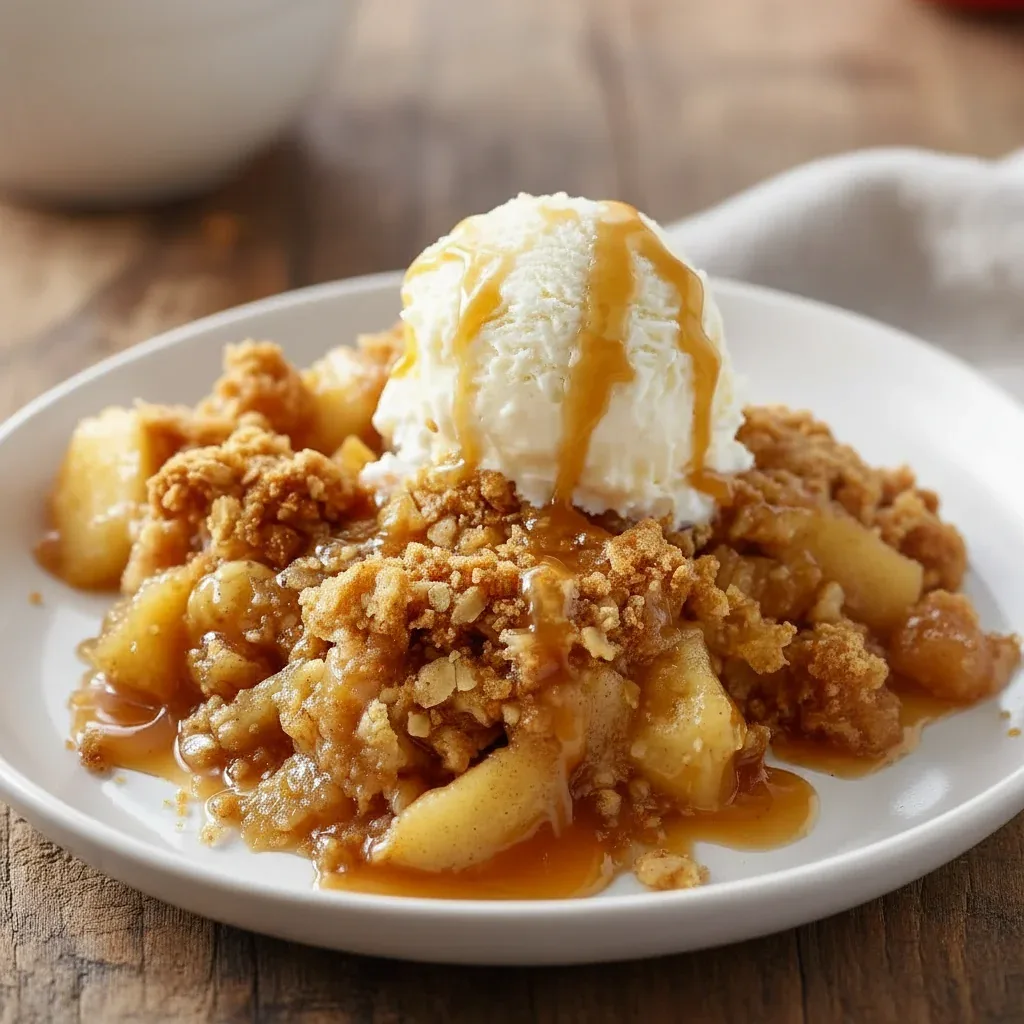
- The Ultimate Comfort Food: Warm, sweet, and deeply gratifying, this is the very definition of a comfort dessert. A spoonful of this crumble, particularly when served with rich custard or vanilla ice cream, feels just like a warm embrace.
- Perfectly Balanced Flavours: We’ve achieved a flawless equilibrium between the sharpness of the apples and the sweetness of the crumble. A touch of cinnamon and a dash of lemon juice in the filling enhance the fruit, resulting in a truly memorable Apple Dessert.
- A Truly Versatile Classic: Although we adore apples in this dish, the recipe serves as an excellent foundation for other fruits. You can readily adapt it to the seasons, using rhubarb in the spring or a medley of berries in the summer.
- Budget-Friendly and Uses Pantry Staples: It’s highly likely you already have the core ingredients—flour, sugar, butter, and oats—in your cupboards. Apples are an affordable fruit available all year round, which makes this a wonderfully economical pudding.
Ingredients
- 1 kg cooking apples (like Bramley) or a mix of cooking and eating apples
- 50g light brown soft sugar (adjust to the sweetness of your apples)
- 1 tbsp lemon juice
- 1 tsp ground cinnamon
- A pinch of ground nutmeg
- 1 tbsp plain flour (to thicken the juices)
- 175g plain flour
- 110g unsalted butter, cold and cubed
- 100g demerara sugar (for that wonderful crunch)
- 50g rolled oats (optional, but highly recommended for texture)
For our recipe, we separate the ingredients into two distinct parts: the sumptuous fruit base and the wonderfully crumbly topping. Using quality ingredients is the cornerstone of a perfect crumble.
- For the Apple Filling:
- 1 kg cooking apples (like Bramley) or a mix of cooking and eating apples
- 50g light brown soft sugar (adjust to the sweetness of your apples)
- 1 tbsp lemon juice
- 1 tsp ground cinnamon
- A pinch of ground nutmeg
- 1 tbsp plain flour (to thicken the juices)
- For the Crumble Topping:
- 175g plain flour
- 110g unsalted butter, cold and cubed
- 100g demerara sugar (for that wonderful crunch)
- 50g rolled oats (optional, but highly recommended for texture)
Essential Equipment for Your Apple Crumble
You won’t require any sophisticated kitchen gadgets to assemble this dessert masterpiece. We find that the most beloved recipes are often the most straightforward. Here is what you will need to get started:
- A 2-litre (approximately 20x30cm) ovenproof baking dish
- A large mixing bowl for the crumble topping
- Another bowl for preparing the apples
- A vegetable peeler and a sharp knife
- A set of measuring spoons and weighing scales
Step-by-Step Guide to the Perfect Baked Apple Crumble
By following our clear instructions, you will have a truly impressive dessert ready in no time. We’ve structured the process into three manageable stages: preparing the filling, crafting the topping, and finally, assembling and baking.
1. Preparing the Delicious Apple Filling
The foundation of any exceptional Apple Crumble is, without a doubt, the fruit. Nailing this initial step paves the way for a triumphant result.
- Preheat Your Oven: To begin, set your oven to 190°C (170°C Fan / Gas Mark 5). This ensures it is at the correct temperature the moment your crumble is ready to bake.
- Prepare the Apples: Peel and core your apples, then slice them into evenly sized chunks around 2-3cm thick. Avoid cutting them too thinly, as this can cause them to turn into a puree while baking. We are aiming for tender pieces, not apple sauce!
- Mix the Filling: Transfer the apple chunks to a large bowl. Scatter over the light brown sugar, ground cinnamon, nutmeg, and plain flour. Add a squeeze of lemon juice (this brightens the flavour and stops the apples from browning). Gently mix everything together until the fruit is uniformly coated.
- Fill the Dish: Pour the apple mixture into your ovenproof dish, spreading it out to form an even layer.
2. Creating the Irresistible Crumble Topping
The topping is what gives a crumble its name and signature texture! The secret lies in using very cold butter and a gentle touch to achieve that perfect, crumbly consistency we all cherish.
- Combine Dry Ingredients: In a separate large mixing bowl, place the plain flour along with a small pinch of salt.
- Rub in the Butter: Add the cold, cubed butter to the flour. Using only your fingertips, gently rub the butter into the flour until the mixture takes on the appearance of coarse breadcrumbs. It’s best to work swiftly to prevent the butter from warming up. A few small, pea-sized lumps of butter should remain; these will melt during baking to create little pockets of richness.
- Stir in Sugar and Oats: Once the breadcrumb texture is achieved, incorporate the demerara sugar and rolled oats (if you’re using them). Avoid over-mixing; a light stir with a fork or your fingers is all that’s needed to combine them.
3. Assembling and Baking Your Masterpiece
We now arrive at the most exciting step—bringing everything together. This is where the magic truly unfolds, as simple components are transformed into a warm, bubbling, golden Baked Apple Crumble.
- Top the Fruit: Spoon the crumble mixture evenly over the apple base in the baking dish. It’s important not to press it down! A light, rustic topping allows steam to escape, ensuring a crisp finish.
- Bake to Perfection: Position the dish on a baking tray (this will catch any juices that might bubble over) and place it in the preheated oven for 35–45 minutes.
- Check for Doneness: The crumble is ready when the topping has turned a rich golden brown and you can see the fruit filling bubbling invitingly at the edges.
- Rest Before Serving: Allow the crumble to sit for at least 10 minutes after removing it from the oven. This helps the filling to set slightly, making it much easier to portion and serve.
Expert Tips for Crumble Success
Through our many baking adventures, we’ve gathered a few key insights to elevate this humble dessert from great to truly exceptional. Following a savoury main course like a Lemon Garlic Chicken, this dessert will undoubtedly steal the spotlight.
Choosing the Right Apples
The variety of apple you select can significantly impact the final result. We highly recommend a firm cooking apple, such as the classic Bramley, which cooks down into a wonderfully fluffy and tart base. For a bit more texture, consider a combination of Bramley and a firm eating apple like a Braeburn or Granny Smith, as they tend to hold their shape better. For a deeper exploration of apple varieties in baking, the experts at Serious Eats offer a brilliant guide.
How to Serve Your Baked Apple Crumble
While this dessert is magnificent on its own, the perfect accompaniment can elevate it to new heights. We feel it is at its best when served warm. Here are some of our favourite ways to enjoy it:
- Classic Custard: A jug of warm, thick, and creamy vanilla custard is the time-honoured pairing and, for many, the ultimate choice.
- Vanilla Ice Cream: The beautiful contrast between the warm, crumbly dessert and the cold, melting ice cream is simply irresistible.
- Clotted Cream or Double Cream: For an exceptionally luxurious finish, a generous dollop of rich clotted cream or a drizzle of double cream is pure indulgence.
FAQ
A Timeless Dessert for All Occasions
And there you have it—our definitive Baked Apple Crumble Dessert Recipe. It stands as a wonderful reminder that the most cherished dishes are often the simplest ones. It makes a perfect conclusion to a Sunday roast or a comforting meal such as our Baked Honey Dijon Chicken Recipe. This recipe is more than a list of instructions; it is an opportunity to forge new memories, to fill your home with the most incredible aromas, and to share a moment of pure comfort with those you care about.
We genuinely hope you enjoy the process of making—and savouring—this classic dessert as much as we do. It’s a recipe to be cherished and shared for years to come. Now it’s over to you! We encourage you to try this recipe and share your thoughts in the comments section below. We would be thrilled to see your wonderful bakes, so please remember to tag us on social media!
Recipe Card

Ingredients
- 1 kg cooking apples (like Bramley)
- 50g light brown soft sugar
- 1 tbsp lemon juice
- 1 tsp ground cinnamon
- A pinch of ground nutmeg
- 1 tbsp plain flour (for the filling)
- 175g plain flour (for the topping)
- 110g unsalted butter, cold and cubed
- 100g demerara sugar
- 50g rolled oats (optional)
Instructions
- Preheat oven to 190°C (170°C Fan / Gas Mark 5).
- Prepare the apple filling: Peel, core, and cut apples into 2-3cm chunks. In a large bowl, toss them with light brown sugar, lemon juice, cinnamon, nutmeg, and 1 tbsp plain flour. Transfer to a 2-litre ovenproof dish.
- Create the crumble topping: In another bowl, rub the cold, cubed butter into the 175g plain flour with your fingertips until it resembles coarse breadcrumbs.
- Stir in the demerara sugar and rolled oats (if using).
- Assemble: Spoon the crumble topping evenly over the apple mixture without pressing it down.
- Bake: Place on a baking tray and bake for 35-45 minutes until golden brown and the filling is bubbling.
- Rest: Let it stand for 10 minutes before serving.


