Bake a Fluffy Japanese Cheesecake for Dessert
There’s something utterly magical about a Fluffy Japanese Cheesecake. It’s not like its dense, rich Western cousin; this is a cloud-like, wobbly creation that’s part soufflé, part cheesecake, and entirely enchanting. It melts on your tongue with a delicate, tangy sweetness that’s light enough to enjoy any time of day. I remember the first time I saw a video of one of these cheesecakes jiggling, and I knew I had to master it myself. It took some trial and error, but the result is a recipe that delivers that signature airy texture every single time.
This Japanese Cheesecake recipe is all about technique, but don’t let that intimidate you. We’re going to walk through it step-by-step, from creating the perfect meringue to setting up the crucial water bath that gives the cake its impossibly moist and uniform crumb. It’s a wonderful bake for a weekend afternoon when you have a little time to focus and want to create something truly special. It’s the kind of dessert that makes guests pause and ask, “How did you make this?”
Whether you’re making it for a special occasion or just to treat yourself, this cake is a gentle and elegant dessert. It’s lovely after a light meal, perhaps something like my Lemon Garlic Chicken, when you want a sweet finish that won’t weigh you down. Get your apron on, and let’s create a bit of baking magic together.
Recipe Overview
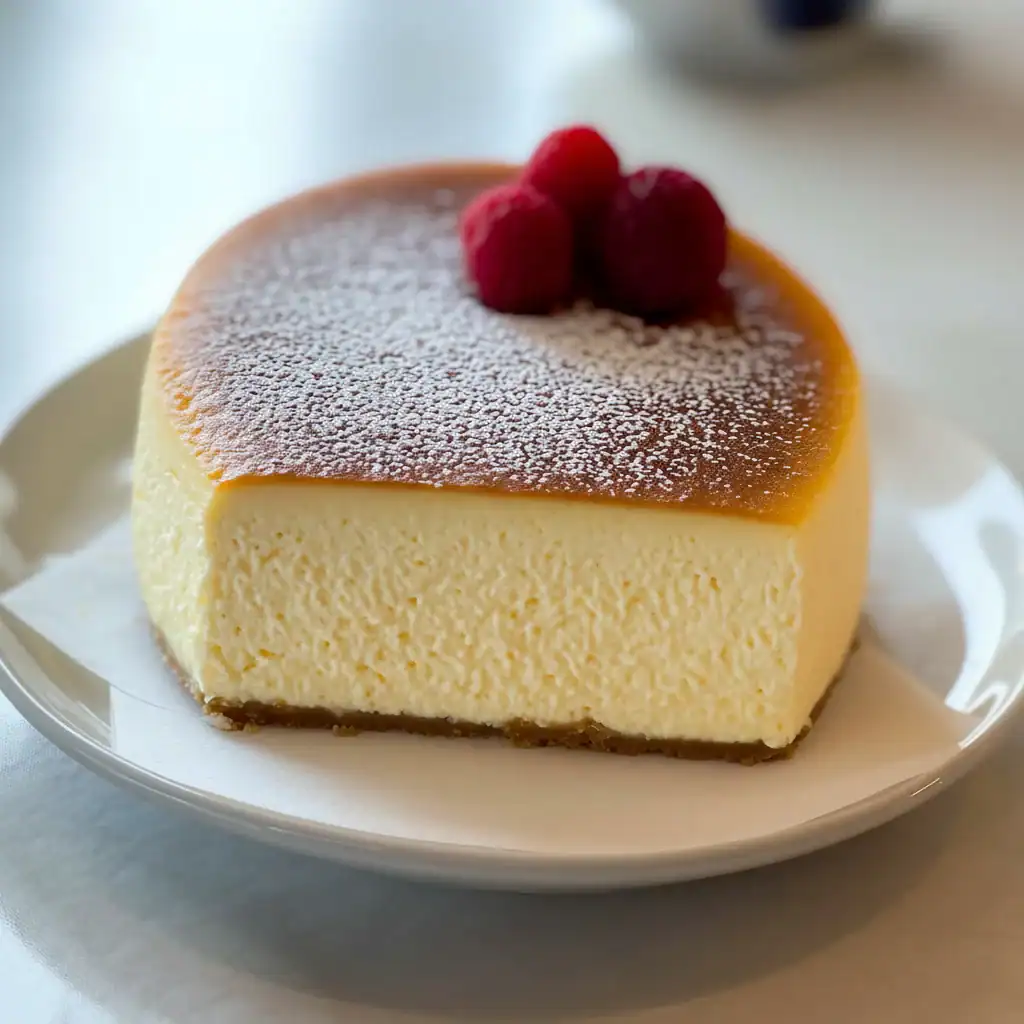
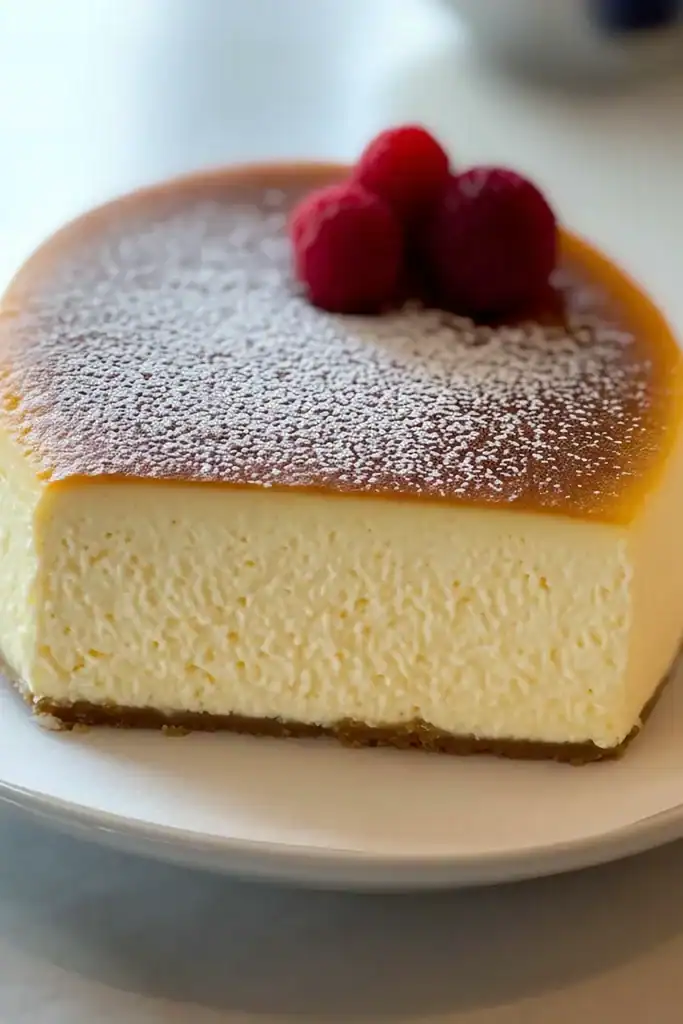
This Fluffy Japanese Cheesecake recipe yields a tall, golden, and incredibly light cake with a fine, even crumb. The flavour is a delicate balance of tangy cream cheese and vanilla, without being overly sweet. Expect a jiggly, soufflé-like texture when warm that settles into a soft, melt-in-the-mouth consistency when chilled. After testing this recipe five times, I finally got the water bath temperature and timing just right to prevent any cracks.
- Prep Time: 25 minutes
- Cook Time: 1 hour 20 minutes
- Total Time: 1 hour 45 minutes (plus cooling time)
- Servings: 8 slices
- Difficulty: Medium
Why You’ll Love This Fluffy Japanese Cheesecake Recipe
- Ethereal Texture: This isn’t just a cheesecake; it’s an experience. The texture is incredibly light and airy, almost like a sweet, cheesy cloud that dissolves in your mouth.
- Subtle, Elegant Flavour: The taste is beautifully balanced. You get the distinct tang of good quality cream cheese, a hint of lemon, and gentle sweetness, ensuring it’s never cloying.
- A Show-stopping Bake: The impressive height and wobble of this cake make it a real centrepiece. It always gets compliments and looks far more complicated to make than it is.
- Works Beautifully for Afternoon Tea: This cake is ideal for serving with a cup of tea or coffee in the afternoon. Its lightness makes it a wonderful treat that doesn’t feel too indulgent.
- Family Tested: My kids, who sometimes find regular cheesecake too heavy, absolutely adore this version. They call it the “wobbly cake,” and it vanishes within an hour of coming out of the tin.
Ingredients You’ll Need
For this recipe, using full-fat ingredients is key to achieving the right texture. I always use Philadelphia full-fat cream cheese as I find its consistency is perfect and gives the best flavour. Make sure all your dairy and eggs are at room temperature before you begin – it makes a huge difference in how the batter comes together.
- 150g full-fat cream cheese, softened
- 50g unsalted butter, softened
- 100ml whole milk
- 6 large egg yolks
- 60g plain flour
- 1 tsp vanilla extract
- 1 tbsp fresh lemon juice
- A pinch of salt
- 6 large egg whites
- 1/4 tsp cream of tartar
- 130g caster sugar
- Icing sugar, for dusting (optional)
- Fresh berries, to serve (optional)
– 20g cornflour
Sara’s Tip: Don’t be tempted to use low-fat cream cheese or milk. The fat content is crucial for the cake’s structure and rich, creamy mouthfeel. Room temperature ingredients emulsify much better, creating a smoother batter.
How to Make Fluffy Japanese Cheesecake
The process for this Japanese Cheesecake relies on two key things: a smooth batter and a stable, glossy meringue. We’ll combine them gently to preserve all that lovely air we’ve whipped in. The water bath (or *bain-marie*) is non-negotiable; it creates a steamy environment for the cake to bake slowly and evenly.
- Prepare Your Tins and Oven: Preheat your oven to 160°C (140°C fan). Generously grease a 20cm (8-inch) round springform tin that’s at least 7-8cm deep. Line the bottom and sides with parchment paper, ensuring the paper for the sides stands about 5cm above the rim of the tin. To make the tin waterproof for the water bath, wrap the outside securely with two large layers of heavy-duty aluminium foil.
- Create the Cheese Batter: In a medium saucepan over low heat, gently melt the cream cheese, butter, and milk. Whisk continuously until the mixture is completely smooth and there are no lumps. Remove from the heat and allow it to cool slightly for about 5-7 minutes.
- Combine Wet and Dry Ingredients: In a large bowl, whisk the egg yolks until they are pale. Slowly pour the slightly cooled cream cheese mixture into the yolks, whisking constantly to prevent the eggs from scrambling. Sift the plain flour and cornflour together into the mixture, then add the vanilla extract, lemon juice, and salt. Whisk until the batter is smooth and silky.
- Whip the Meringue: In a separate, scrupulously clean bowl (or the bowl of a stand mixer), whisk the egg whites and cream of tartar on medium speed until frothy. Gradually add the caster sugar, a tablespoon at a time, while continuing to whisk. Increase the speed to high and whip until you have a glossy meringue with soft to medium peaks. The peaks should hold their shape but curl over slightly at the tip. Be careful not to overwhip.
- Fold the Meringue into the Batter: Take about a third of the meringue and fold it into the cheese batter to lighten it. Then, gently fold in the remaining meringue in two more additions. What works best for me is using a large spatula to cut down the middle and fold the batter over from the bottom, rotating the bowl as you go, to avoid deflating the egg whites. Stop as soon as it’s combined and no white streaks remain.
- Prepare the Water Bath and Bake: Pour the batter into your prepared tin. Place the tin inside a larger roasting pan. Carefully pour boiling water into the roasting pan until it comes about halfway up the sides of the cheesecake tin.
- Bake the Cheesecake: Carefully transfer the whole setup to the preheated oven. Bake for 20 minutes at 160°C (140°C fan), then reduce the oven temperature to 140°C (120°C fan) and bake for a further 60 minutes. The cheesecake should be risen, golden brown, and a skewer inserted into the centre should come out clean.
- Cool Down Slowly: Turn off the oven, but leave the cheesecake inside with the door slightly ajar for at least 45-60 minutes. This slow cooling process is vital to prevent it from cracking and sinking.
- Chill and Serve: Once cooled, remove the cheesecake from its tin. You can serve it warm for a super soufflé-like texture, or chill it in the fridge for at least 4 hours (or overnight) for a denser, melt-in-the-mouth texture. Dust with icing sugar before serving.
Tips From My Kitchen
- Room Temperature is Key: I can’t stress this enough. Having your eggs, cream cheese, and butter at room temperature ensures they combine into a smooth, homogenous batter without lumps or splitting.
- The Secret to Perfect Meringue: The goal is soft-to-medium peaks. If the meringue is under-whipped, it won’t provide enough lift. If it’s over-whipped (stiff and grainy), it will be difficult to fold in and can cause the cake to crack. I learned that using an impeccably clean bowl, free from any grease, is non-negotiable for a stable meringue.
- Make-Ahead Advice: This cake can be made a day in advance. The texture changes upon chilling, becoming slightly denser but still incredibly light. I personally love it best after it has chilled overnight.
- Storage: Store any leftover cheesecake in an airtight container in the refrigerator. It will keep well for up to 3 days. I find its flavour deepens a little by the second day.
Equipment You’ll Need
- 20cm (8-inch) round, deep springform tin
- Stand mixer or a reliable hand mixer
- Large roasting pan (for the water bath)
- Heavy-duty aluminium foil
- Parchment paper
- Spatula and whisks
- Sieve
Common Mistakes to Avoid
- A Cracked Surface: This is usually caused by an oven that’s too hot or a meringue that was whipped to stiff peaks. Reducing the temperature after the initial 20 minutes and aiming for soft, glossy peaks in your meringue will help prevent this.
- A Deflated Cheesecake: The dreaded sink! This often happens from over-folding the batter and knocking all the air out of the meringue, or from cooling the cake too quickly. Be gentle when folding and always let it cool down slowly in the oven with the door ajar.
- A Waterlogged Bottom: If your aluminium foil wrap isn’t secure, water from the bain-marie can seep into the springform tin. Use at least two layers of strong, heavy-duty foil and ensure there are no tears.
What to Serve With Fluffy Japanese Cheesecake
This cake is so delicate that it really doesn’t need much accompaniment. Its elegant flavour shines on its own. However, if you want to add a little something extra, here are a few ideas that work beautifully.
- Fresh Berries: A handful of fresh raspberries, strawberries, or blueberries provides a lovely, sharp contrast to the creamy cake.
- A Light Fruit Coulis: A simple raspberry or passion fruit coulis drizzled over the top adds a touch of acidity and colour.
- A Dollop of Cream: A spoonful of lightly whipped, unsweetened double cream complements the texture perfectly without overpowering the flavour.
- Green Tea: For a truly authentic experience, serve a slice with a cup of Japanese sencha or matcha tea. The clean, slightly bitter notes of the tea are a wonderful pairing.
Frequently Asked Questions
Fluffy Japanese Cheesecake Recipe
Ingredients
Method
- Prepare Your Tins and Oven: Preheat your oven to 160°C (140°C fan). Generously grease a 20cm (8-inch) round springform tin that's at least 7-8cm deep. Line the bottom and sides with parchment paper, ensuring the paper for the sides stands about 5cm above the rim of the tin. To make the tin waterproof for the water bath, wrap the outside securely with two large layers of heavy-duty aluminium foil.
- Create the Cheese Batter: In a medium saucepan over low heat, gently melt the cream cheese, butter, and milk. Whisk continuously until the mixture is completely smooth and there are no lumps. Remove from the heat and allow it to cool slightly for about 5-7 minutes.
- Combine Wet and Dry Ingredients: In a large bowl, whisk the egg yolks until they are pale. Slowly pour the slightly cooled cream cheese mixture into the yolks, whisking constantly to prevent the eggs from scrambling. Sift the plain flour and cornflour together into the mixture, then add the vanilla extract, lemon juice, and salt. Whisk until the batter is smooth and silky.
- Whip the Meringue: In a separate, scrupulously clean bowl (or the bowl of a stand mixer), whisk the egg whites and cream of tartar on medium speed until frothy. Gradually add the caster sugar, a tablespoon at a time, while continuing to whisk. Increase the speed to high and whip until you have a glossy meringue with soft to medium peaks. The peaks should hold their shape but curl over slightly at the tip. Be careful not to overwhip.
- Fold the Meringue into the Batter: Take about a third of the meringue and fold it into the cheese batter to lighten it. Then, gently fold in the remaining meringue in two more additions. What works best for me is using a large spatula to cut down the middle and fold the batter over from the bottom, rotating the bowl as you go, to avoid deflating the egg whites. Stop as soon as it's combined and no white streaks remain.
- Prepare the Water Bath and Bake: Pour the batter into your prepared tin. Place the tin inside a larger roasting pan. Carefully pour boiling water into the roasting pan until it comes about halfway up the sides of the cheesecake tin.
- Bake the Cheesecake: Carefully transfer the whole setup to the preheated oven. Bake for 20 minutes at 160°C (140°C fan), then reduce the oven temperature to 140°C (120°C fan) and bake for a further 60 minutes. The cheesecake should be risen, golden brown, and a skewer inserted into the centre should come out clean.
- Cool Down Slowly: Turn off the oven, but leave the cheesecake inside with the door slightly ajar for at least 45-60 minutes. This slow cooling process is vital to prevent it from cracking and sinking.
- Chill and Serve: Once cooled, remove the cheesecake from its tin. You can serve it warm for a super soufflé-like texture, or chill it in the fridge for at least 4 hours (or overnight) for a denser, melt-in-the-mouth texture. Dust with icing sugar before serving.
Notes
I hope you adore making and eating this Fluffy Japanese Cheesecake as much as my family and I do. It’s such a rewarding bake, and that first bite of the light, airy cake is always worth the effort. It’s perfect after a savoury main like my Bruschetta Chicken for a complete, satisfying meal. If you try this recipe, please let me know how it turns out in the comments below – I’d love to hear from you! Happy baking, Sara.


